

If home organization projects make your heart flutter, today is your day! Seventeen talented bloggers are sharing their projects for the Organization Challenge (be sure to check out all the amazing DIY organization projects linked at the end of this post!). The task?
Choose a space in your home that is in need of some organization and build a clever solution for it!
My project was aimed at bringing some level of organizational sanity to the closet on our main level. Here are some embarrassing before photos (yikes! I blame my children ? ), on the left in it’s natural state, and on the right with most of the junk emptied out:


Closet space on our main level is fairly precious. We’ve got a tiny closet by the front door for coats, and another small closet by the garage for our bags/backpacks. This is the only other closet on the main level, and therefore needs to hold quite a bit of “stuff,” including the tall and awkward steam mop and shark vacuum . . . you can see it’s not really working. Even when all of the junk was cleared out on the right, this closet is just not designed for efficiency.
Small Closet Organization Problem
The shelves are WAY TOO SPACED OUT. It’s difficult to efficiently store anything in a shelf that is 20″ tall. Either most of the space is going to be wasted, or things are going to be stacked up making everything nearly impossible to get to.
Small Closet Organization Solution
The solution: Tear out most of the shelves & make a simple DIY closet organizer to wrangle the madness. It is seriously simple AND affordable to make. And once you’ve got it in place, that crazy closet will be so much more navigable.

House Becoming Home is a participant in the Amazon Services LLC Associates Program, an affiliate advertising program designed to provide a means for sites to earn advertising fees by advertising and linking to Amazon.com. Some links in this post may be affiliate links. Read my full disclosure policy here.
DIY Closet Organization Materials
- 3/4″ plywood (for the frame)
- 1×4 (for shallow drawers)
- 1×6 or 1×8 (for deeper drawers)
- 14″ drawer slides
- Drawer pulls or knobs
- 1/4″ plywood or mdf (for drawer bottoms)
- 1-1/4″ pocket screws
- 4-cuts of 4×4 scraps (if you want to keep the closet organizer off the floor so you can store something underneath)
- Miter saw
- Table saw or circular saw
- Pocket hole jig
- Drill or Impact Driver
- Nail gun and 18 gauge staples (*optional* to attach drawer bottoms)
How to Make a Simple DIY Closet Organizer
I haven’t included any measurements in these instructions, as your organizer will likely be a different size than mine.
Step 1
Build the frame of the closet organizer using 3/4″ plywood, pocket holes and screws. I had a lot of scraps of 1/2″ plywood, so I used that. But the pocket screws poke through the plywood in some areas. 3/4″ plywood would be a better choice.


You can see in this photo I placed the pocket holes on the bottom faces of the top and bottom frame pieces.

Step 2
Use pocket holes and screws to attach a 1×4 or 1×6 to the top back of the closet organizer frame. When you’re finished, you’ll be screwing the organizer into the wall studs through this piece to keep it from tipping over:

Step 3
Cut drawer sides, fronts and backs from 1x4s or 1x6s. (I made three shallow drawers using a 1×4, and one deeper drawer from a 1×6).


I normally join my drawer boxes with pocket holes on the back face of the back piece, and the front face of the front piece. This time, however, instead of making pocket holes on the front piece, I made the them on the side pieces since I wasn’t going to be attaching a drawer front like I normally do (for dressers, bed drawers, etc.).
If you want your drawer to hide your drawer slides, make the front piece 1/2″ wider (the thickness of the drawer slides) on both the left and right sides:

Before assembling the drawer boxes with screws, route 1/4″ grooves in the side pieces. The placement and number of grooves you make is up to you, just make sure the they line up across from eachother so that you can slide drawer dividers into each set of grooves.


Screw together drawers with 1-1/4″ pocket hole screws. Cut drawer bottoms from 1/4″ plywood or hardboard and attach with staples.

Attach drawer slides to sides of drawers and inside the cabinet frame. Remember to set the slides back 3/4″ from the front to allow room for the 3/4″ drawer face.


Cut drawer dividers from 1/4″ plywood or mdf, then slide into place.

Step 4
To add shelves to your closet organizer, cut 3/4″ plywood to size, make pocket holes on the bottom side, and attach with pocket hole screws to the cabinet frame.
Step 5 (optional)
-To cover up the rough ends of the plywood, attach veneer edging.
-Attach scraps of 4×4 to the bottom of the closet organizer to allow for storage space underneath. I didn’t do anything fancy here–I screwed these in straight from the bottom of the organizer.
-Add knobs or pulls to drawers
Step 6
Attach to closet wall with screws into the studs.


Hip Hip HOORAY, this closet is tidy and organized. Best of all, even my vacuum and steam mop now fit inside this tiny closet without any trouble.


DIY Closet Organization Tips
Tips for making your own closet organizer:
1. Make a List
Make a list of all the items that need to go in the closet. Include items that may not be in it currently, but ones that you want to make room for as well. Anything that you want in the closet, write it down!
2. Identify “Priority” Items
Look at the list. Are there any large/bulky/awkward items that need to go inside the closet? For me, our vacuum and steam mop were my two “priority” items. Because of their large height I had to prioritize a spot for them. Pick a spot for the large items. Everything else is smaller and can work around those. The width of my closet organizer was determined by the space remaining after the mop and vacuum are in their spots.
3. Pick Spots for what’s Left
What items are left on your list? Ask yourself some of these questions as you begin to plan a spot for each item:
- Will this item be accessed often? (keep often-used items easy to get to)
- Who needs access to this item? (if it’s crayons for my three year old, I’m going to make a spot for them at his level. If it’s a stash of permanent markers I DON’T want him playing with, I’ll pick a spot out of his reach).
- Would this work better in a drawer or on a shelf? A shallow drawer or a deep drawer?
4. Map it out!
Call me an organization nerd, but I like to draw it out and write down what items will go in each shelf or drawer. Look at the sketch and visualize actually accessing those items in the organizer. Are any of the drawers way too full? Is it going to be hard to see or access any of the items on these shelves? Change up your plan if you foresee problems.
Organization Challege
Now you’ve GOT TO CHECK OUT ALL THE OTHER FABULOUS ORGANIZATION PROJECTS LINKED BELOW!
Get inspired. I know you will be. Pick something you can do to improve the organization in one area of your home. Come back and tell me what you did, I’d love to hear about it–really! Leave me a comment or find me on instagram (@housebecominghome) or facebook (House Becoming Home).
Check Out these DIY Organization Projects:
- House of Wood : DIY Shoe Organizer
- House Becoming Home: DIY Closet Organization
- Anika’s DIY Life: Vegetable Storage Bin
- 100Things2Do: Small Parts Bins
- Addicted 2 DIY: French Cleat Wall Organizer
- RemodelaCasa: Storage
- Jaime Costiglio: Easy Closet Shelves
- The Created Home: Shoe Cabinet With Trays
- Woodshop Diaries: DIY Closet Cabinets
- The Inspired Workshop: Ziploc Bag Storage Organizer
- Her Toolbelt: Backpack Storage Bench Plans
- My Love 2 Create: Between Studs Workshop Organization
- My Repurposed Life: Between Studs Broom Closet
- Ugly Duckling House: DIY Jewelry Organizer
- Hazel and Gold Designs: DIY Bathroom Drawer Organizer
- Place of My Taste: Easy Wine Rack
- Joyful Derivatives: Spice Rack
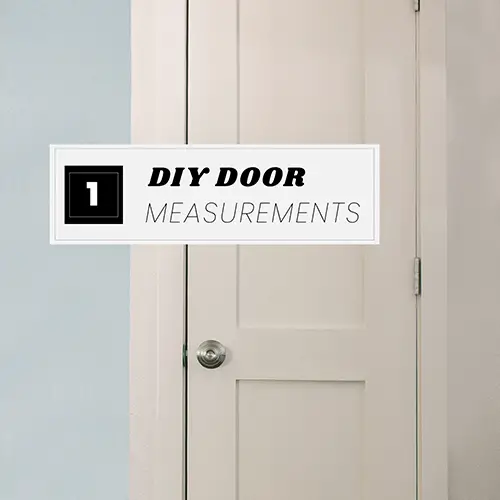
DIY Door
Another build that transformed this mess of a closet into something much more attractive was the door I built for it. It started as a falling-off-its-track-bi-fold door, and I replaced it with a built-from-scratch door. To build your own solid doors from affordable, off-the-shelf-lumber, check out the Build a Door series links below:


I’m so impressed! Those drawers are a great way to get all that stuff organized and really maximize the space! Nice work girl. 🙂
I love this idea! It is perfect for so many closets!
Great solution to corral all those craft supplies! I love the drawer dividers.
This is awesome! Love those pulls and cannot imagine how good it feels to have this kind of organization in a closet. Nice work!
I just love this, Angie! Your closet is so much more functional! Thanks for joining in on the fun!
This is exactly why I love to DIY! When something doesn’t work, you can change it up to make it work! You did amazing on this project! Love this, and it has inspired me to tackle a closet of mine! Send help! Lol!
Great job! The custom dividers are genius! I could DEFINITELY use something like this!
You can’t beat CUSTOMIZED organization! Perfect solution, super job!
pinning!
gail