Let’s see how much we have in common:
- Your home came with standard, boring, hollow-core doors
- You LOVE paneled, shaker style doors, and think that solid core doors are the way to go
- You’ve priced out replacing all of your boring, hollow doors with beautiful, solid doors, then a small part of you died when you found out the price tag was in the $thousands$ . . . and wasn’t going to happen.
Anyone else???
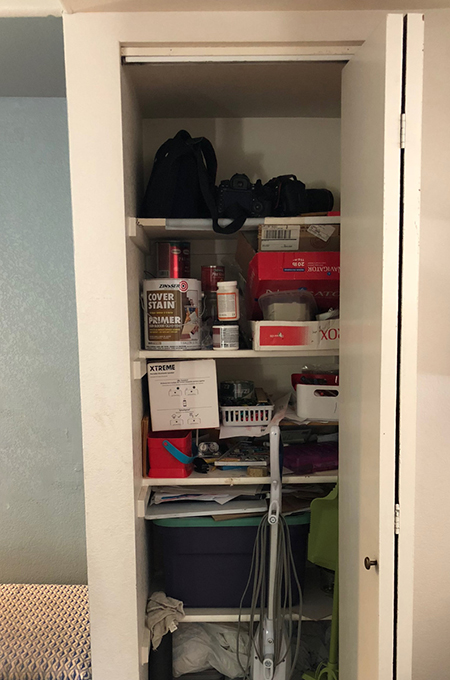
About a month ago I was looking at a small closet on our main level in disgust, with its bi-fold doors falling off their track, always looking like a mess. The DIY wheels in my head started turning, and I began sketching out a design to make a new door.
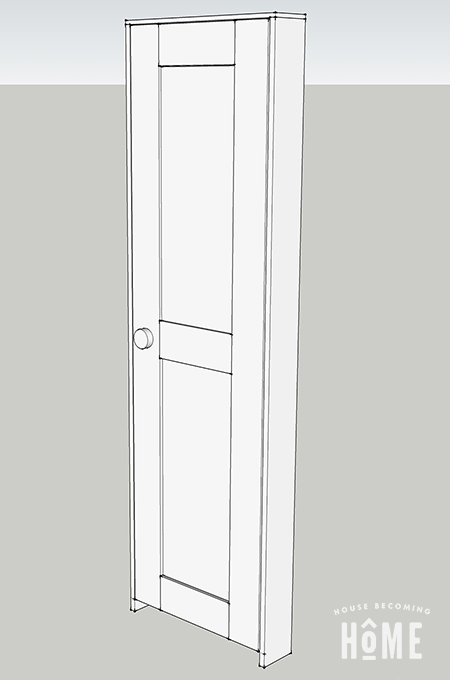
I’ll be honest–through every step of the door making/hanging process, I had serious doubts that this door would even work. Perfect measurements, getting things level, hinges lined up, etc. etc etc….I was almost positive that something wouldn’t be quite right and the whole thing wouldn’t work. But guess what? It WORKED! And we have a new, solid, shaker style, two-panel door for the closet that once had falling-off-its-track-bi-fold doors. Did I mention it was affordable too?
DIY Door: Everything You Need to Know to Build, Hang, and Trim a Solid-Core, Shaker-Style Door
If I can do it, I’m pretty sure you can too, and over the next few days I’ll be publishing several posts in a series I am calling DIY Door: Everything You Need to Know to Build, Hang, and Trim a Solid-Core, Shaker-Style Door. I’ll go through my entire process and you’ll learn exactly how to do it–from measuring and determining the correct size, to hanging and finishing with trim.
Today, you may have guessed, is part one. 🙂
**DISCLAIMER: I am not a professional. This is the process that I used and it worked well for me!**
Part One: Determine the size to build your DIY Door
Step 1 : Remove the Old
If you are replacing a hollow core door, remove the door, the door trim, then the door frame (save the door hinges and knob, you can reuse those!). If your door opening is already empty (as in my case, because there wasn’t a door jamb or trim with the bi-fold door I was replacing), move ahead to step 2.
Step 2 : Measure the Width
Measure the width of the opening at top and bottom (in case the opening isn’t quite square). Don’t round here, measure to the 16th of an inch. Hopefully the numbers are nearly identical. If not, use the larger number as your measurement.
Step 3 : Measure the Height
Measure the height of the door opening in several spots. Again, be exact about this, and take measurements from a few different spots. Go with the larger number.
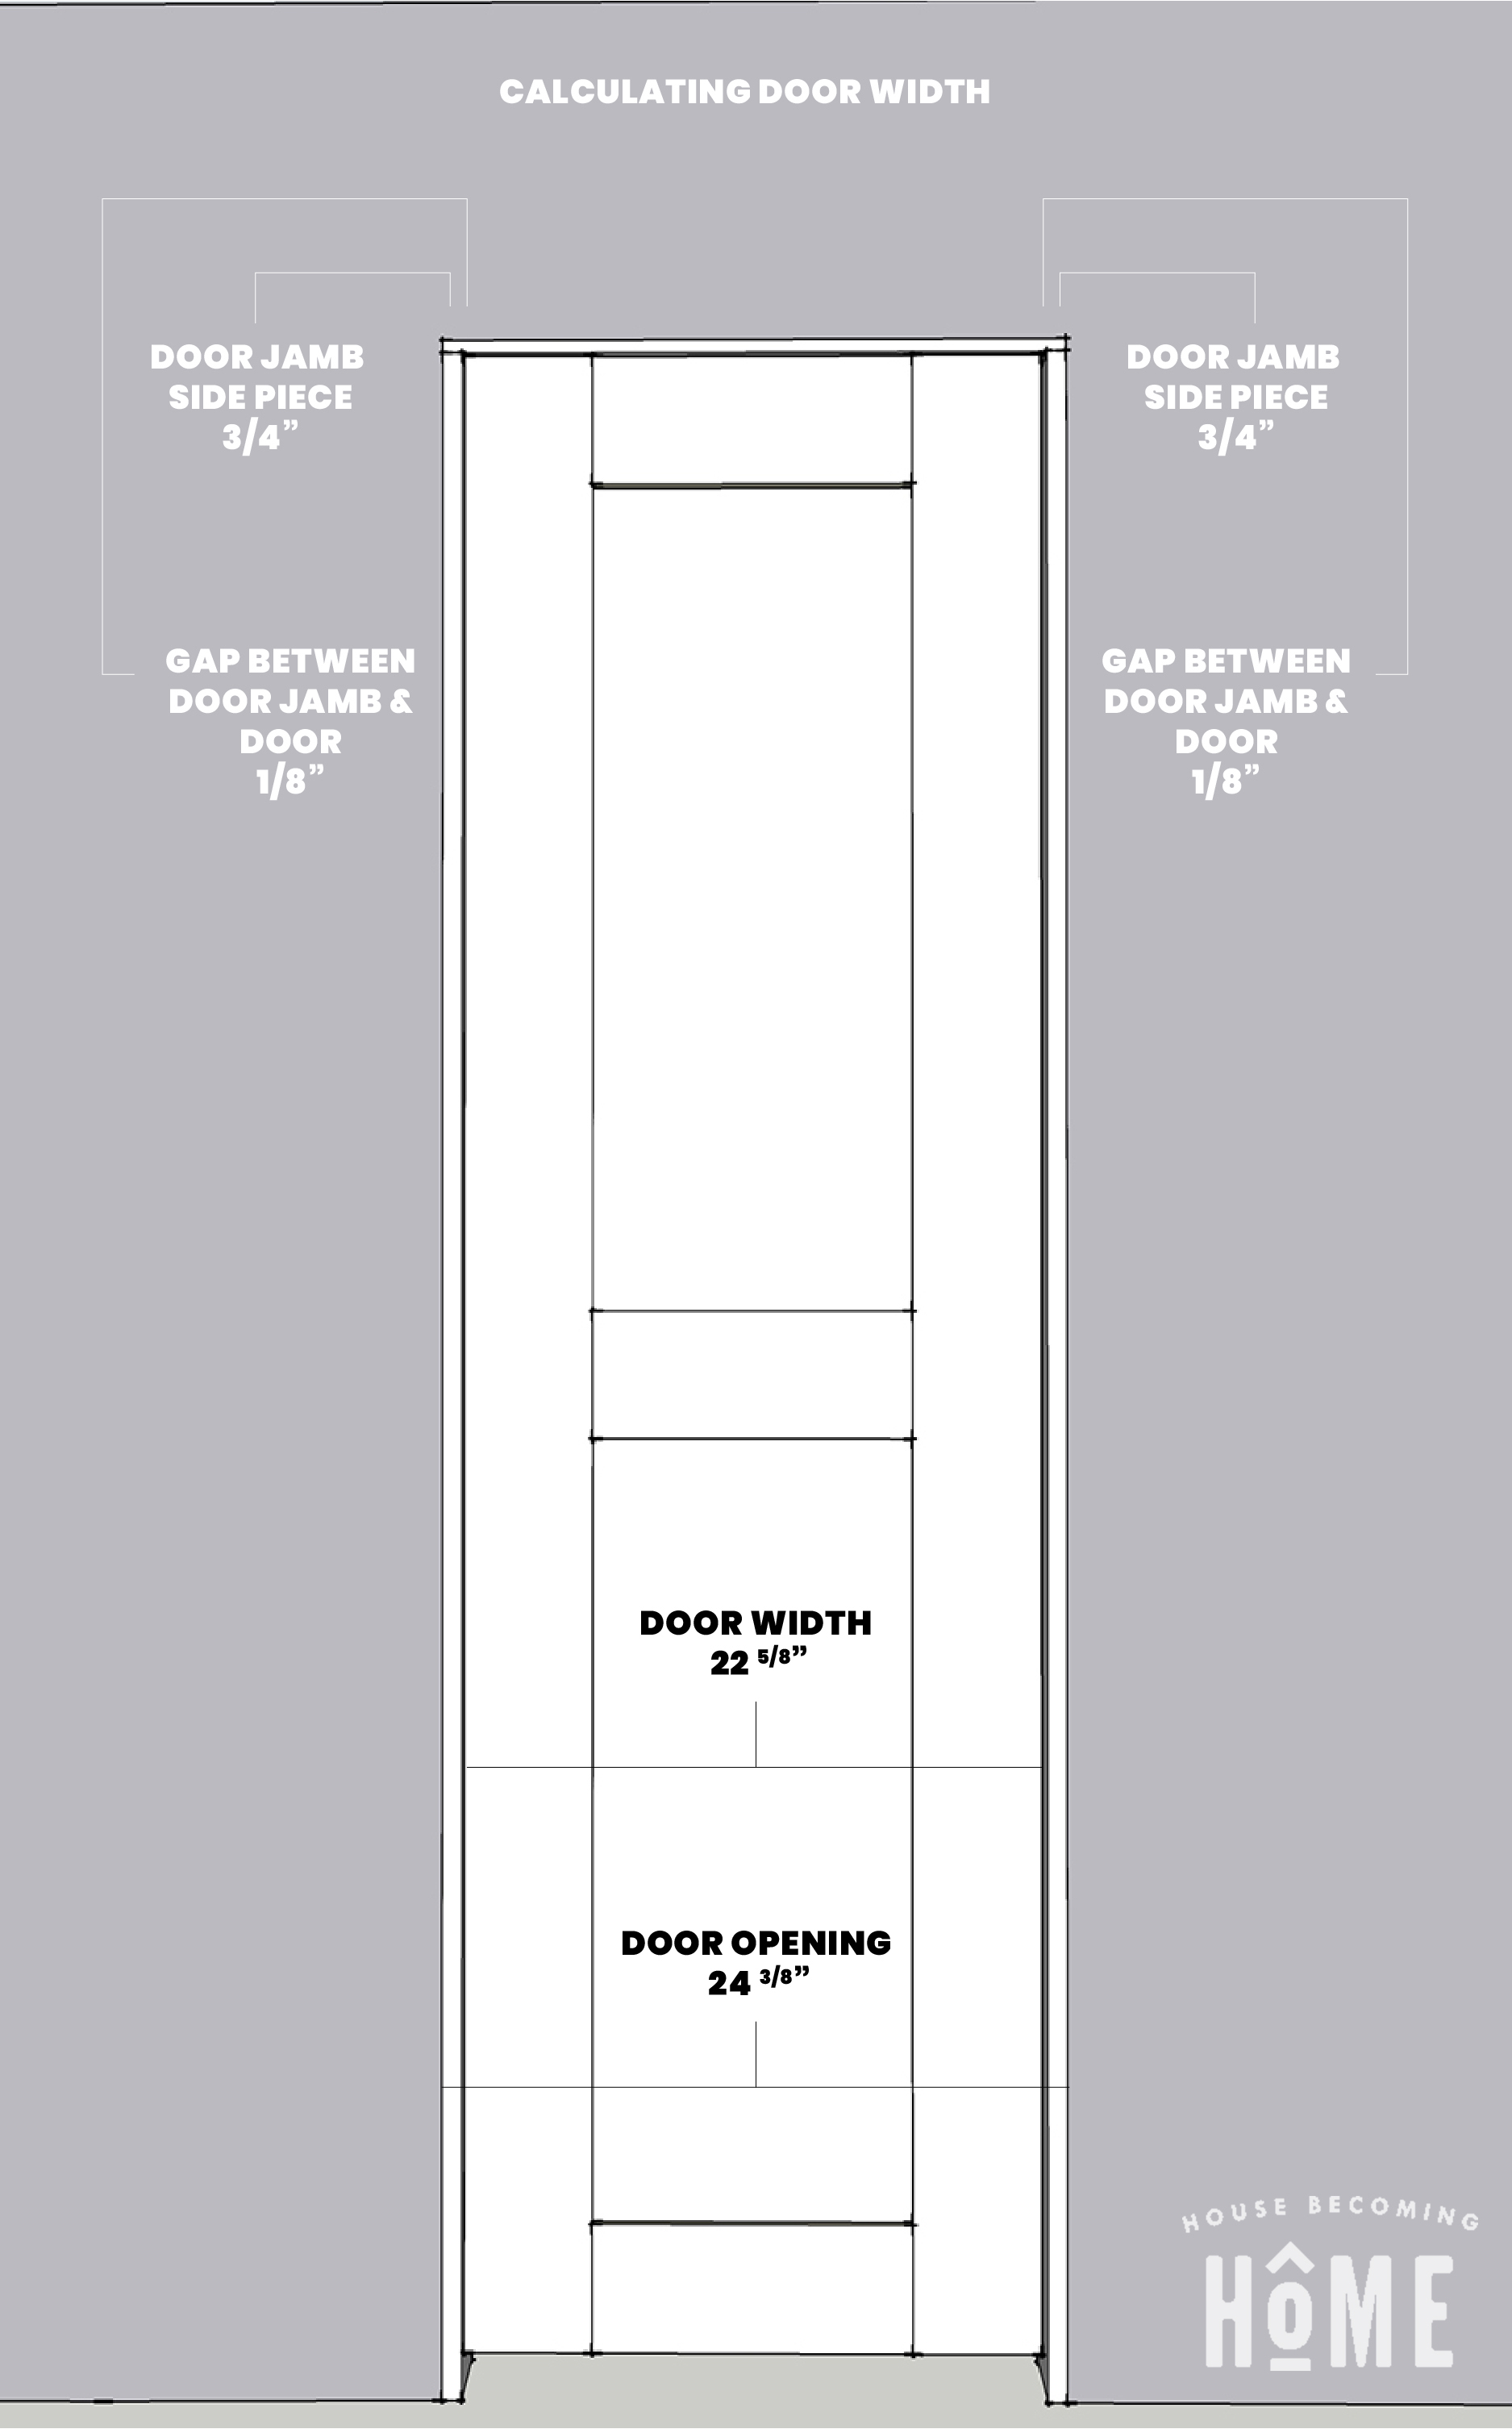
Step 4 : Calculate Width
Calculate the width of your new door. (width of new door = opening dimension minus thickness of two door frame side pieces, minus ⅛” gap on left side, minus ⅛” gap on right side). Here are the measurements from my small closet door, if it helps to see:
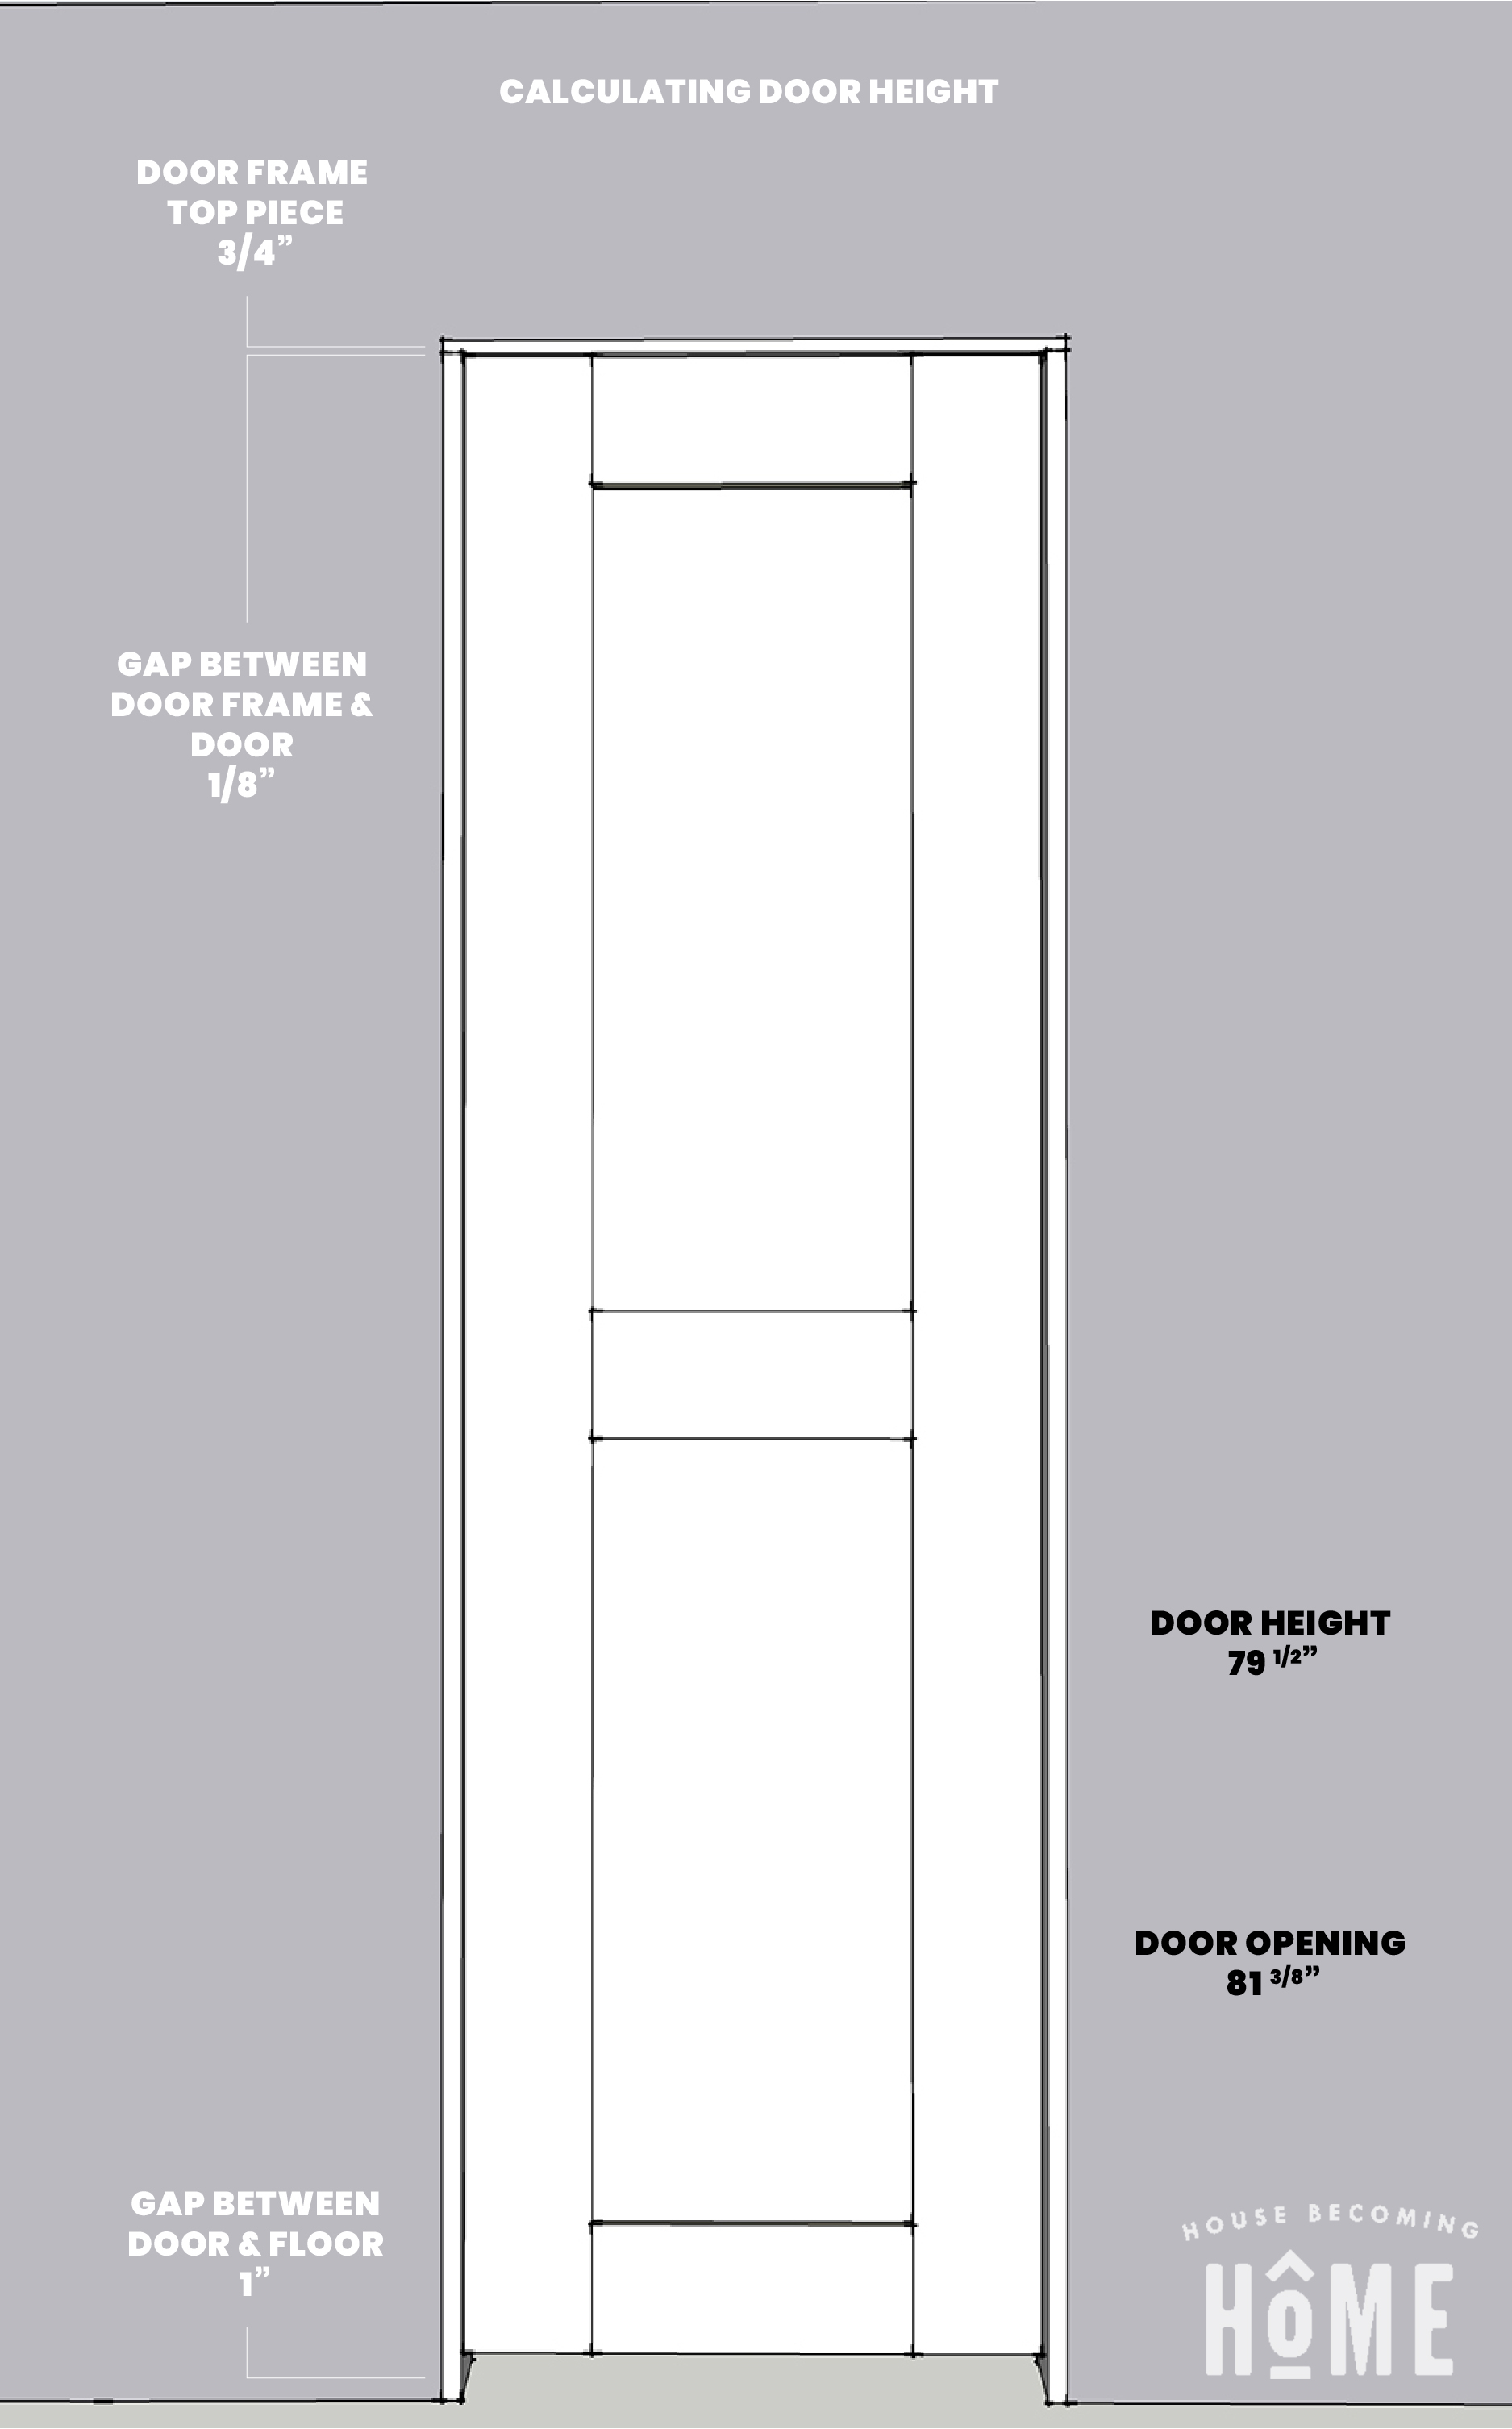
STEP 5 : Calculate Height
Calculate the height of your new door. (height of new door = opening dimension minus top piece of door frame thickness, minus ⅛” gap at the top between door and jamb, minus 1” gap at bottom). Again, here are the measurements from my small closet door, if it helps to see:
Step 6 : Determine Thickness
Determine the thickness of your door based off the materials you will be using. I went the super affordable route with 2×6’s, which have a thickness of 1 ½ ”. FYI: standard door thicknesses are 1 ⅜” or 1 ¾”. If you want to be “standard,” you can sand or plane the thickness of your 2×6 down to 1 ⅜”. If you don’t mind not being “standard,” stick with 1 ½”, and note that you’ll have to make a quick and easy adjustment when using a hinge mortising template later in the door making process (no big deal, I did it, you can too).
Interior Door Standard Sizes
Below I’ve added the standard interior door sizes. Unless you have an opening that is really unusual (like our small closet door), you’ll likely be building a door the height and width of these standard sizes:
Standard Interior Door Heights
- 6’ 6”
- 6’ 8”
- 7’ 0”
- 8’ 0”
Standard Interior Door Widths
- 24”
- 28”
- 32”
- 34”
- 36”
- 42”
So there you have it. For my non-standard, unusually small-sized opening, the dimensions of my door were 22 ⅝” wide, 79 ½” tall, and 1 ½” thick.
PART 2 : DETERMINING DOOR FRAME SIZE
You’ve now got the dimensions for your new door. Since you’re already writing down measurements, now is a good time to record the size of lumber you’ll need to make the door jamb. I used a few simple pine 1x4s to make my door frame/jamb, which have a thickness of ¾”. The jamb should fit snug around the door, with just ⅛” gap between it and the door.
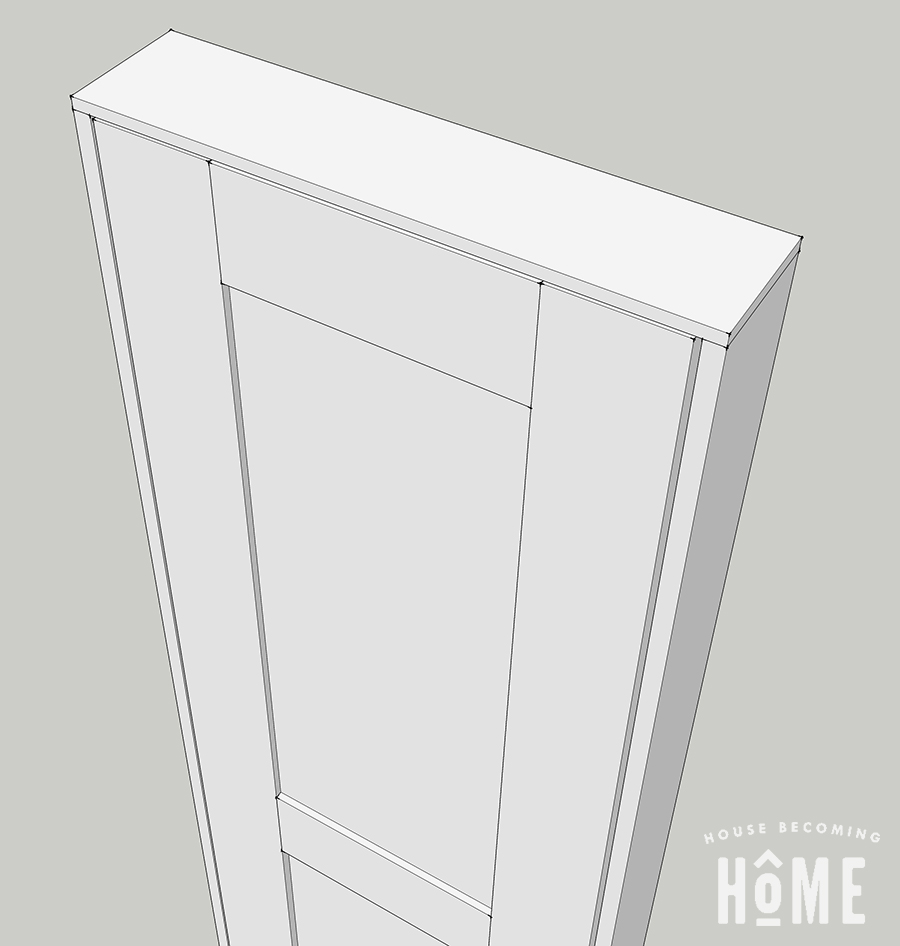
Be sure to calculate dimensions based on the top piece of the door frame running the full width, going OVER the side jamb pieces.
*TIP*
Write down exact measurements, but when determining door and door frame size, you may want to take off 1/2” or so from the height and width. I didn’t do this, and my door was a VERY tight fit into the opening.
It is probably better to err on the side of having a door that is slightly too small, rather than slightly too large. With a door and frame that is slightly too small, having an extra ½” or so is no big deal. You can always add shims between the wall and the door jamb (and it’s probably helpful to have that extra wiggle room when making your door level). Shaving off width from a door that is too wide, on the other hand, is much more of a pain and will affect the visual proportions if you’re making a rail and stile type of door.
Check out more from the DIY Door Series