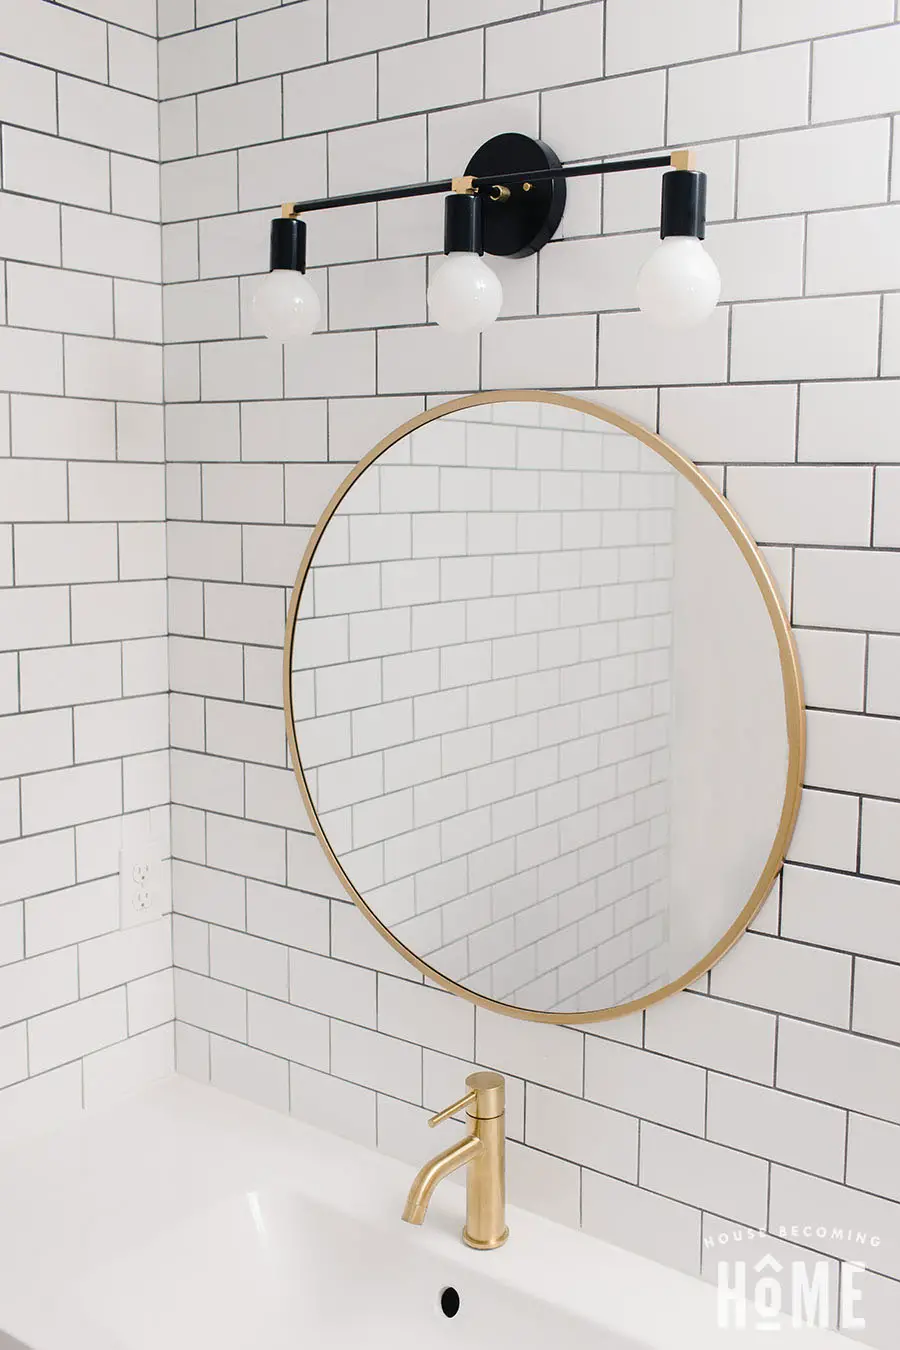
Lately I’ve been drawn to the look of black and white + brass, especially in bathrooms. So when we decided to renovate our kids’ bathroom, I knew I wanted a primarily black + white palette with punches of brass details scattered throughout. And what better place to incorporate black + brass than in the light fixture above the mirror?
After learning how to wire lamps last year (the twisted copper pipe light is still one of my favorites), I was pretty sure I could figure out how to make a modern bathroom light fixture using the same ideas. Read on to learn how to make your own DIY modern light fixture–it’s really not too difficult and the savings of making it yourself is huge!
**And of course, I must disclose that I am NOT an electrician** This post is for general information and inspiration.
How to Make a Modern Bathroom Light Fixture
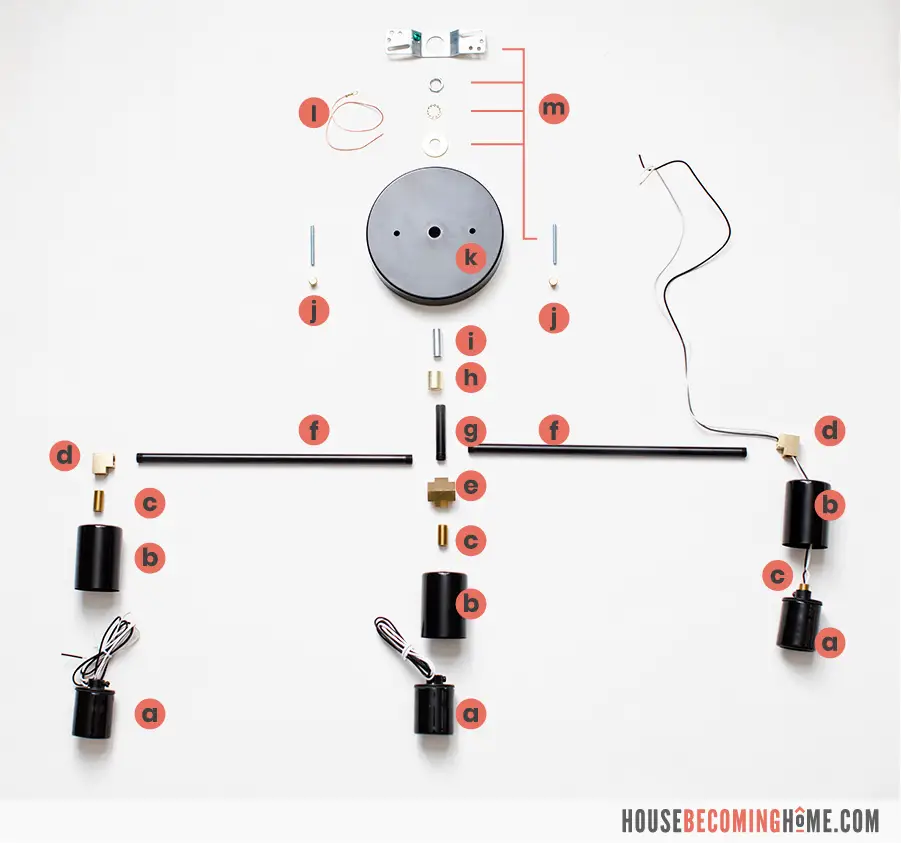
Modern Bathroom Light Fixture Supply List
*I bought all of my DIY light supplies from Grand Brass Lamp Parts. The supply list below links to each product I used.
- a (3)E-26 BLACK PORCELAIN SOCKET WITH 1/8IPS. CAP AND 18/1 WIRE LEADS
- b (3)BLACK POWDERCOAT FINISH EDISON SOCKET CUP
- c (3)3/4IN. X 1/8IPS. THREADED BRASS HOLLOW NIPPLE
- d (2)THREADED UNFINISHED BRASS 90 DEGREE ARMBACK
- e (1)UNFINISHED BRASS THREADED 4 WAY ARMBACK
- f (2)10IN LONG X 1/8IPS MALE THREADED BLACK POWDER COATED STEEL PIPE
- g (1)2IN LONG X 1/8IPS MALE THREADED BLACK POWDER COATED STEEL PIPE
- h (1)5/8IN W X 5/8IN H – FEMALE THREADED UNFINISHED BRASS STRAIGHT COUPLING
- i (1)1IN. X 1/8IPS. THREADED HOLLOW NIPPLE
- j (2)8/32 FEMALE THREADED TAPERED KNOB FINIAL – UNFINISHED BRASS
- k (1)5IN POWDERCOATED MATTE BLACK FINISH FLAT CANOPY WITH 2-3/4 BARHOLES – STEEL
- l (1)1/8IPS. LUG WITH 12IN. LONG 18/1 BARE COPPER GROUND WIRE STRAP
- m (1) CEILING CANOPY CROSS BAR SET
Modern Bathroom Light Fixture Step-by-Step
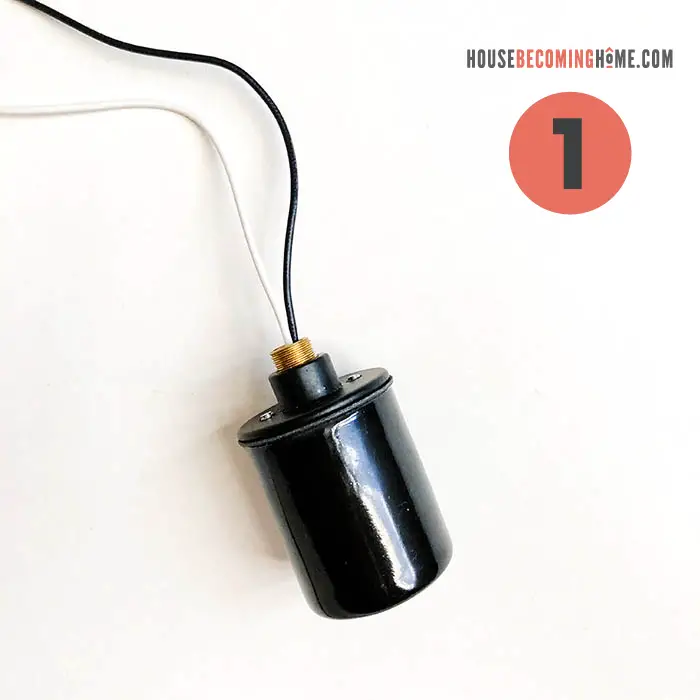
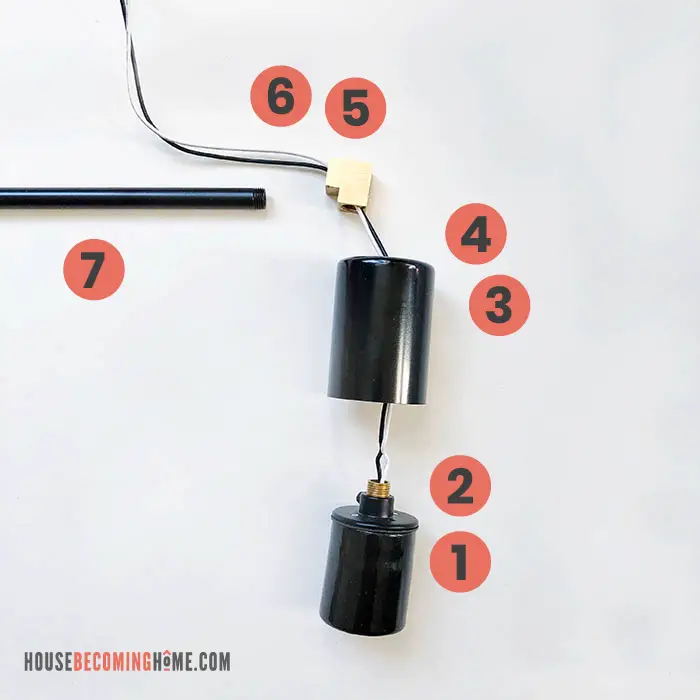
1
Thread the wire leads from one of the sockets through the hollow brass nipple, then screw the brass nipple into the threads at the top of the light socket.
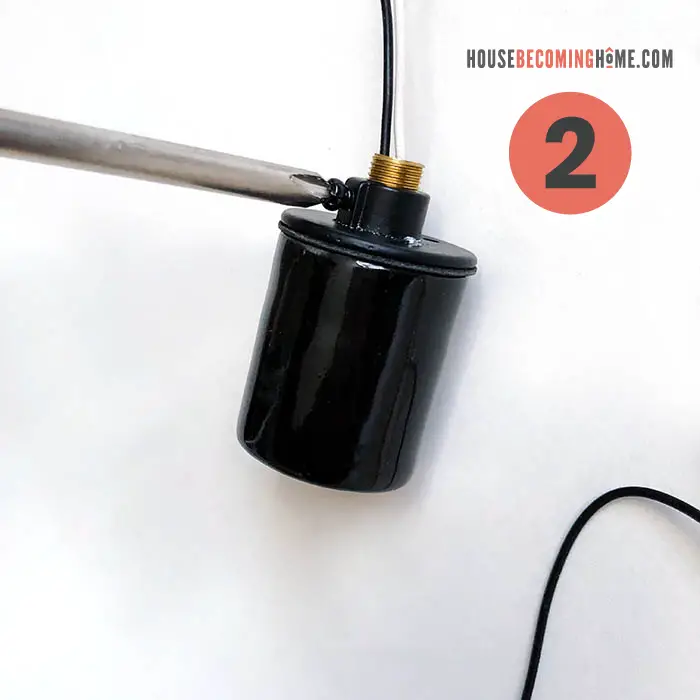
2
Tighten the small screw on the side of the socket.
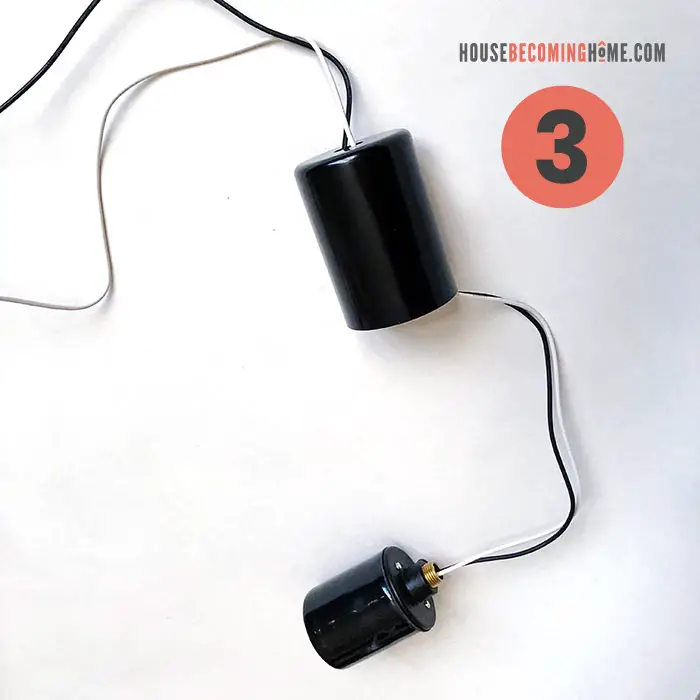
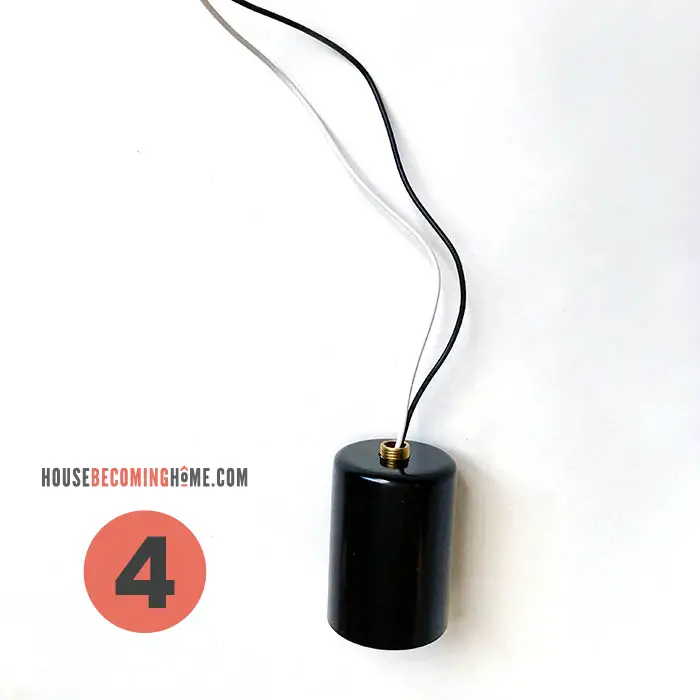
3 & 4
Thread the wires through the socket cover.
5
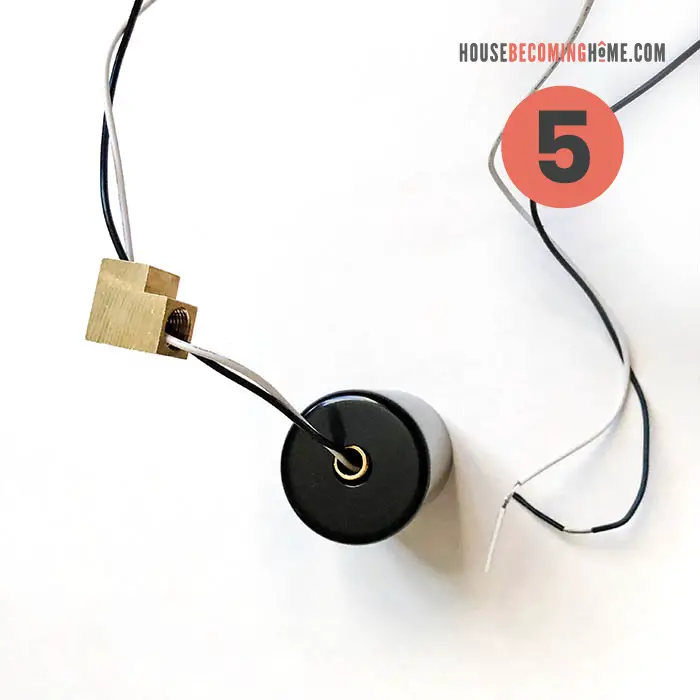
Next, thread the wires through one of the brass elbows (90 degree armback).
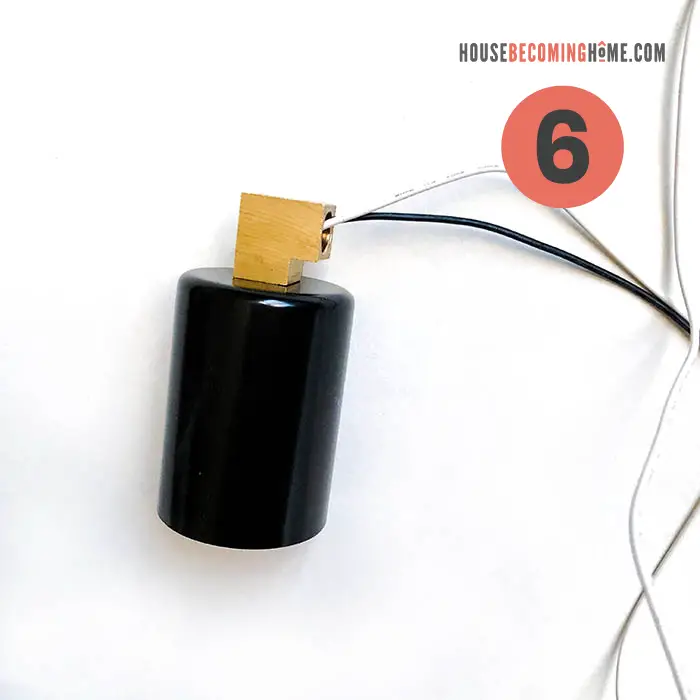
6
Screw the brass elbow onto the brass nipple.
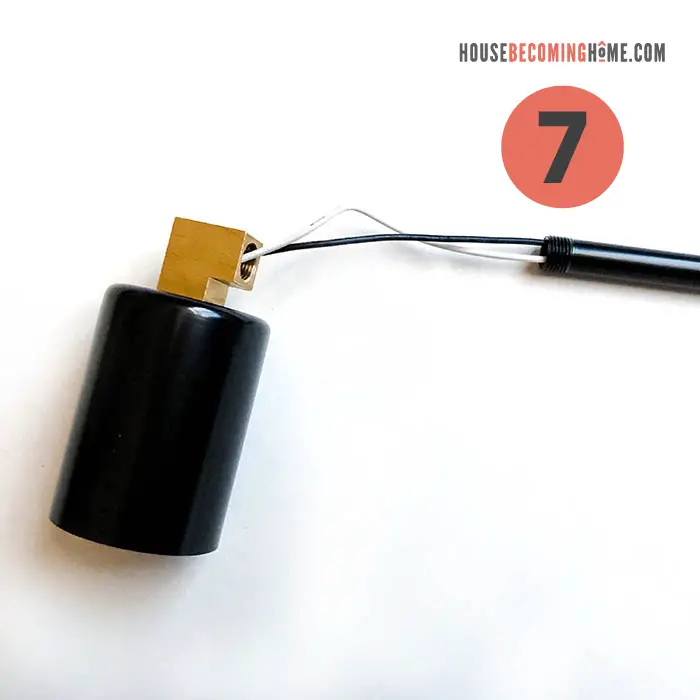
7
Thread the wires through one 10″ piece of pipe.
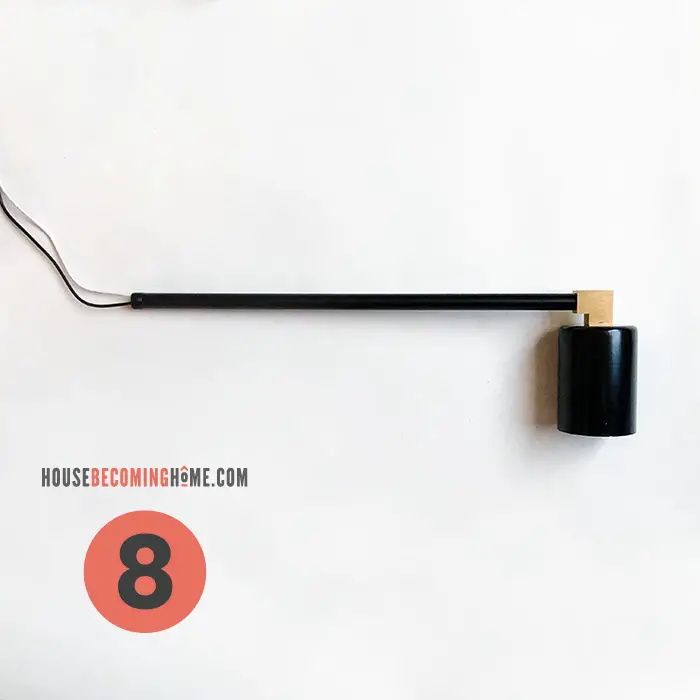
8
Screw the end of the pipe into the brass elbow.
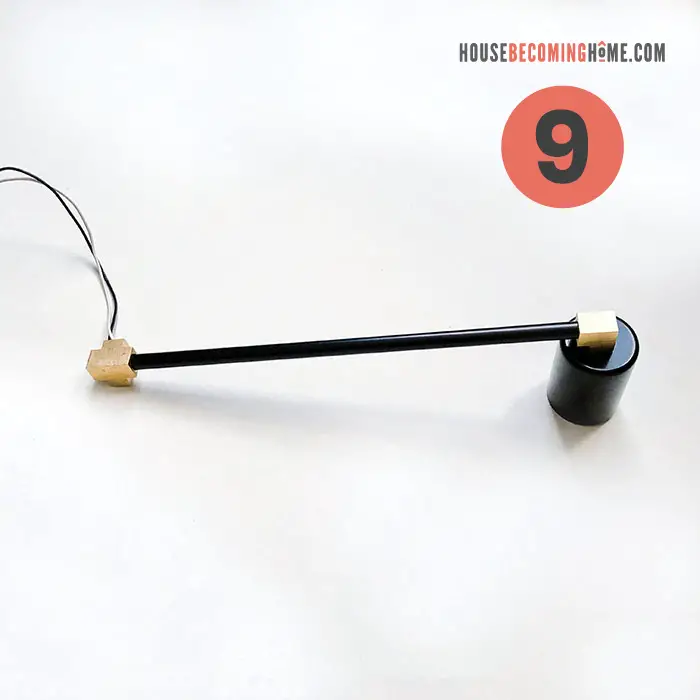
9
Thread the wires through the 4 way armback, then screw the armback into the end of the black pipe.
**Repeat Steps 1-7 with one of the remaining light sockets **
This will be the other side of the light fixture.
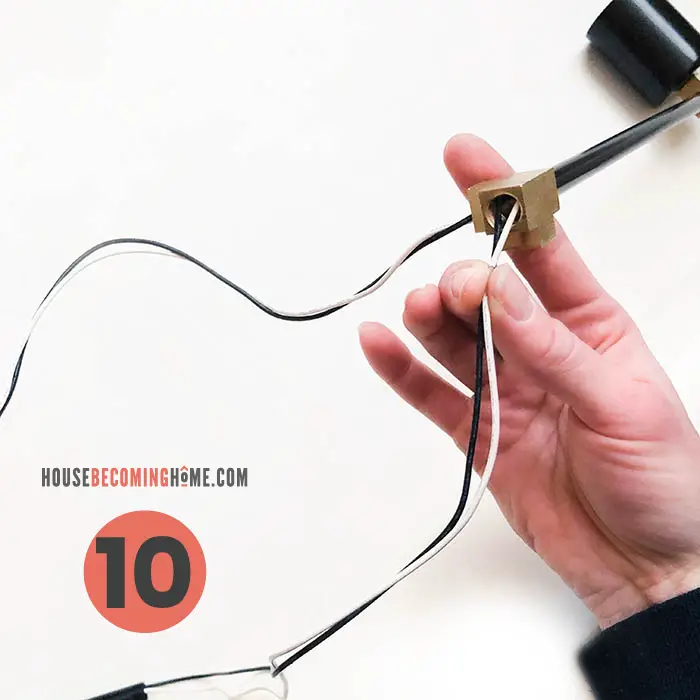
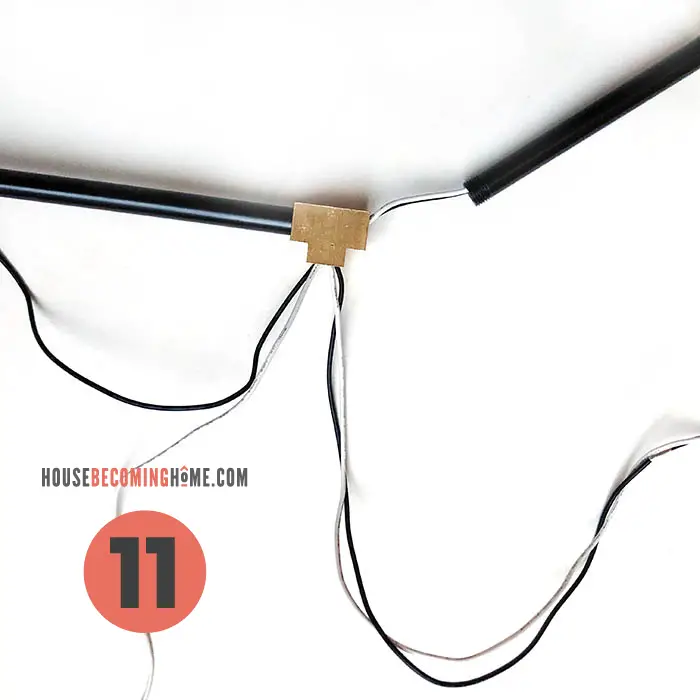
10 & 11
Thread the wires of socket #2 into the side of the 4-way armback, exiting through the back.
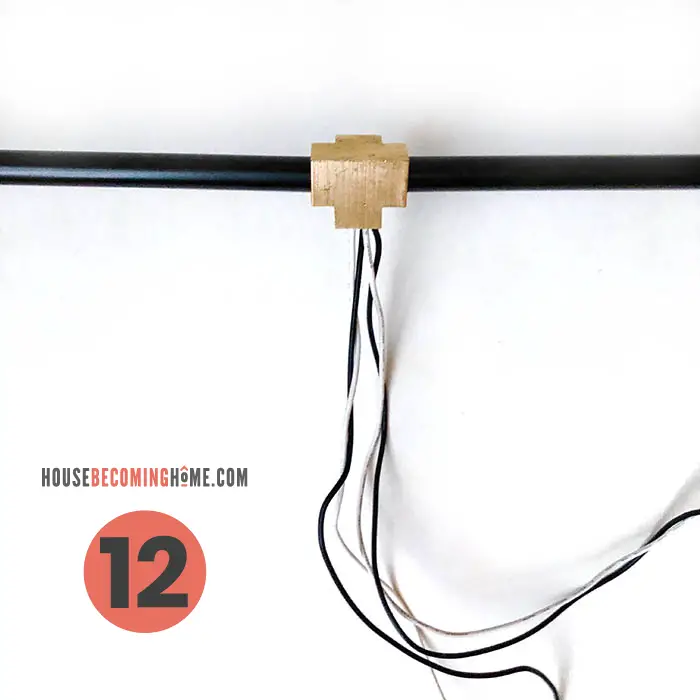
12
Screw the end of the pipe into the 4 way armback.
13
Prepare the last socket as you did in steps 1-4.
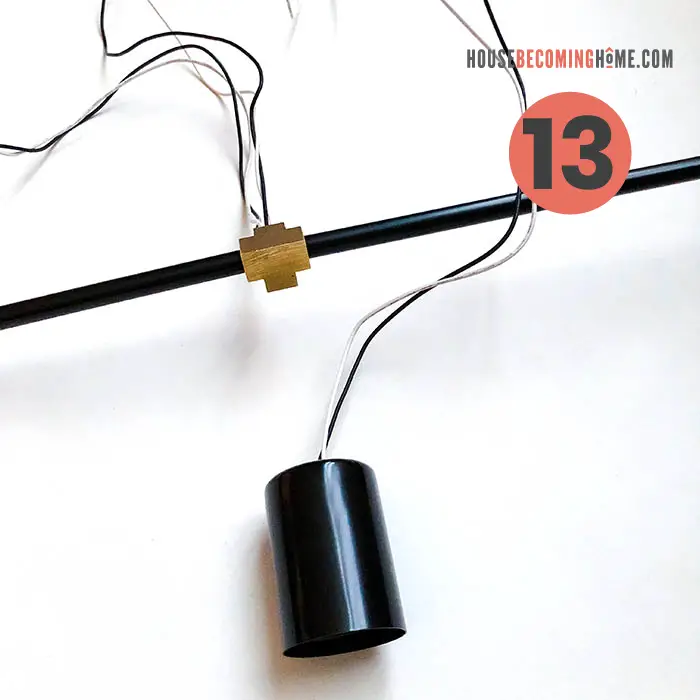
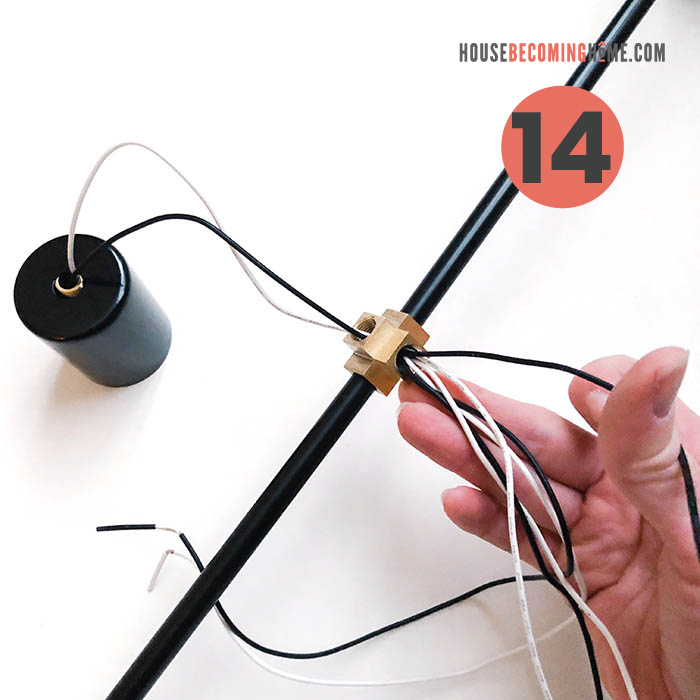
14
Thread the wires of the last socket through the bottom hole of the 4-way armback, exiting through the back side.
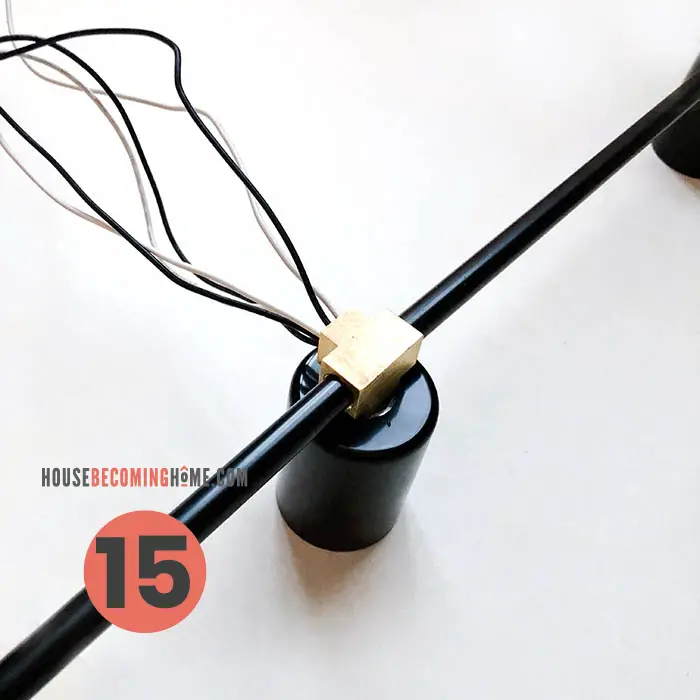
15
Screw the nipple of the last socket into the bottom threads of the 4-way armback.
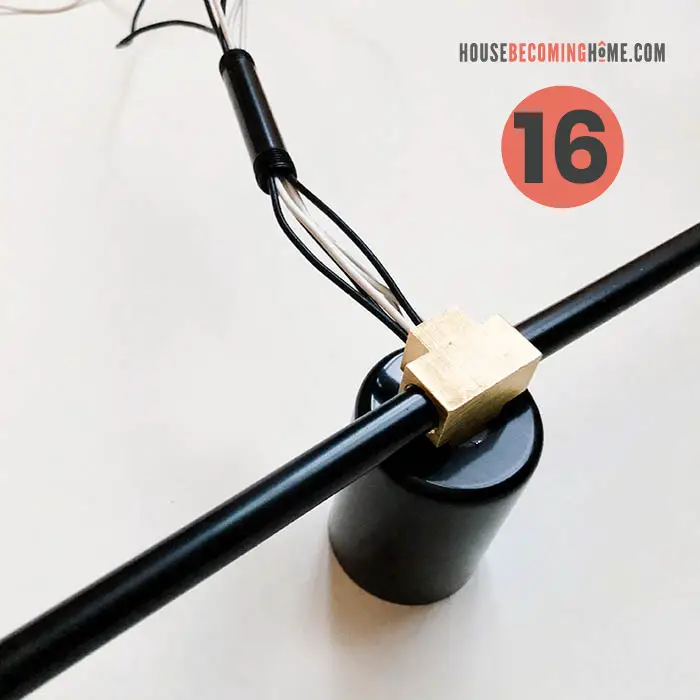
16
Next, thread all six wires of the three sockets onto a 2″ piece of black pipe. Screw the pipe into the back threads of the 4-way armback.
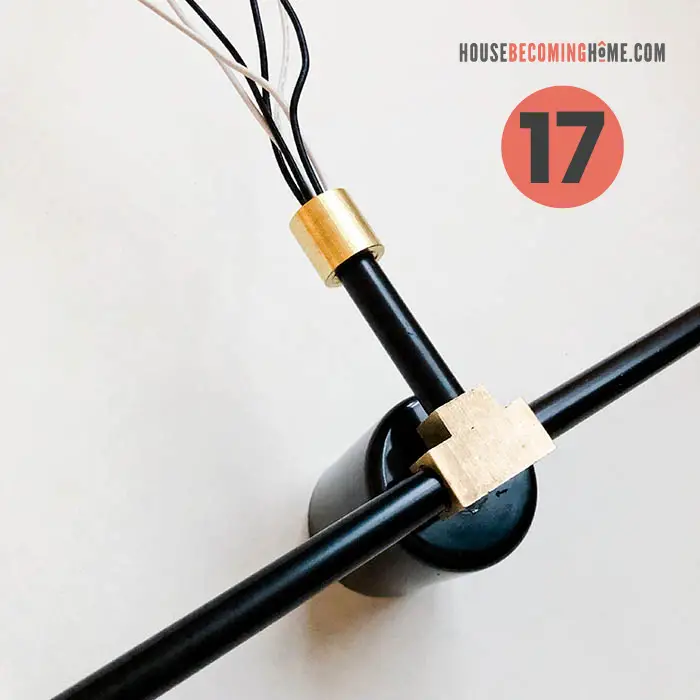
17
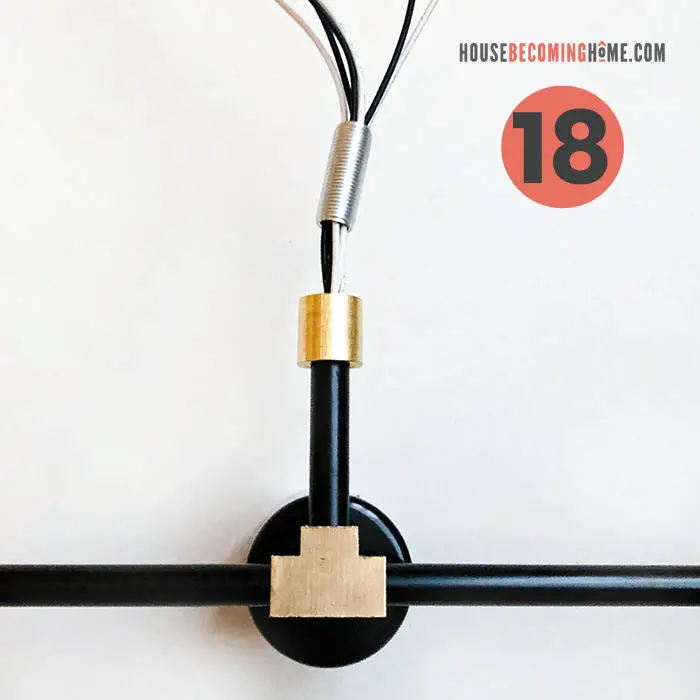
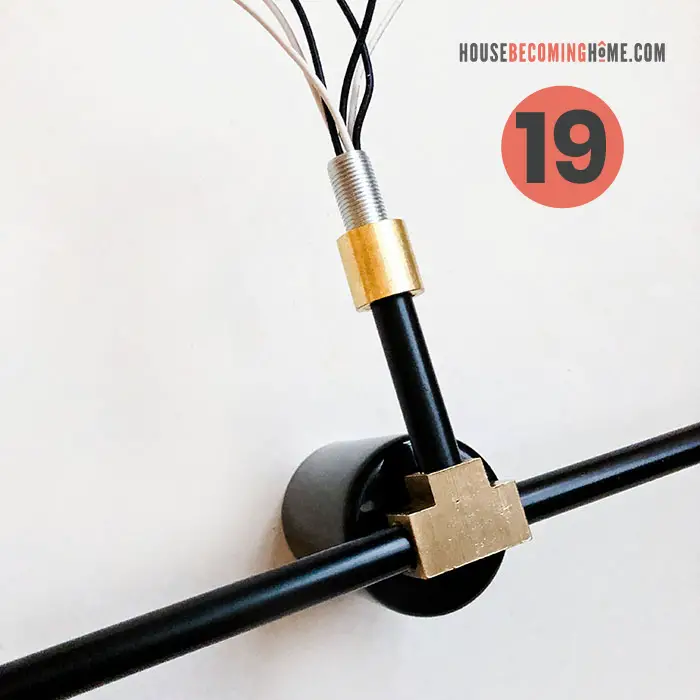
Attach the brass coupling onto the end of the black pipe.
18 & 19
Thread the wires through the zinc plated nipple, then screw it into the threads of the brass coupling.
20
Finally, insert the wires and nipple through the center hole of the black canopy. Slide the cross bar onto the nipple, followed by a brass washer, then a copper ground wire strap, a slip star lock washer, and finally, a hex head nut.(The steel studs on the sides will be used later to attach the fixture to the wall.)
21
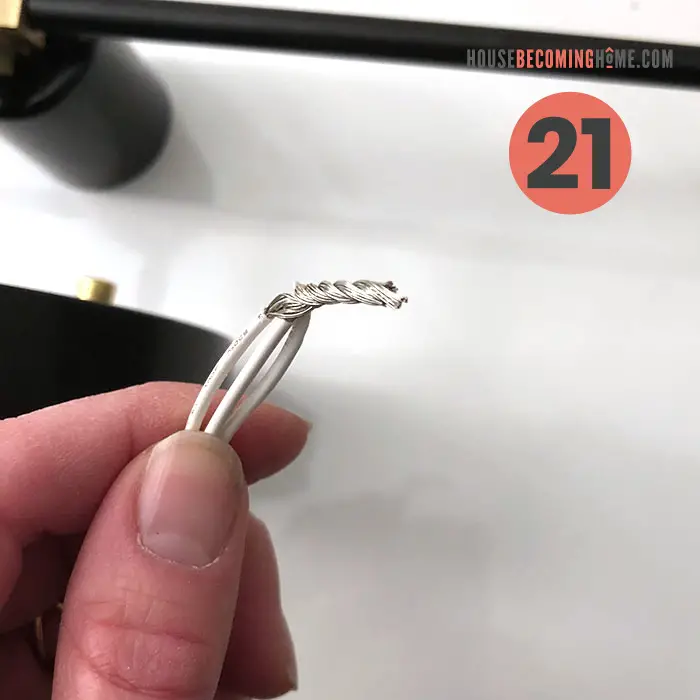
Connect all three white wires by twisting the ends together. Connect all three black wires by twisting the ends together.
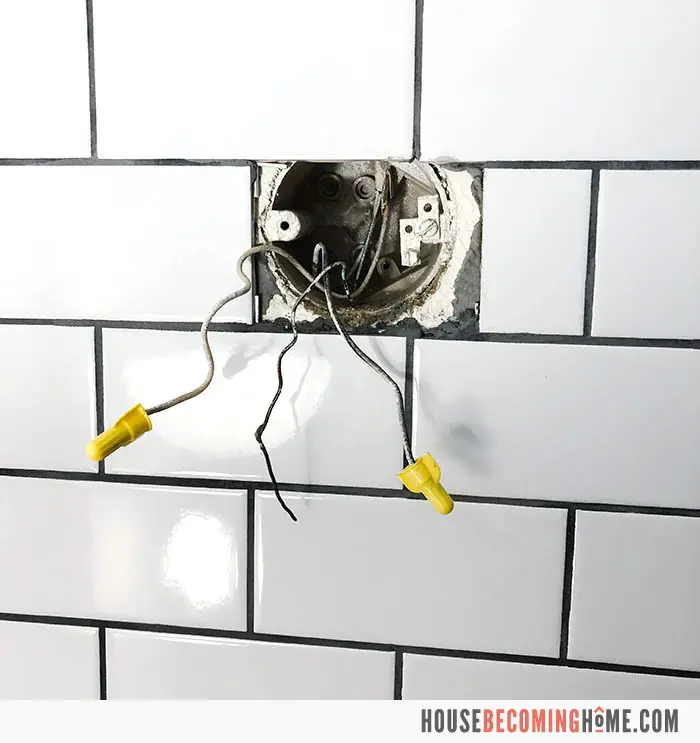
Connect the wires of the fixture to the appropriate wires from the electrical box inside the wall. Black to black, white to white, copper to copper. Twist together with the appropriately sized wire nut. Consult an electrician if you’re not confident in what you’re doing here.
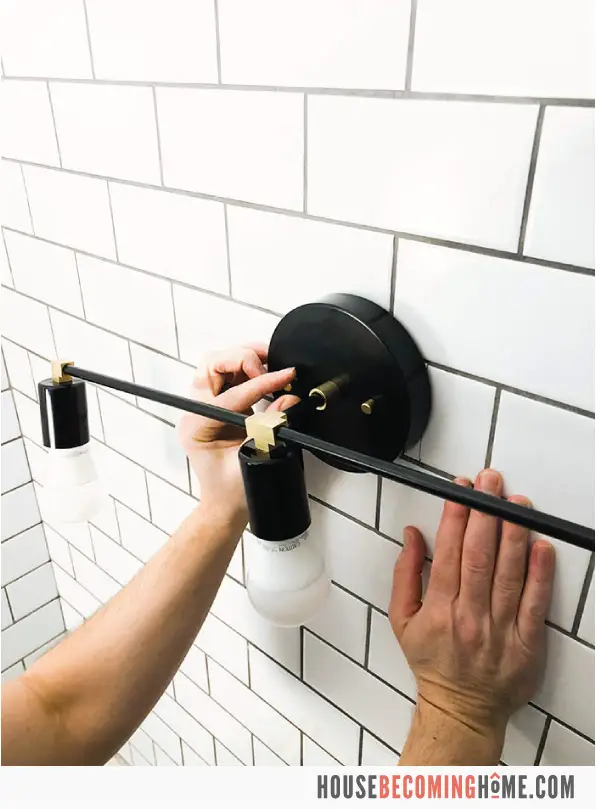
Screw the steel studs into the holes of the electrical box, then slide the canopy onto the steel studs through the two side holes. Tighten with 8/32 threaded finials.
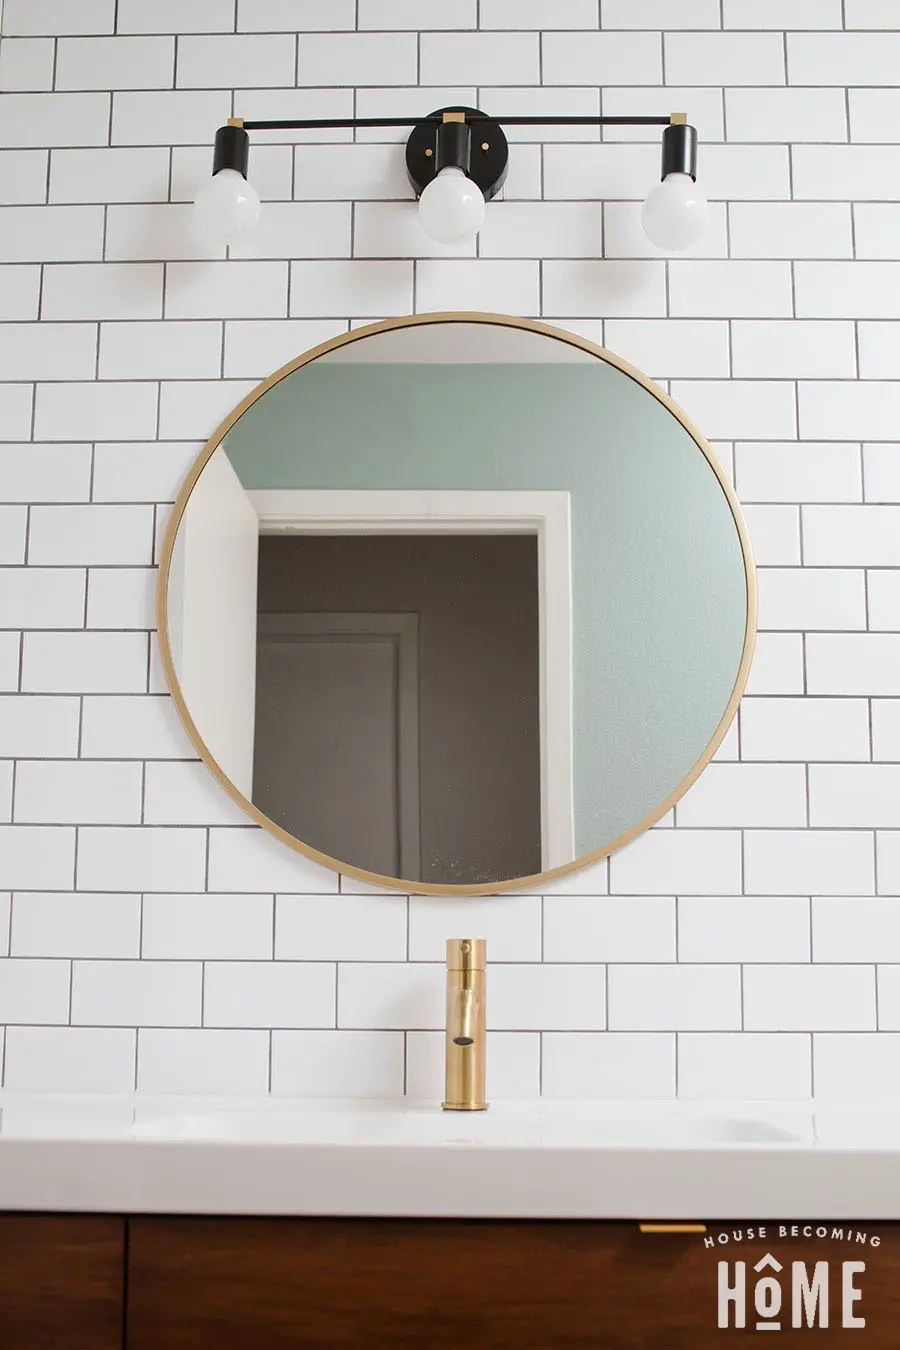

Let me know if you make your own modern bathroom light fixture–I’d love to see how it turns out! As always, tag me on facebook or instagram if you post a photo so I can cheer you on!

This is AWESOME, thank you for the instructions! This is my new favorite website.
Thanks Dan, I’m so glad you found it helpful! I’d love to see it if you make one! 🙂