
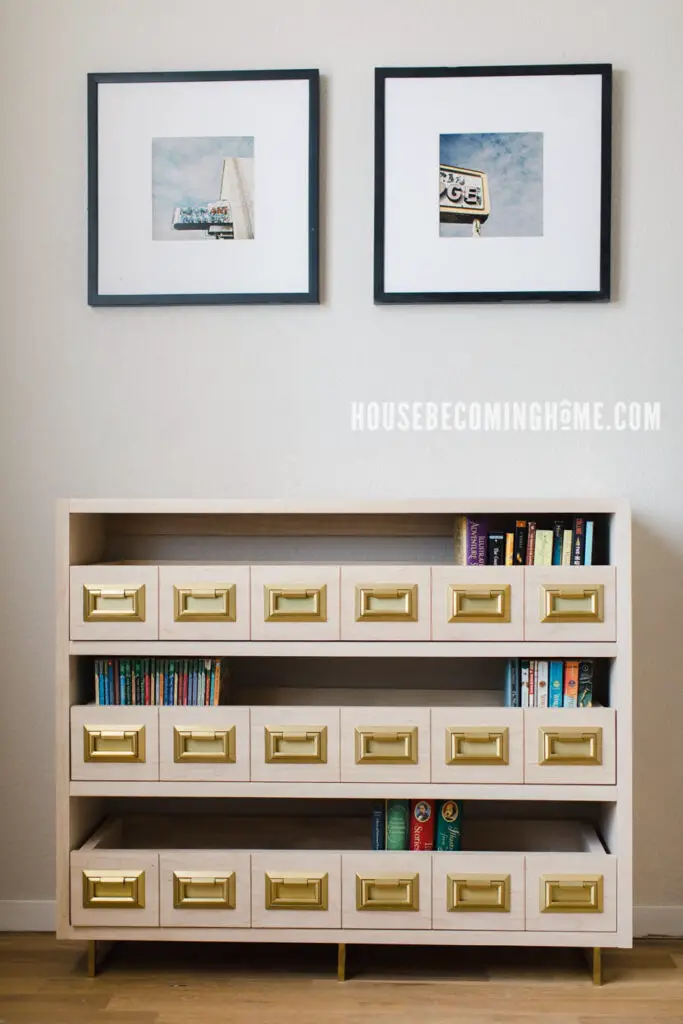
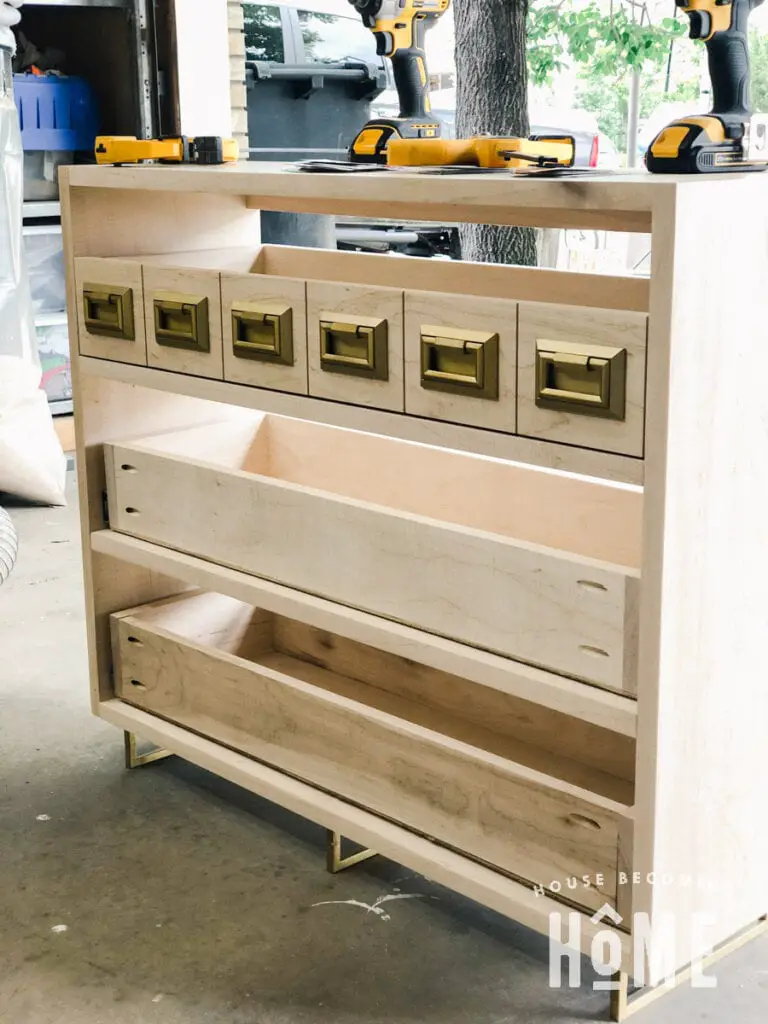
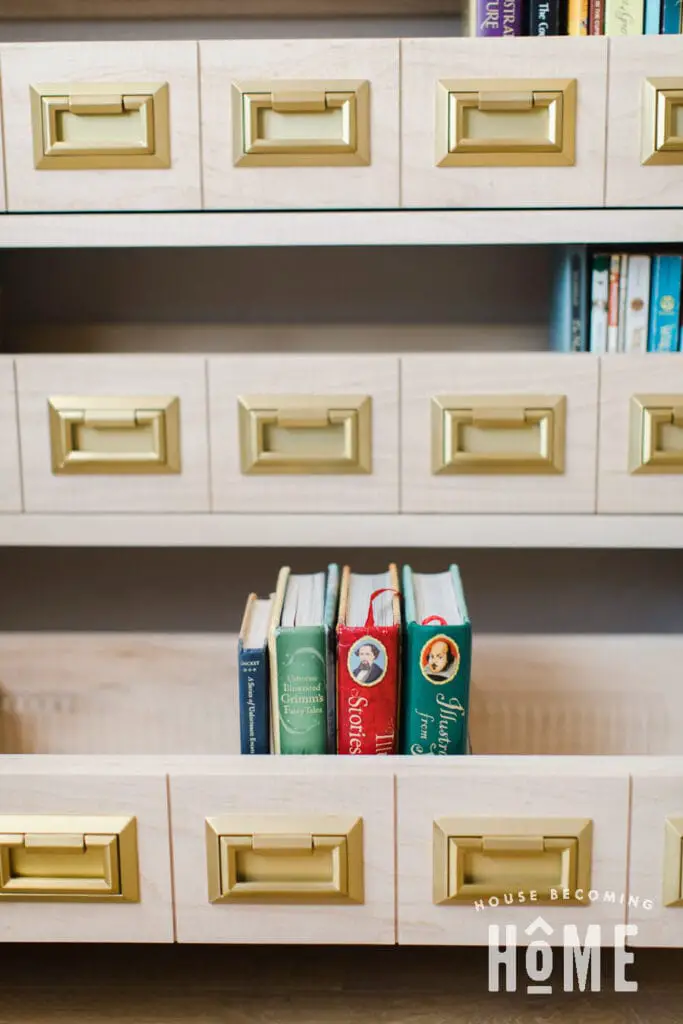
Anyone with children likely knows the struggle to keep the contents of a bookcase organized. This kid-friendly catalog bookcase provides a solution with its pull-out drawers and moveable dividers. I’d love to take design credit, but the genius idea belongs to my friend Sarah from The Created Home. She put together both beginner and advanced plans for this bookcase, and today we’re sharing tutorials for both versions. Here you’ll find the instructions to build the beginner version of the catalog bookcase. If you’d like to try the advanced version, be sure to check out Sarah’s advanced catalog bookcase tutorial.
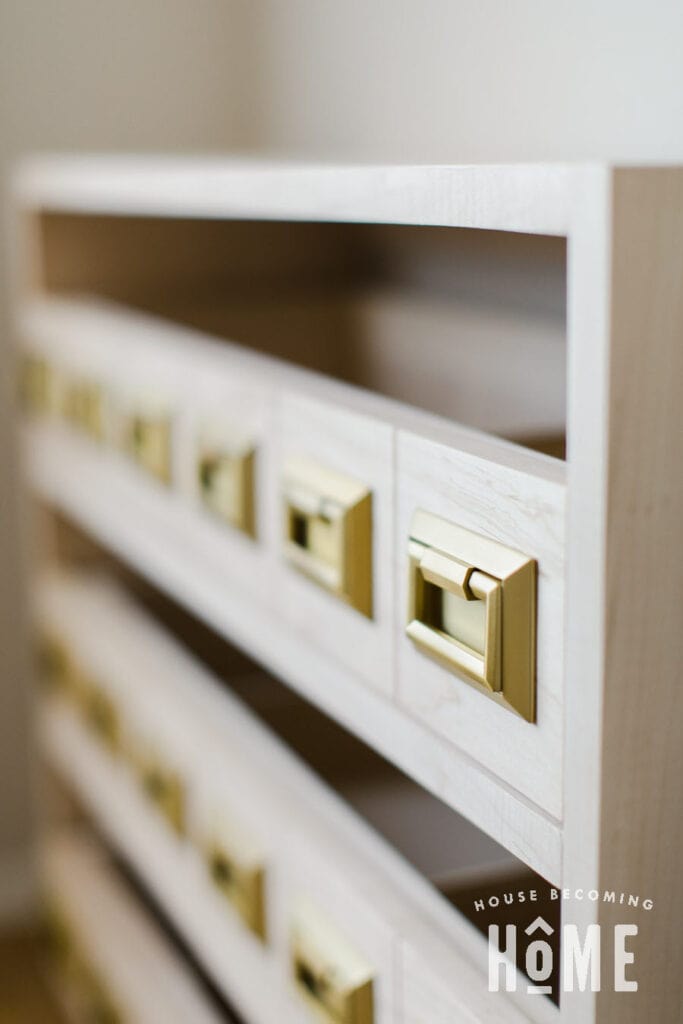
Whichever build you choose, I’m fairly certain you’ll love the drawers with adjustable dividers, the no-weld legs made from square brass pulls, and the rows of shiny campaign bail pulls. Let’s get building!
What You Need to Build The Catalog Bookcase
* This post has affiliate links for your convenience. You can read my full disclosure policy here *
Materials
- 17′ of 12″ material for sides and shelves
- 23′ of 4″ material for drawers
- 6′ of 2-1/12″ nailer material
- (1) 8×4′ sheet of 1/4″ plywood
- 9′ of 4-3/4″ material for drawer faces
- 1-1/4″ pocket hole screws
- (3 pairs) 10″ full extension drawer slides
- (6) 10″ square drawer pulls (for the legs)
- (3) Rockler Drawer Divider Holders
- (18) Campaign Bail Pulls (keep reading for a 10% off coupone code!)
- CA Glue
Tools
- Pocket Hole Jig
- Table Saw
- Miter Saw
- Sander + Sandpaper
- Hack Saw or Coping Saw (or use threaded rods)
- Drill + drill bit capable of making a hole in metal
- Clamps
This post provides the tutorial and general building instructions. To download the printable plans, click here.
HOW TO BUILD THE CATALOG BOOKCASE
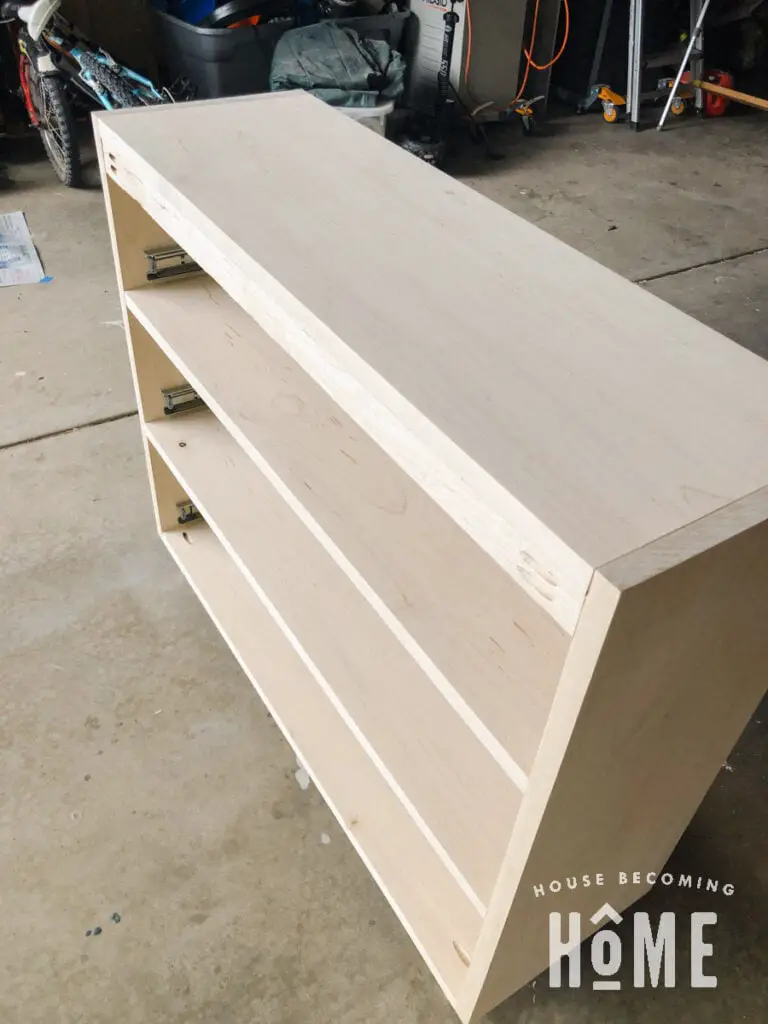
CONSTRUCT THE FRAME + SHELVES
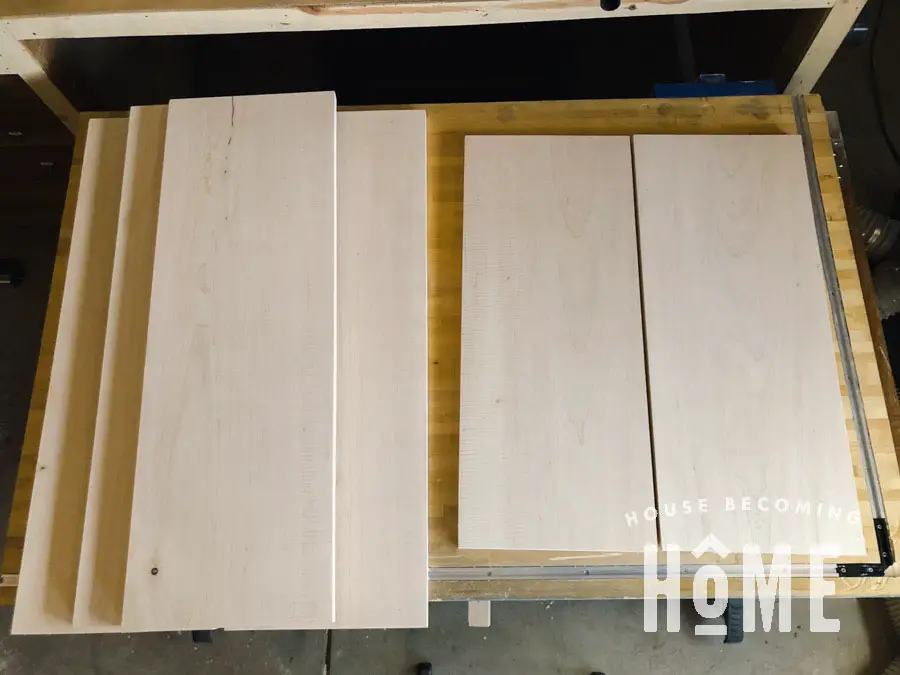
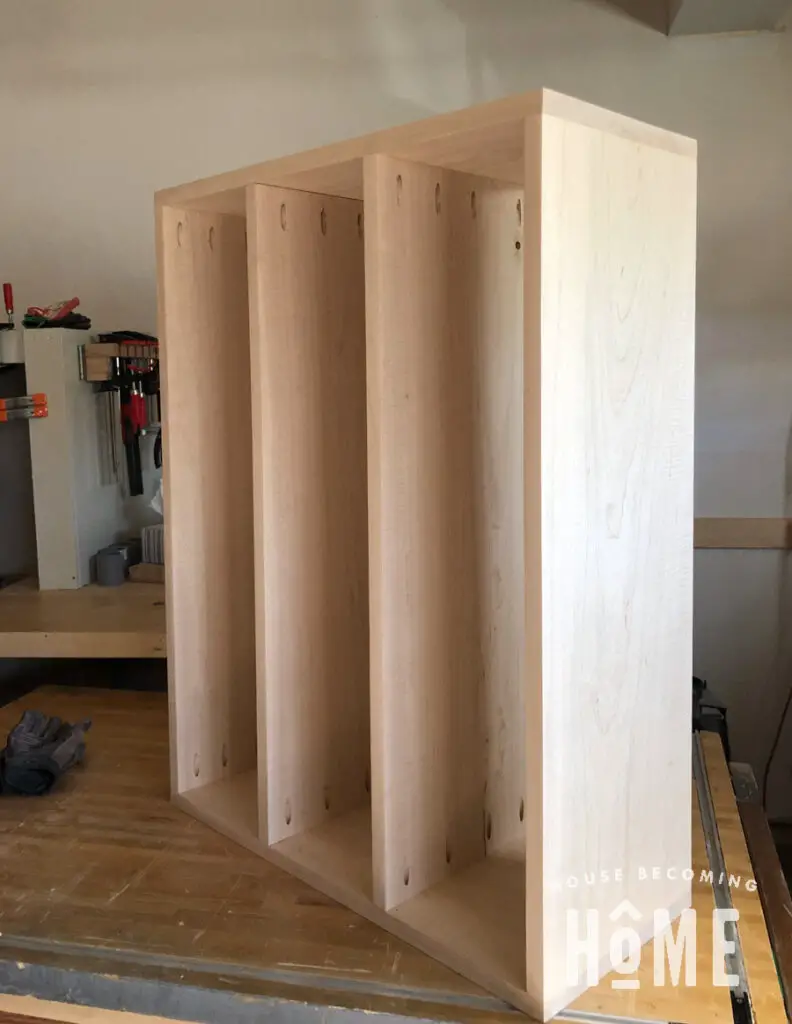
Begin by constructing the frame of the bookcase. Cut four pieces, identical in size, to form the bookcase top, bottom, and two shelves. Next, cut two bookcase sides.
Make pocket holes on both ends of the top piece, bottom piece, and each shelf, then join together with 1-1/4″ pocket hole screws.
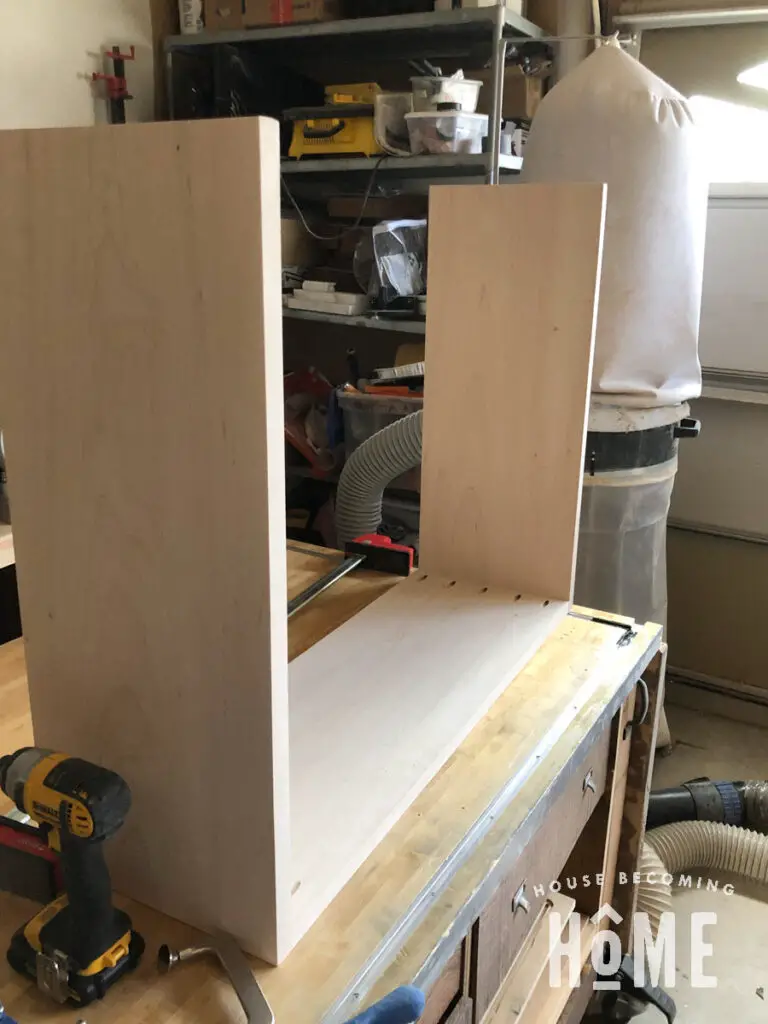
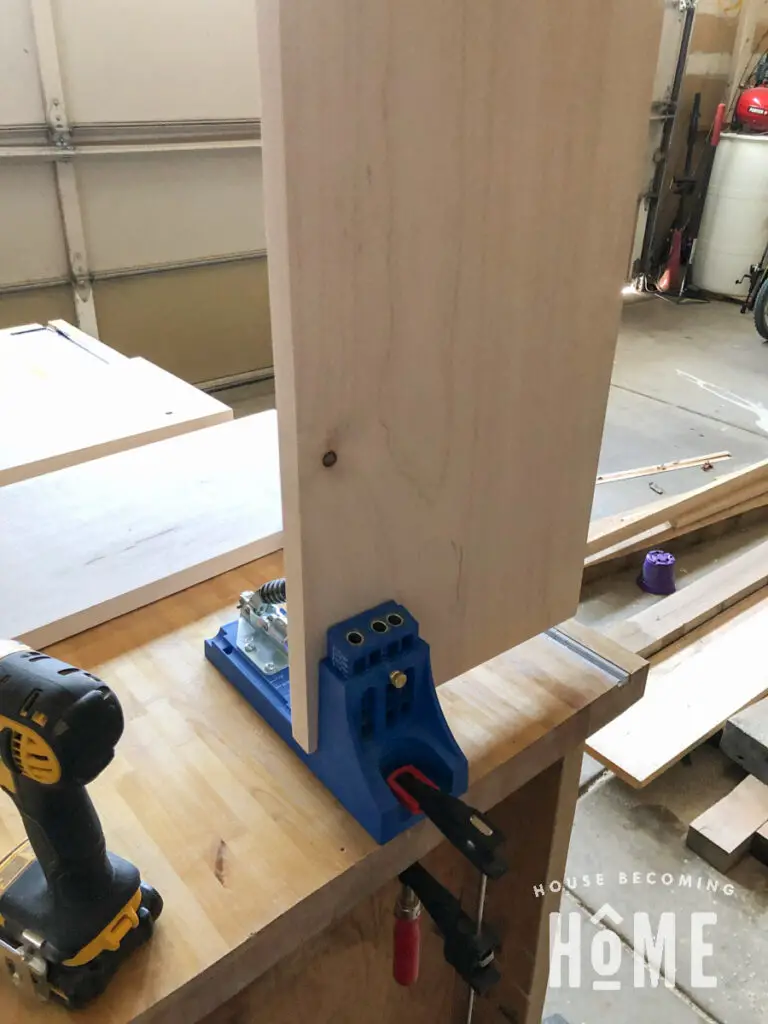
Use a carpenter’s square to ensure the bookcase pieces meet at 90 degree angles.

BRASS DRAWER PULL LEGS
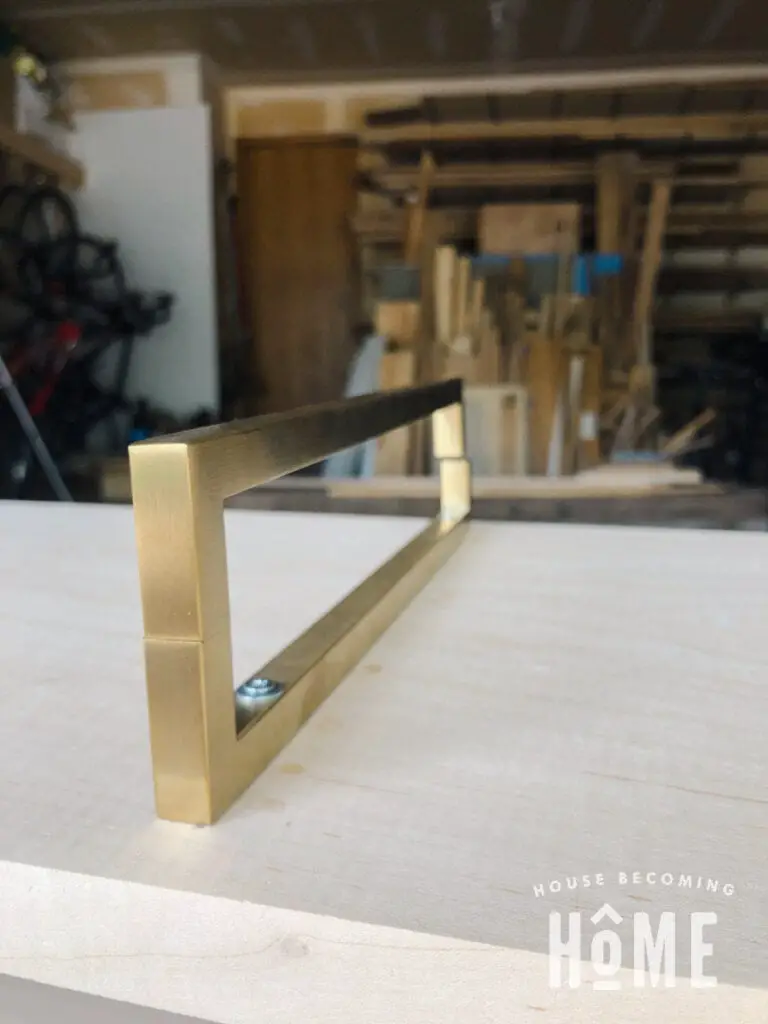
I love the look of brass legs on furniture, but without welding skills, I haven’t been able to incorporate them into any of my builds. Until now. Sarah came up with a no-weld method that utilizes brass drawer pulls. If you have a drill or drill press, clamps, a sander and some super glue, you can make these no-weld metal furniture legs. I still want to learn how to weld, but until then, I’ll be doing it this way!
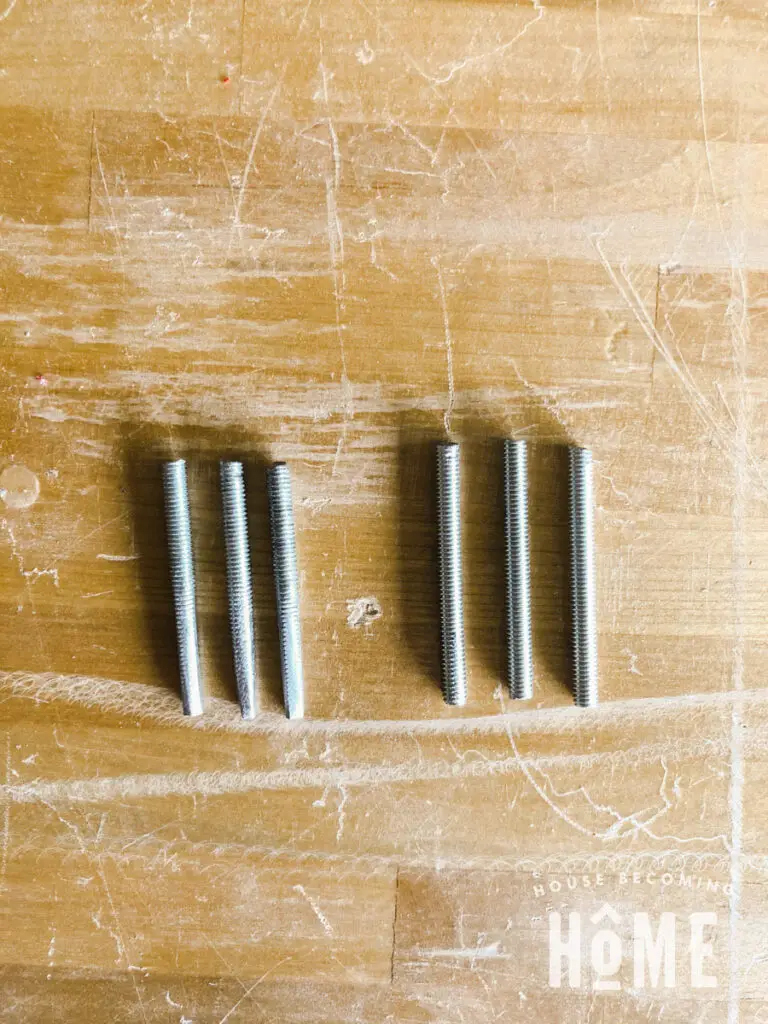
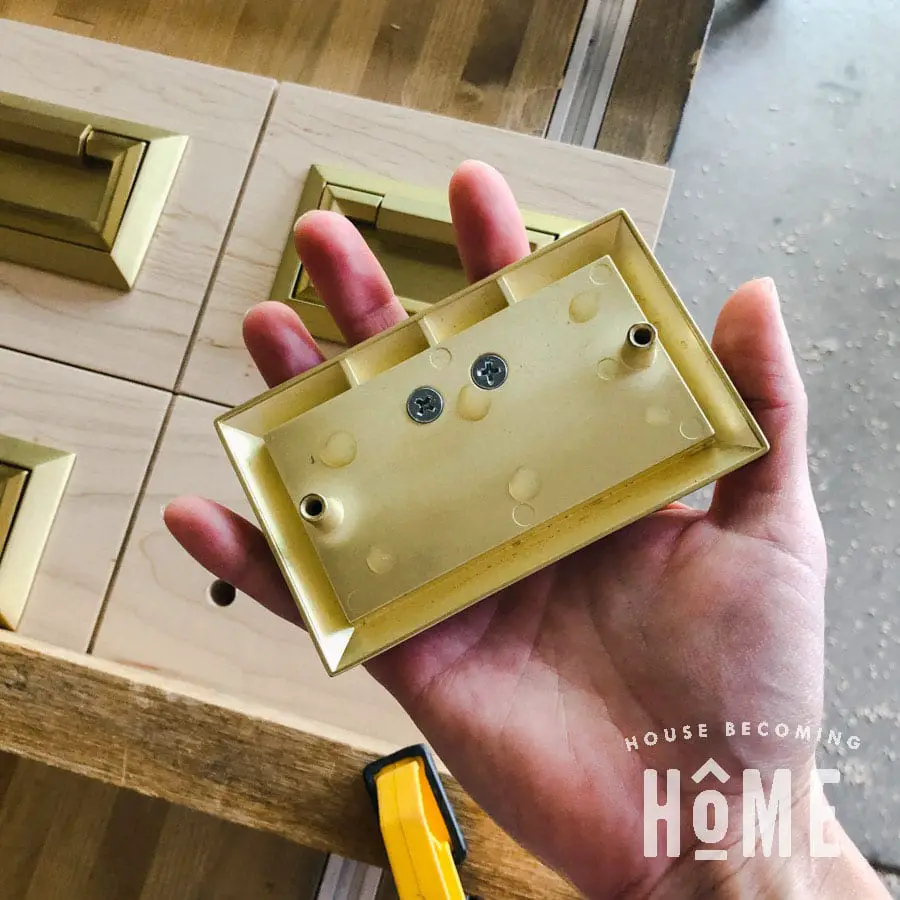
To begin, drill two 5/32″ holes into three 10″ square brass pulls. The placement of the holes doesn’t really matter.
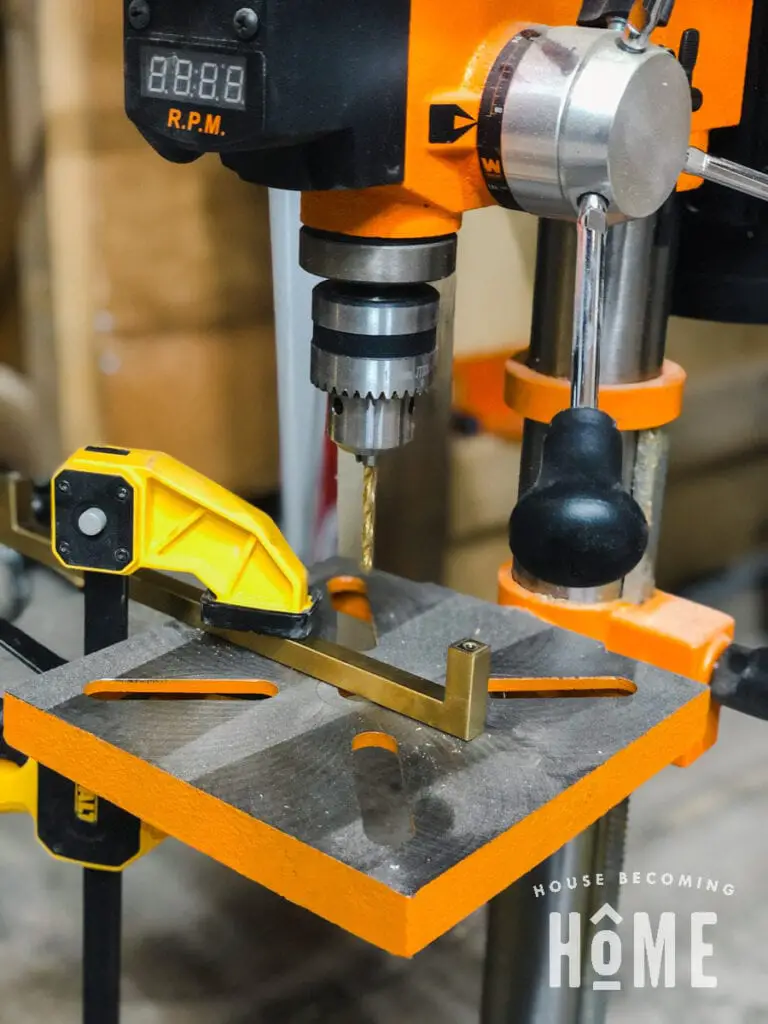

I clamped each brass pull in place and set my drill press to the slowest speed possible. Don’t forget your safety gear here, as drilling into metal produces tiny metal shavings.
After each brass pull had two 5/32″ holes, I changed to a 5/16″ bit to create a countersink hole. Watch out here not to drill to far, or you’ll just create a 5/16″ hole (a mistake I made at one point).
Attach Brass Pull “Leg” to Bookcase
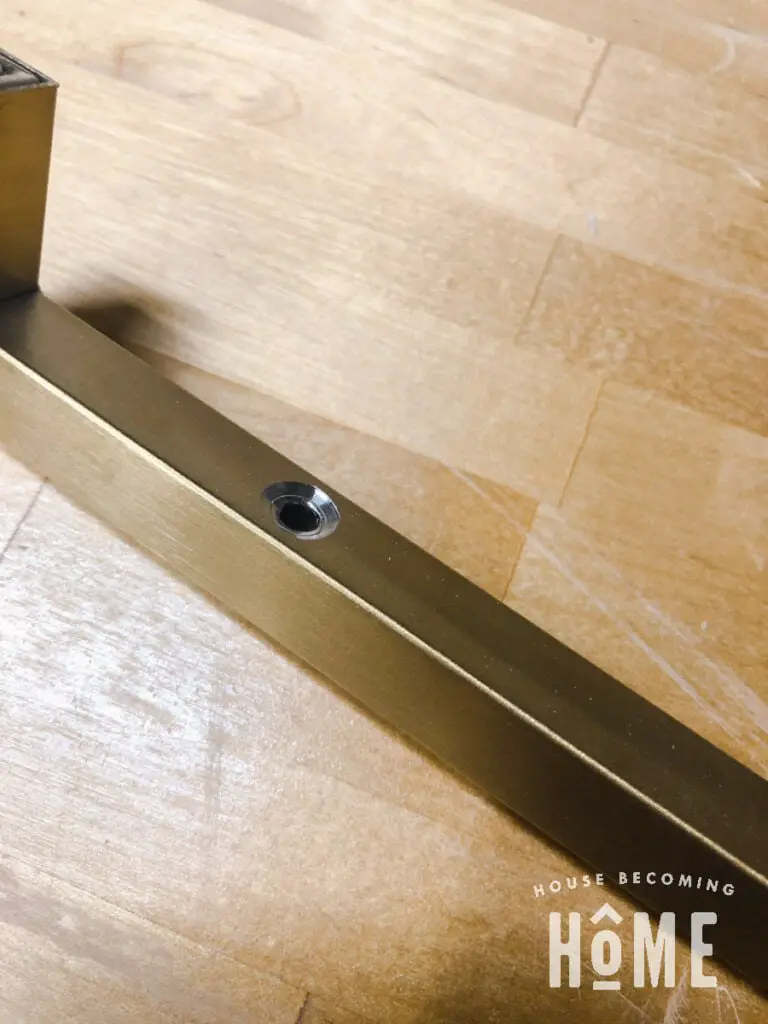
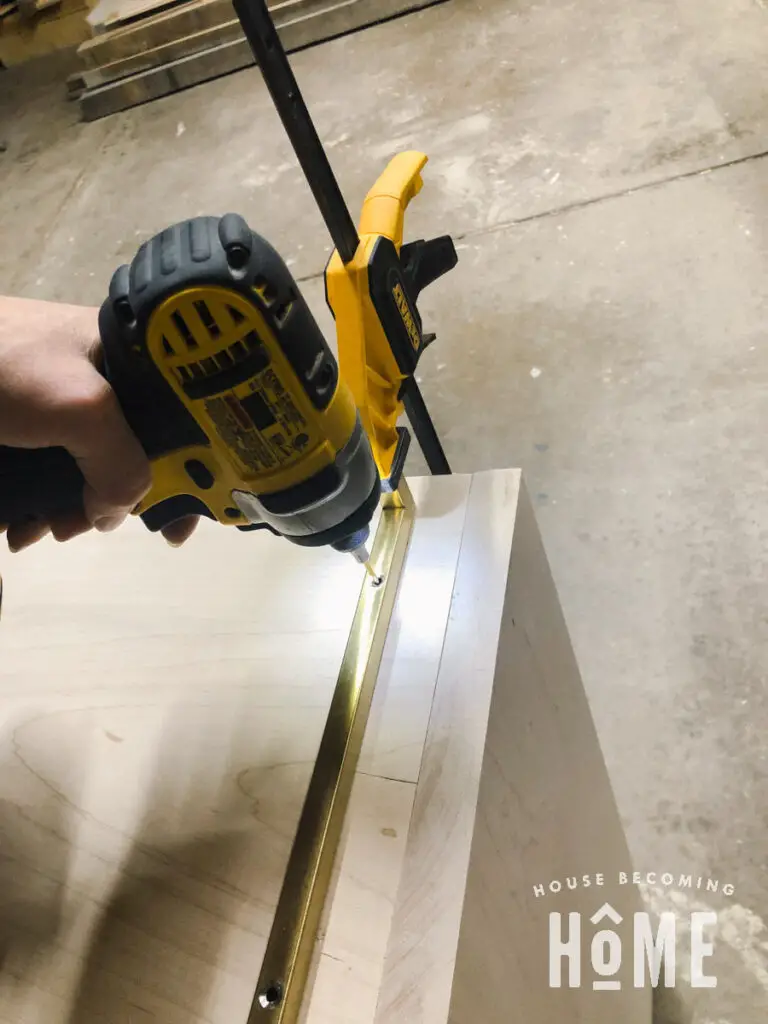
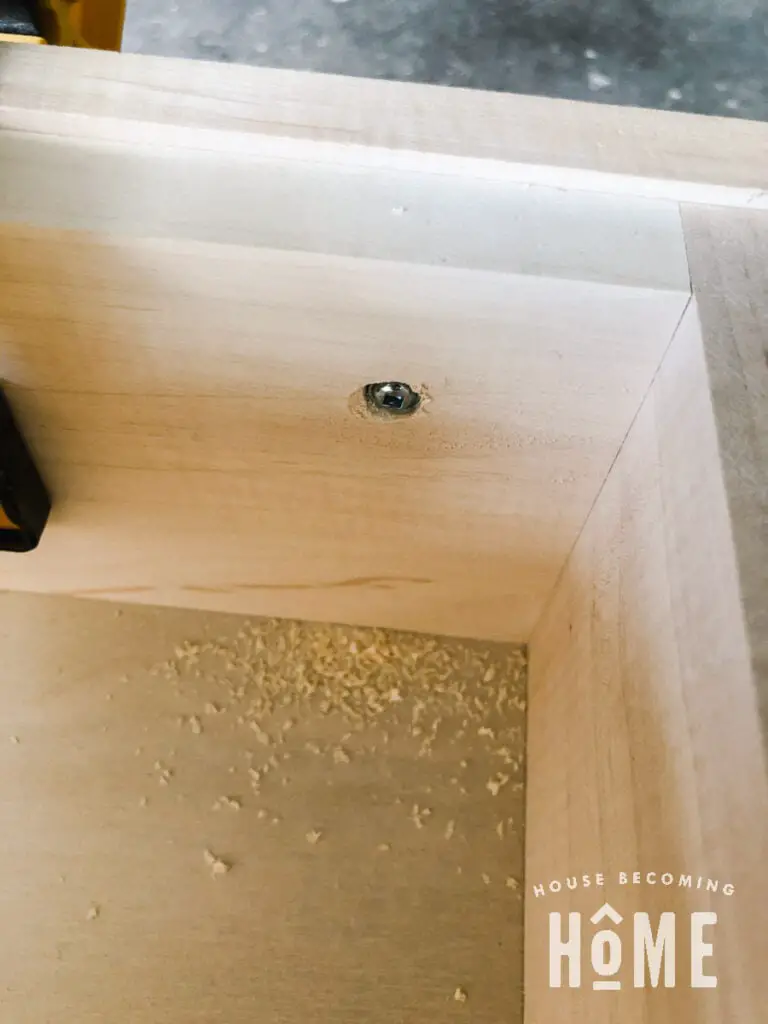
On the bottom of the bookcase mark the placement of the three legs. Add drops of CA glue to each pull then set in place and apply pressure. Next, I pre-drilled a 3/32″ hole into the bookcase, through the holes in the brass pulls made in the previous step. Attach pulls to the bookcase with #6, 1-1/4″ wood screws.
ATTACH ADDITIONAL PULLS TO COMPLETE BRASS LEGS
To complete the legs we’ll attach brass pulls to the ones fixed to the bookcase.
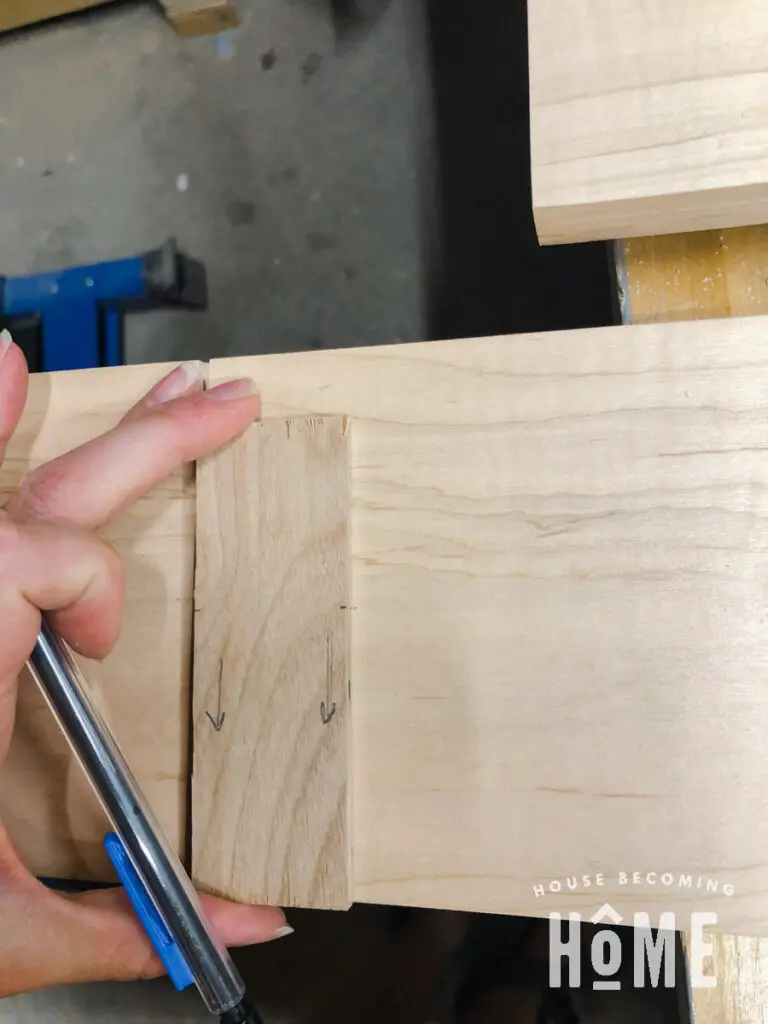
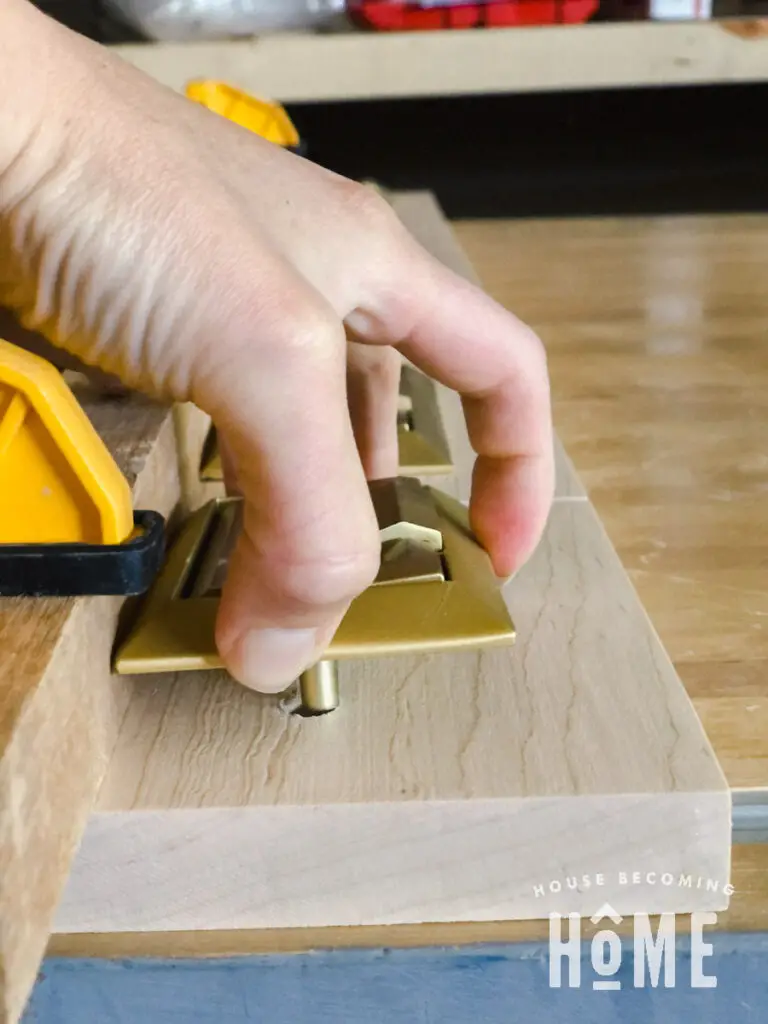
The brass pulls come with machine screws, but before we can use them, we need to remove the heads (you can also purchase threaded rods at your local hardware store if you’d prefer to skip this step). I held the screw in place using the vice on my DIY portable assembly table, and removed the screw’s head with my terrible coping saw. I wasn’t sure if I would have any luck, but in a matter of seconds I had the head more than halfway off, as you can see in the photo on the right.
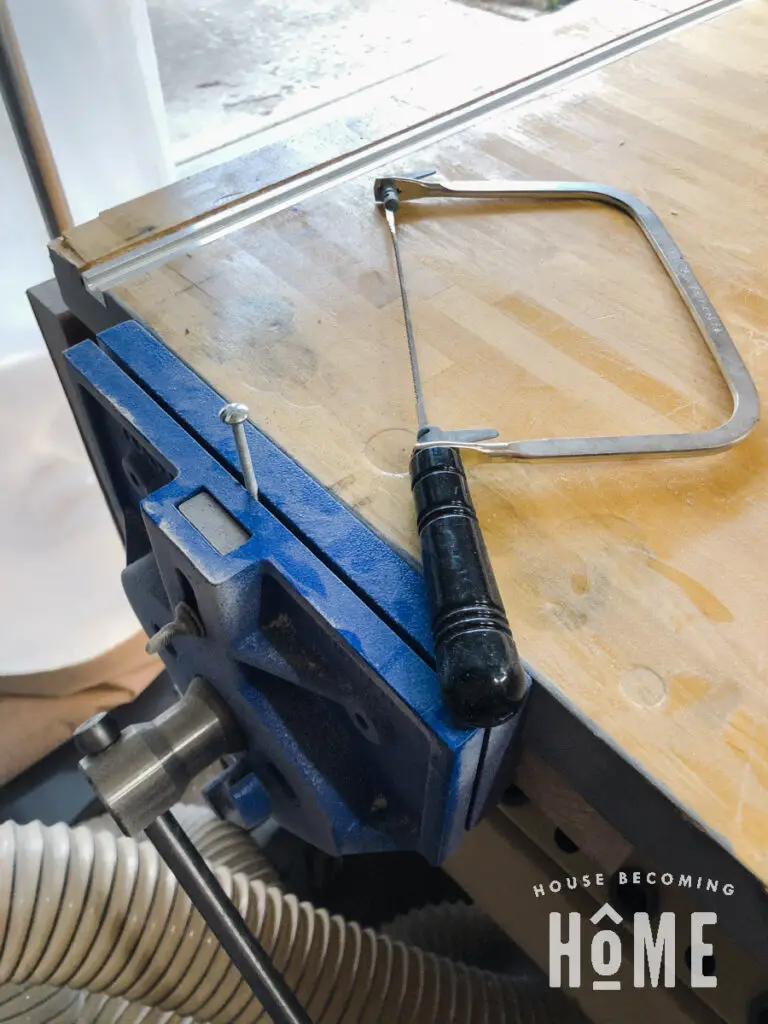
After a few more seconds the head was off. Repeat for all six screws.

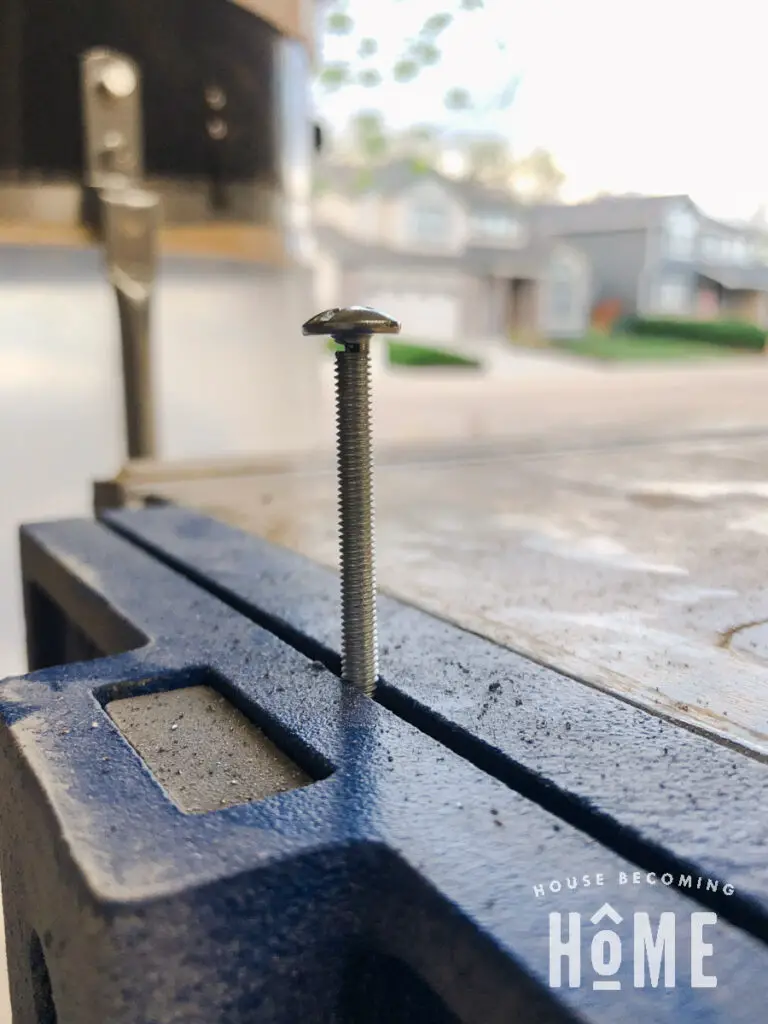
Sand Threads off Three Screws
Now, sand off the threads from three of the “screws.” Only sand the threads off of half of the screw. You’ll use these in the final brass-leg-making step.
I clamped the screw to my workbench, then sanded the exposed half for a few seconds with 80 grit sandpaper. Unclamp, rotate the screw, and continue sanding. Wear gloves, because the screw is hot. Continue until the threads are gone from all sides of half of the screw.
You should now have six headless screws; three with the threads sanded off from half, and three with the threads intact.
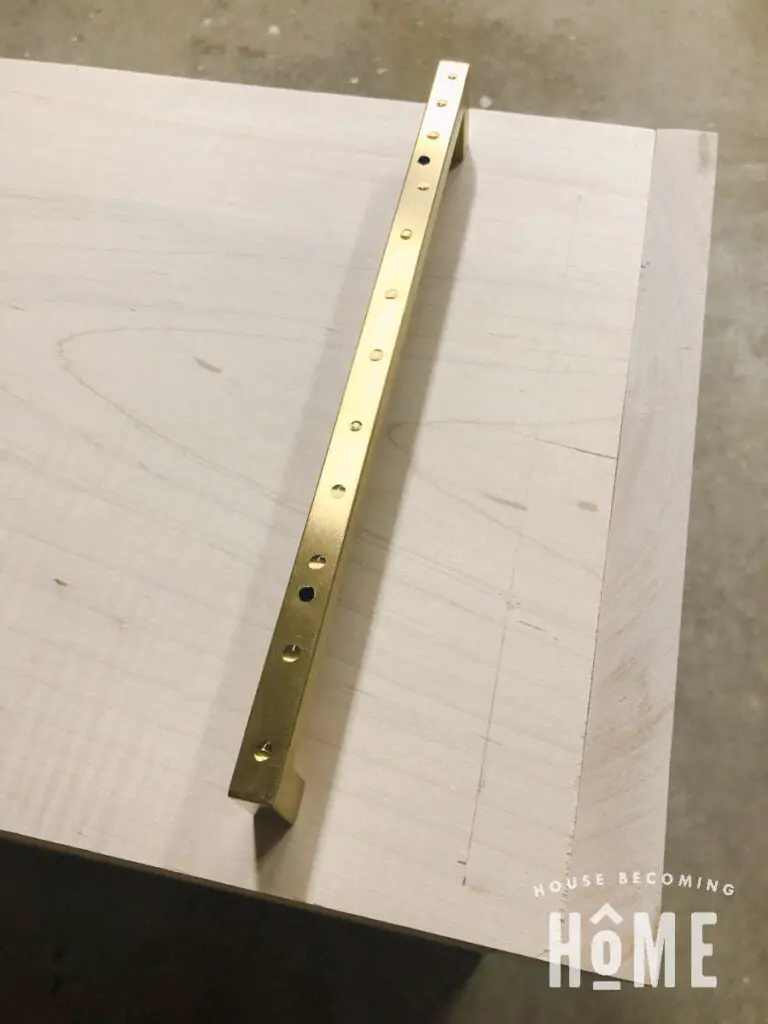
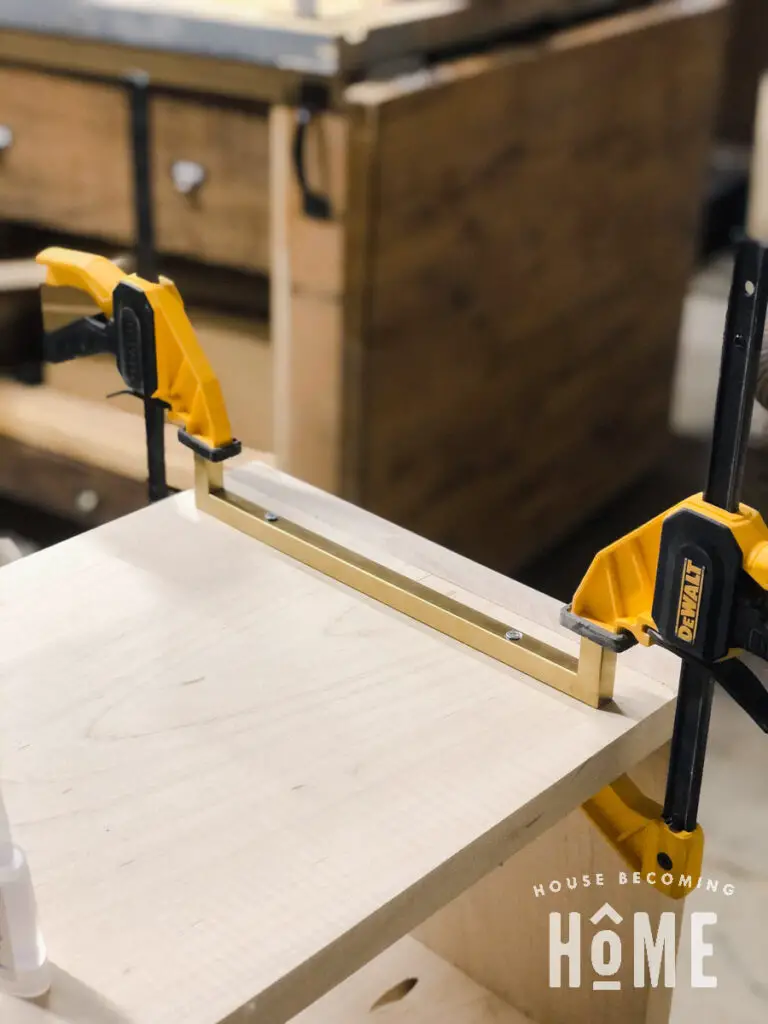
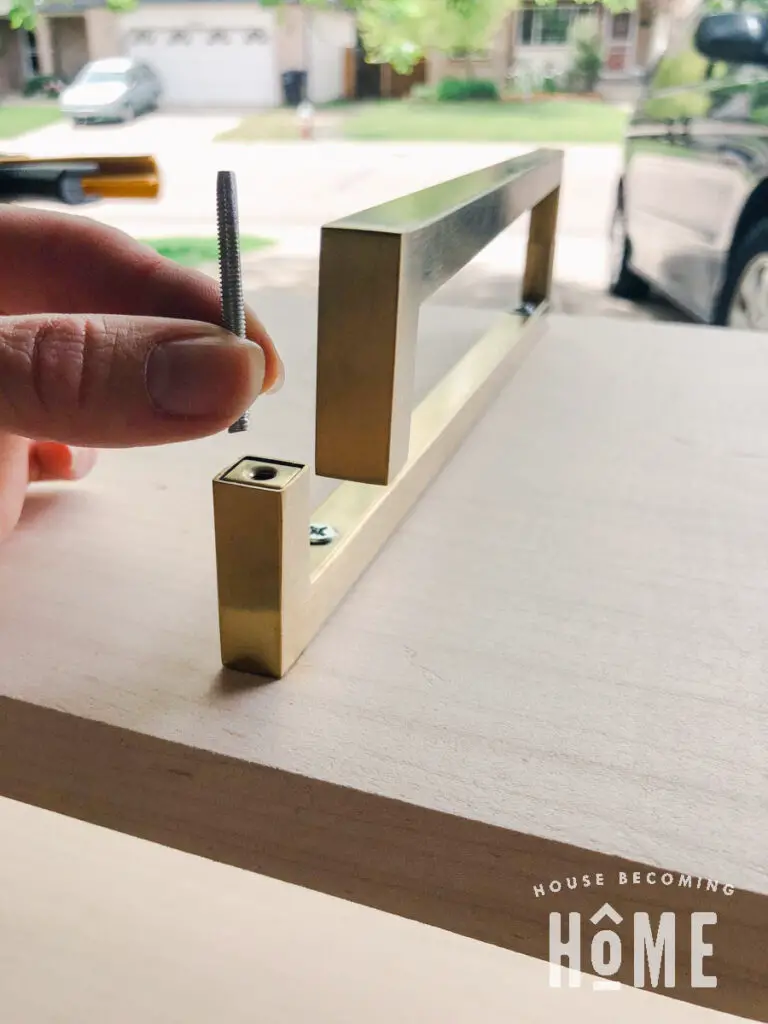
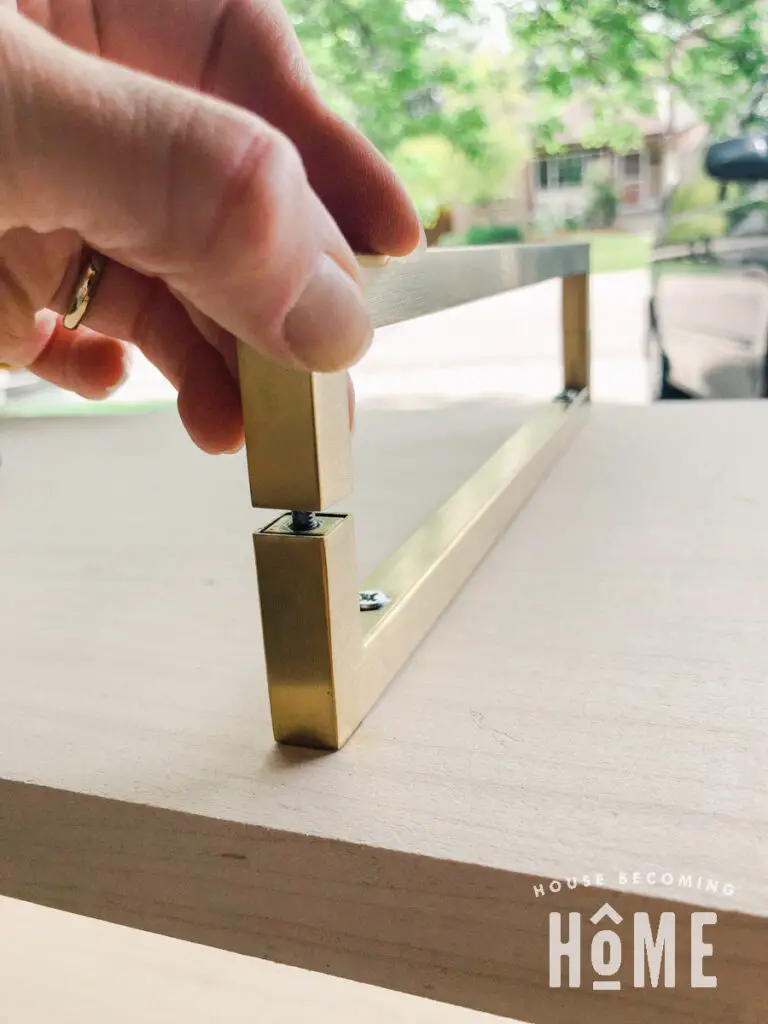
Take the three headless, threads-intact screws, and add one to each leg. Put a bit of CA glue onto the threads of each and twist them into the threads of the drawer pulls already fastened to the bookcase.

Now, add some CA glue to the remainder of the screw, and twist a drawer pull onto it.
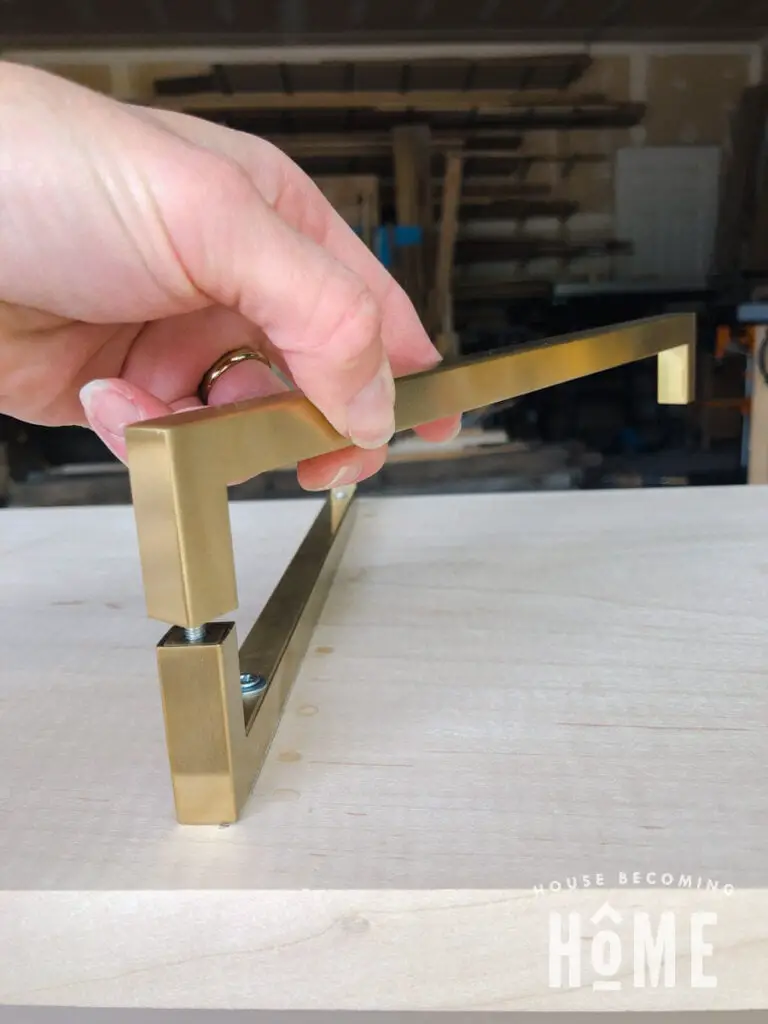
Keep rotating until the drawer pull is fastened tightly against the other.
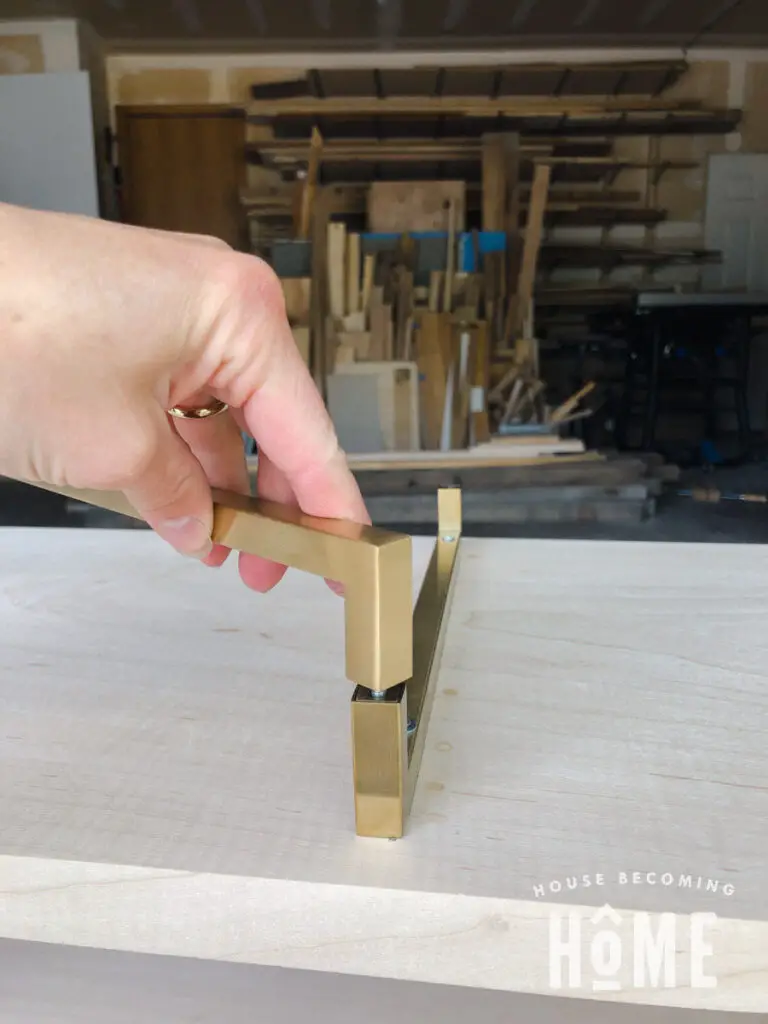
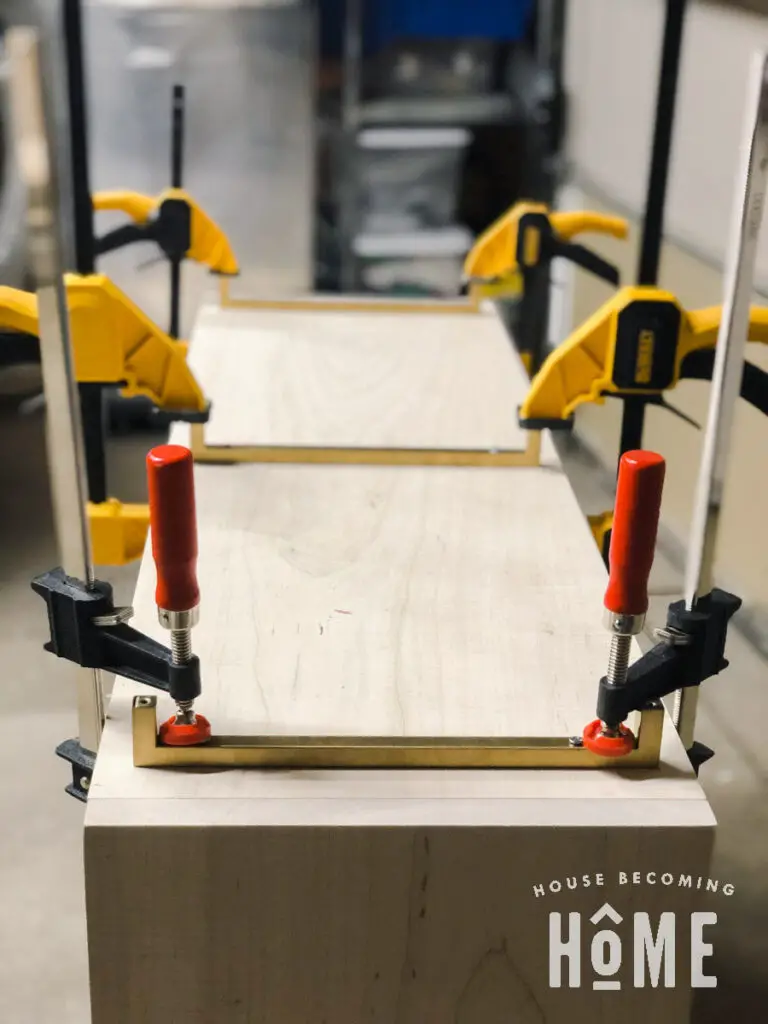
Finally, to complete the drawer pull brass legs, we need to attach the other side. This is where you’ll need the half-threads-sanded-off-headless screws.
After twisting the threaded side into the drawer pull, add some CA glue to the remainder of the screw.
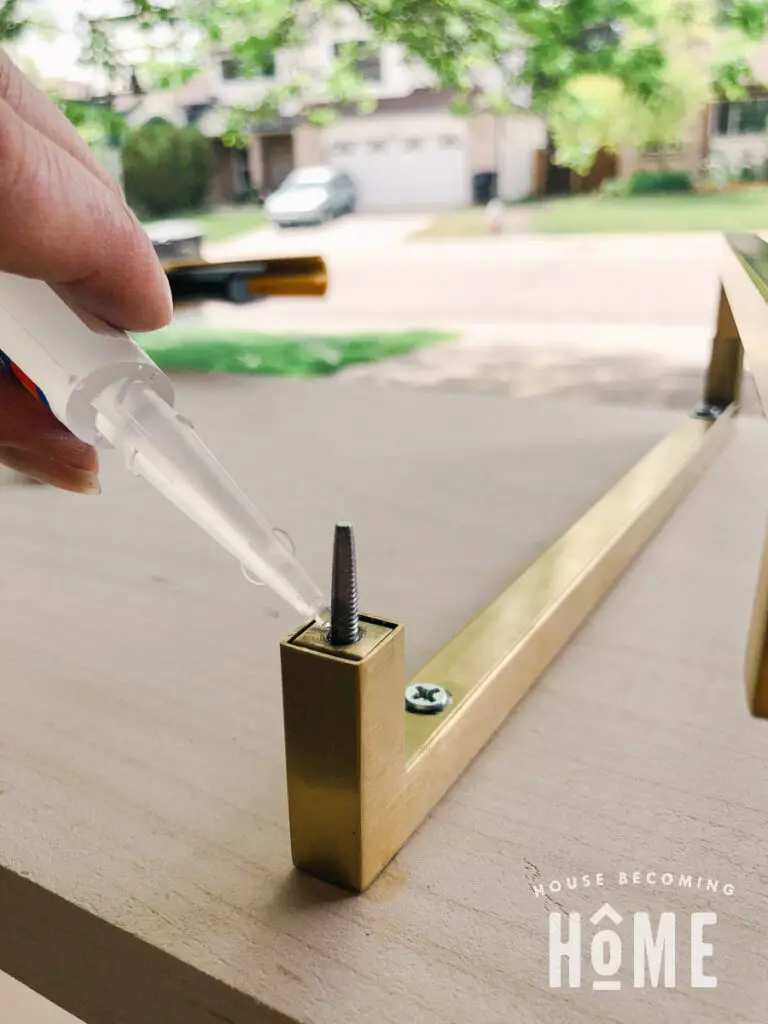
Because the threads are gone, you can push the drawer pull into place:
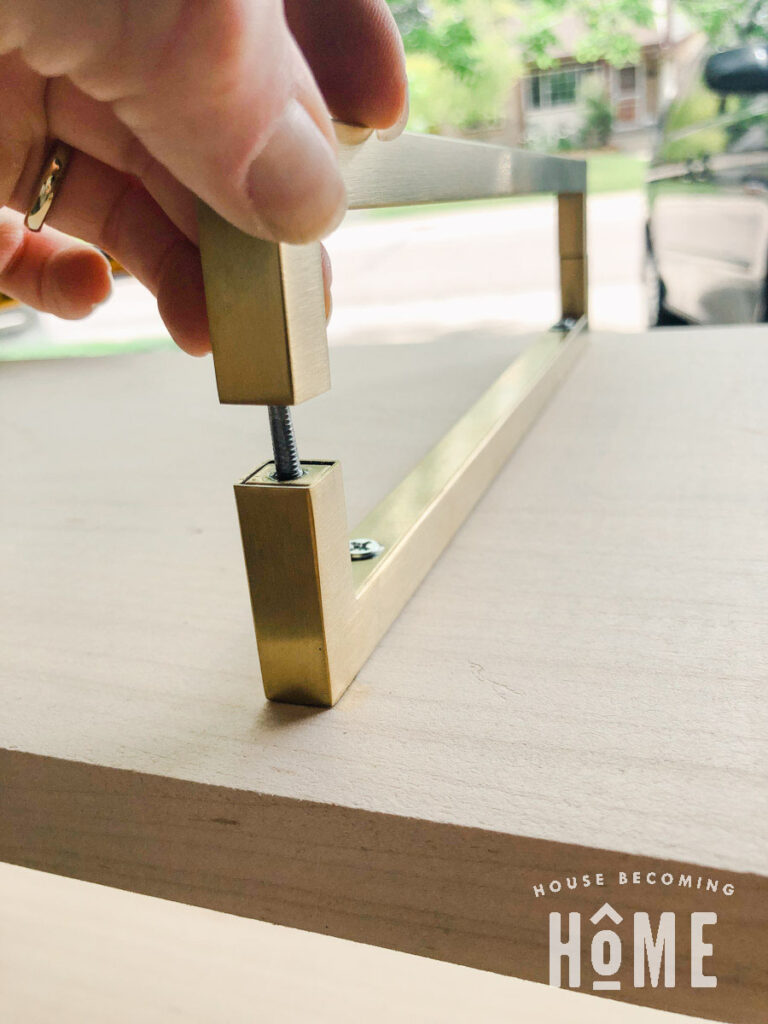
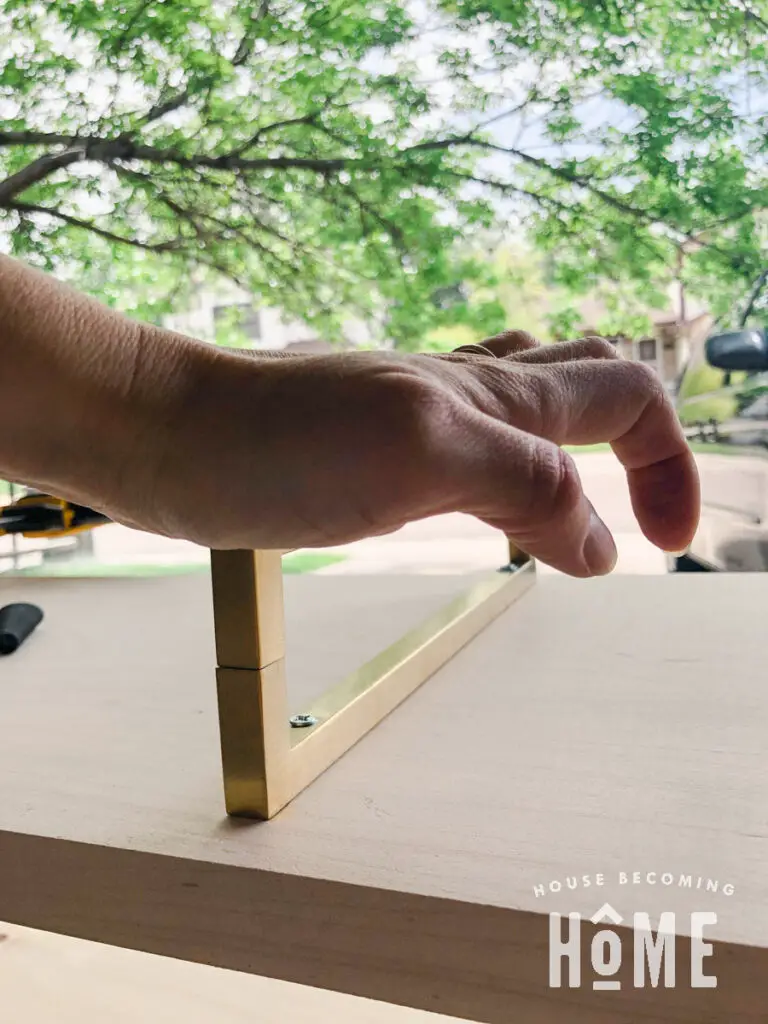
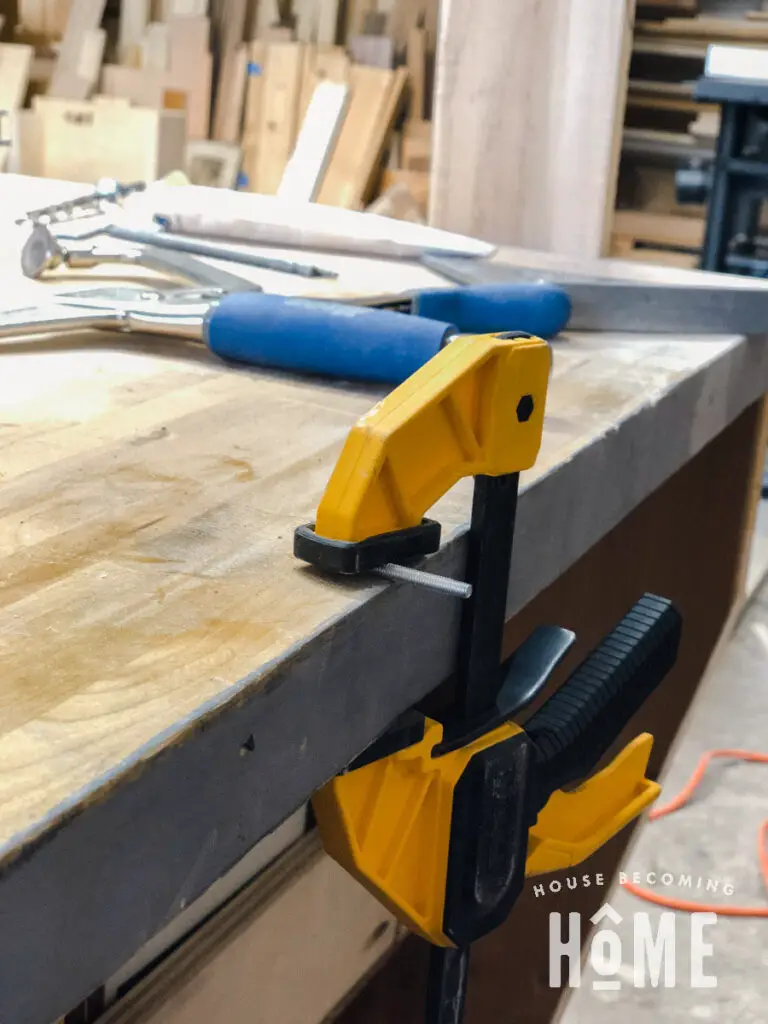
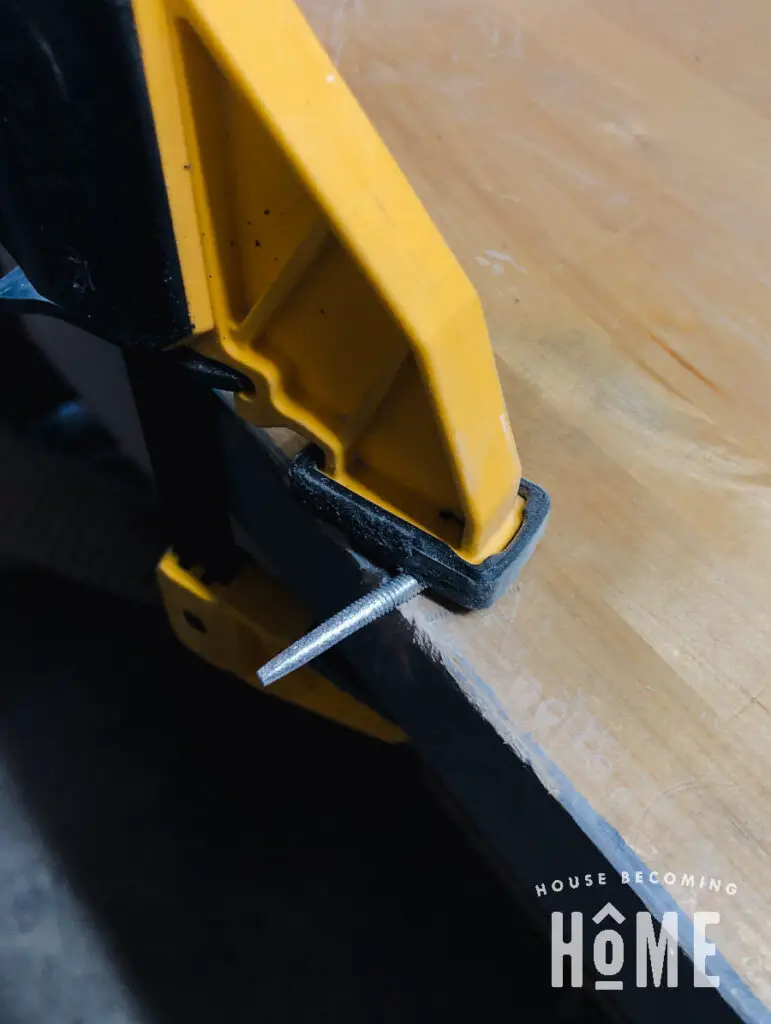
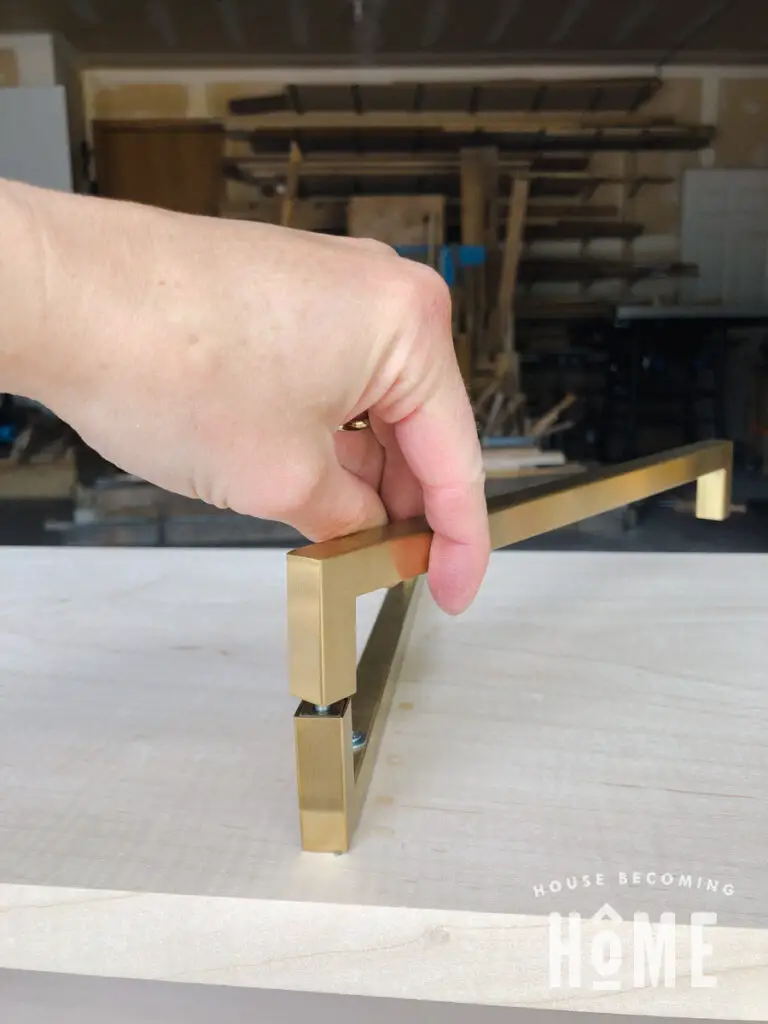
I clamped the drawer pull in place while the glue dried to ensure it stayed properly aligned.
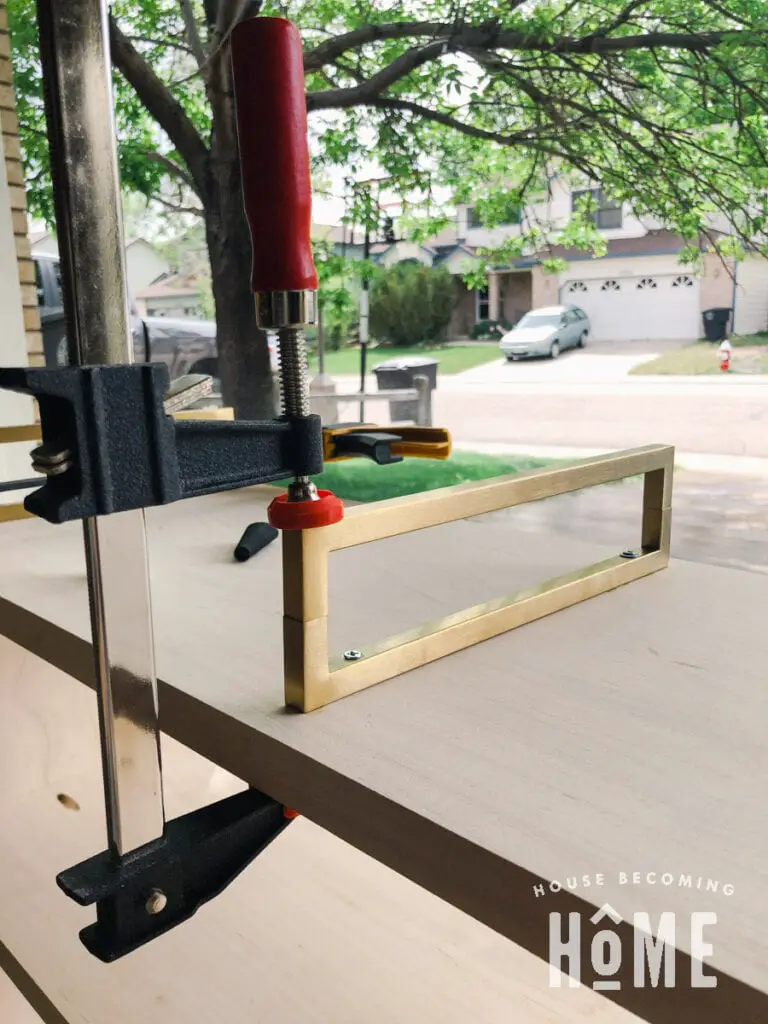
Repeat until all three legs are completed.
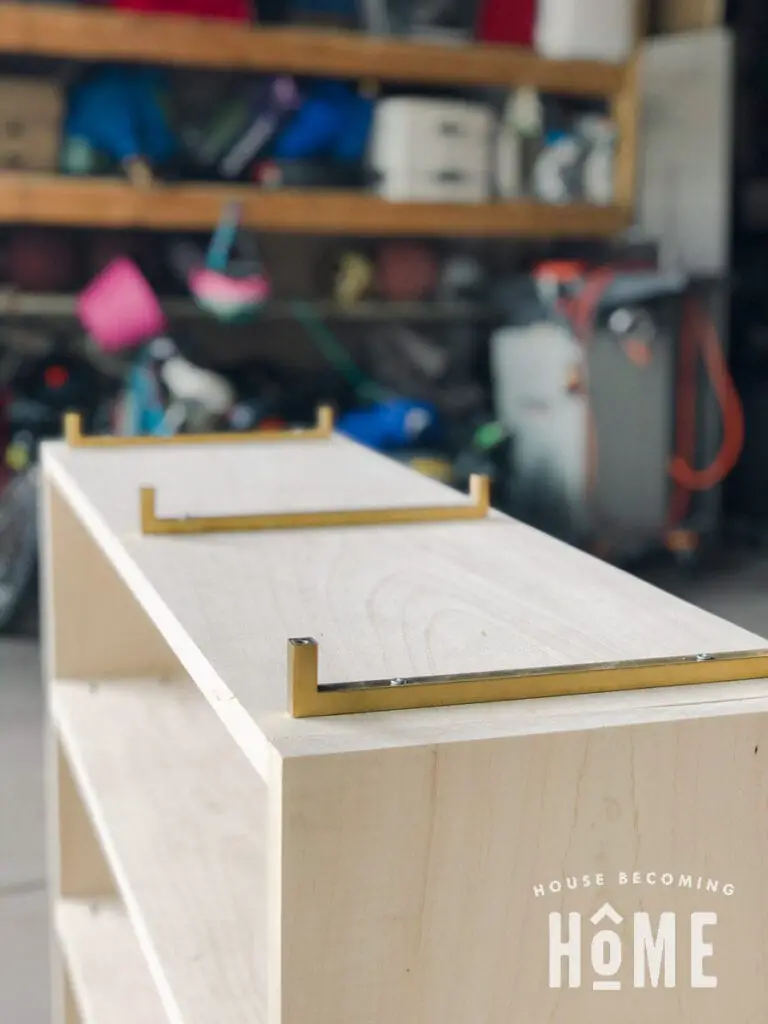
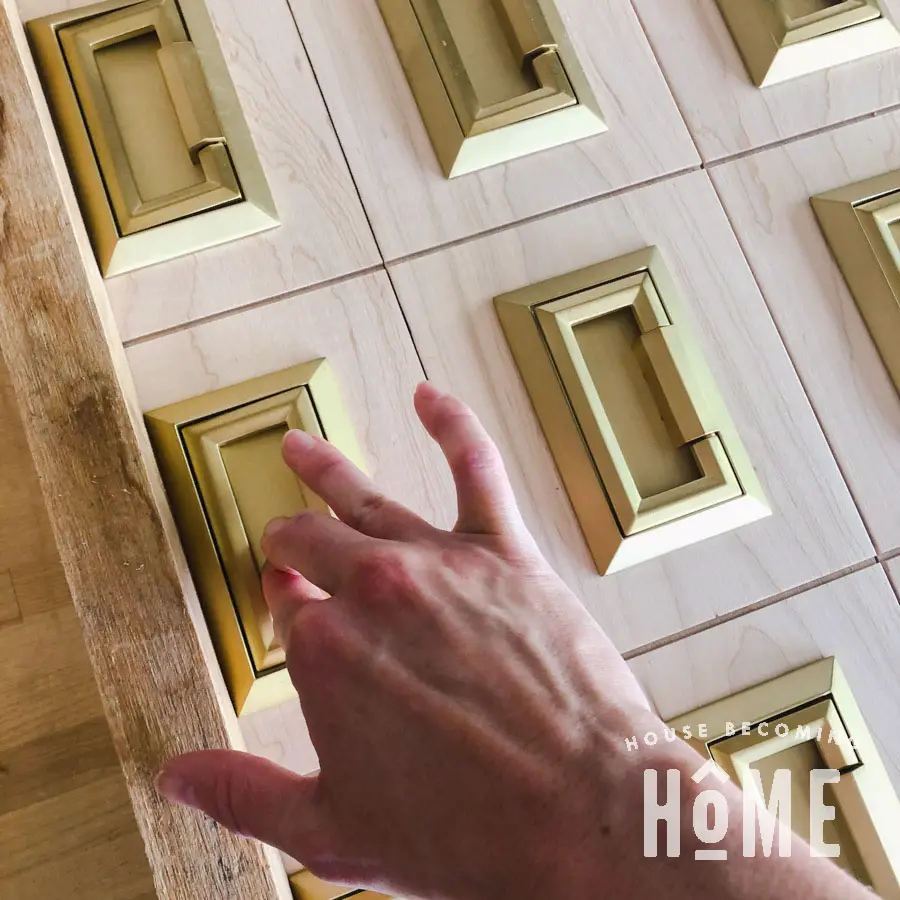
I’m jumping ahead here, but I have to show you the final product, so that you can be sure all that work was worth it (truth is, it’s really not that much work, it just takes a lot of photos to explain the process!). Don’t these brass drawer pull legs look awesome?
![]()
Fasten Nailers to Back
Something to know about the catalog bookcase is, IT’S HEAVY! You’ll want this to be securely fastened to the studs in the wall behind it, which is why you need to attach nailers to the back of the bookcase. I attached one directly underneath the top (pictured below), as well as another underneath the bottom shelf (not pictured). I attached it with pocket holes and screws, but you could also use wood glue, or both!
Once you’r’e finished building the bookcase you’ll securely fasten it to the wall with screws through these nailers.
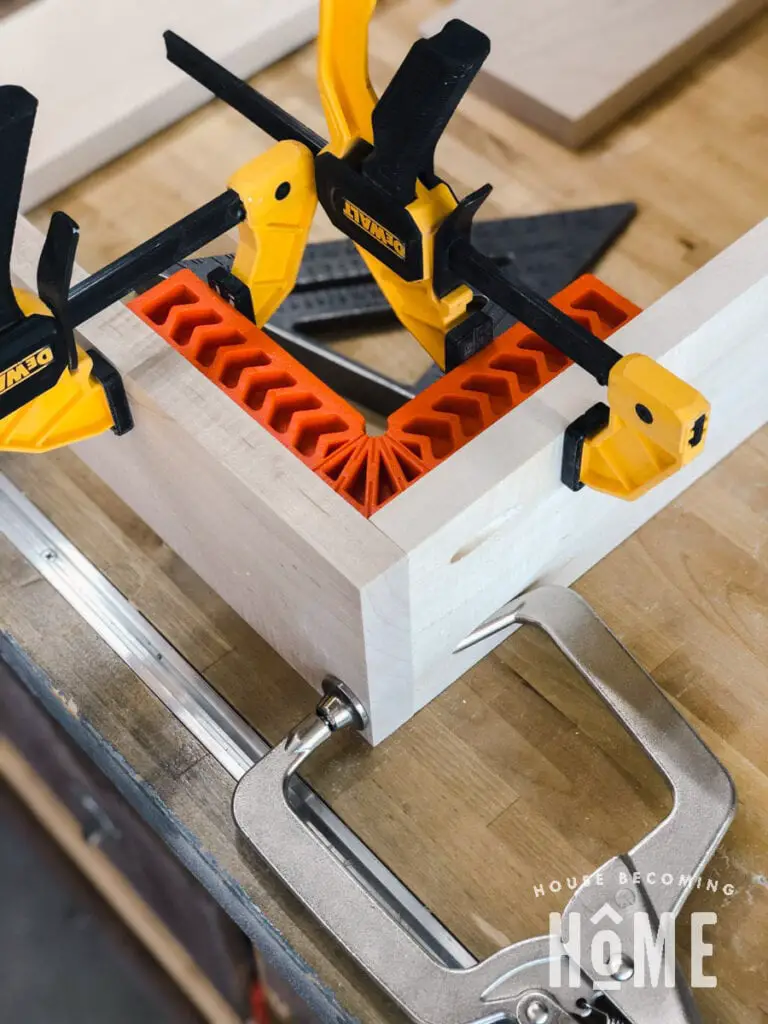
Build Drawers
Cut lumber for drawers, then make pocket holes on the front and back pieces.
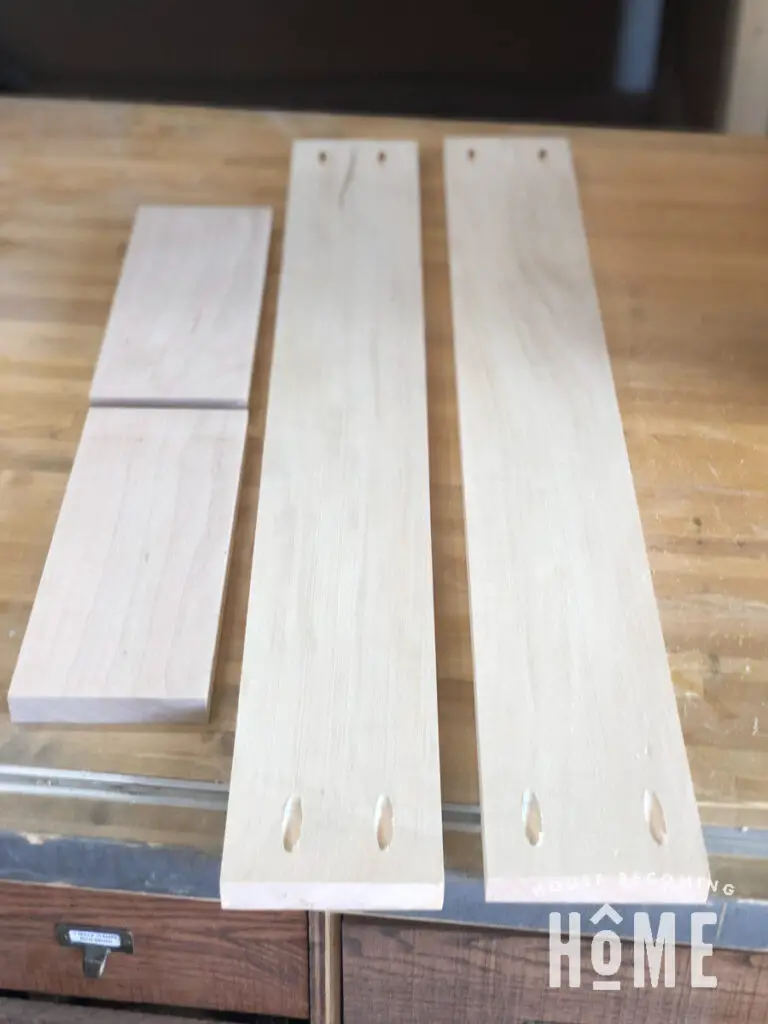
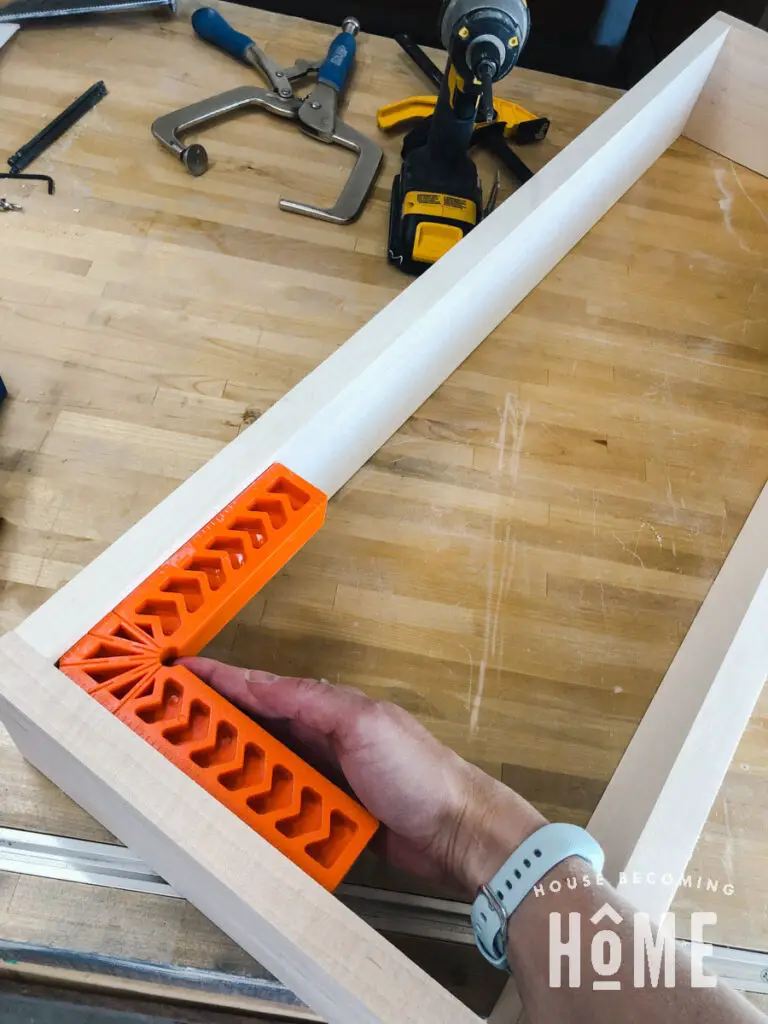
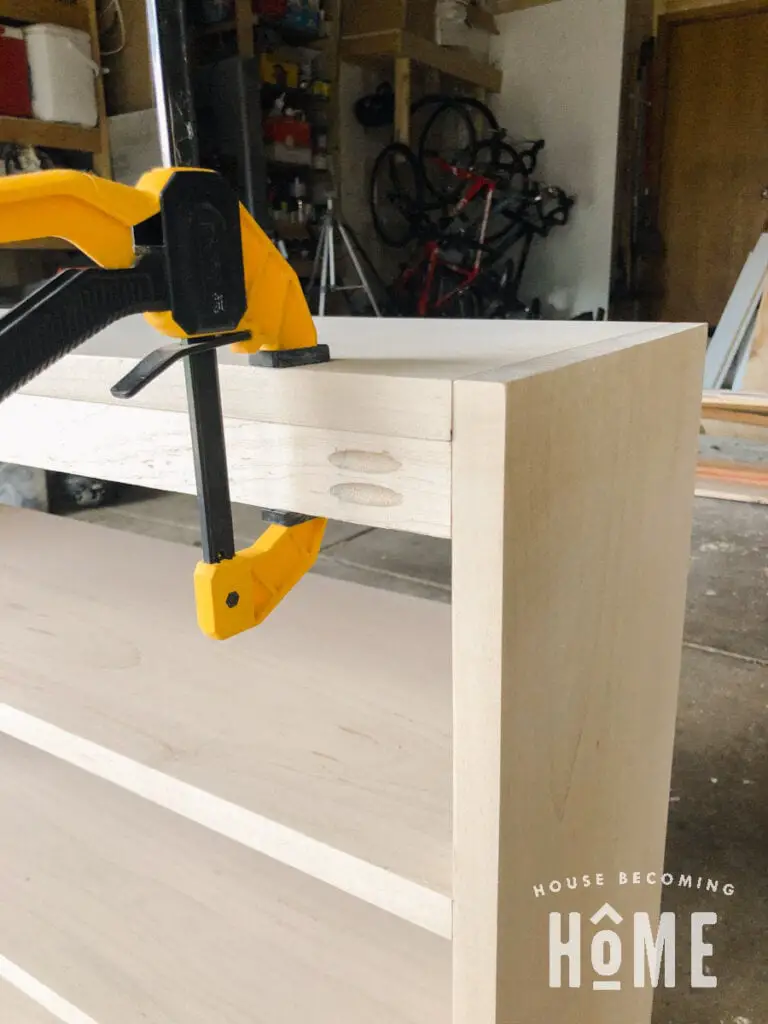
Join drawer pieces together with 1-1/4″ pocket hole screws. Use clamps and squares to ensure all angles are 90 degrees.
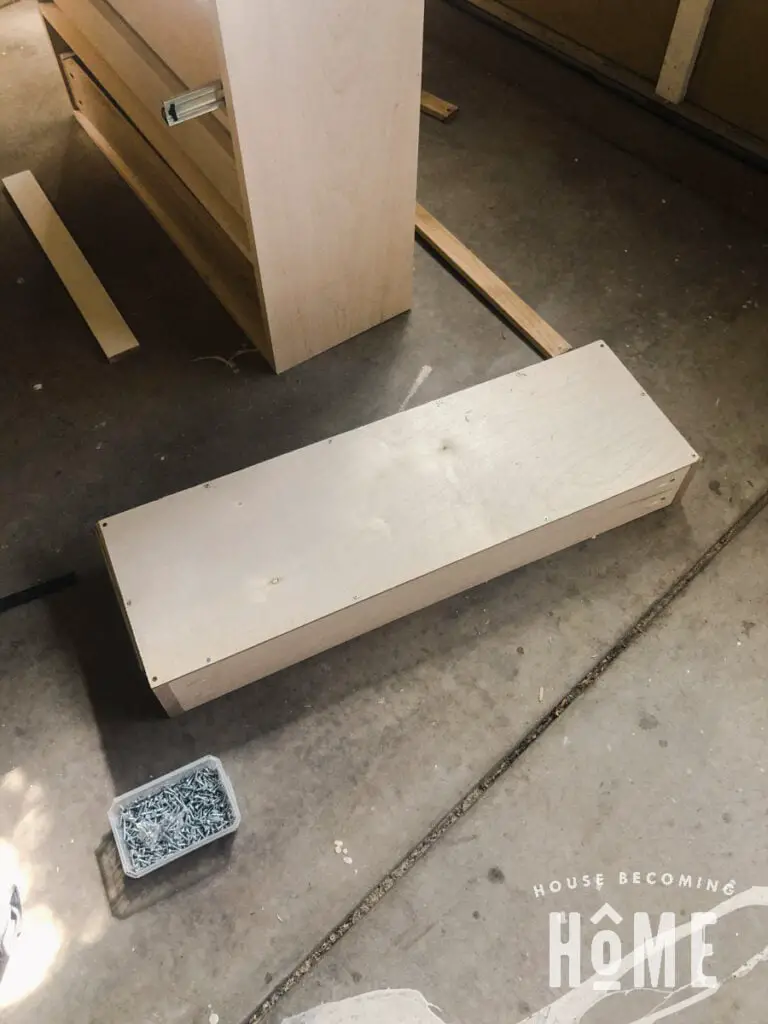
Cut 1/4″ plywood and attach to bottom of drawer with nails or screws:
Add Drawers to Bookshelf
*FYI : I completed this step before attaching the drawer bottoms.*
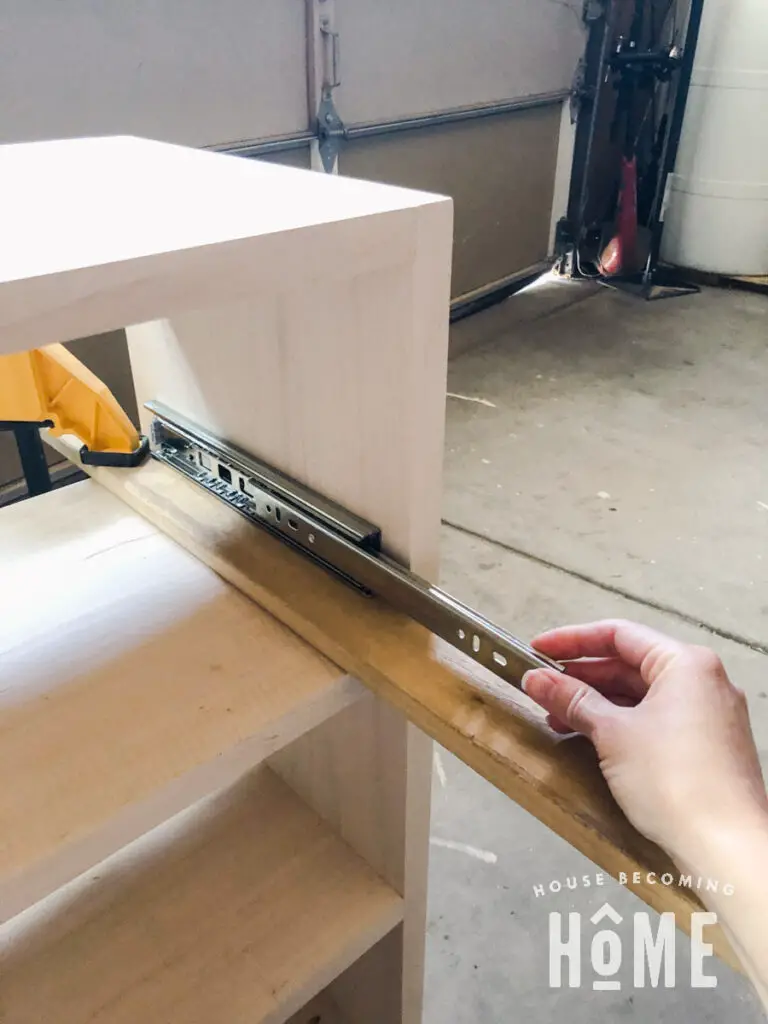
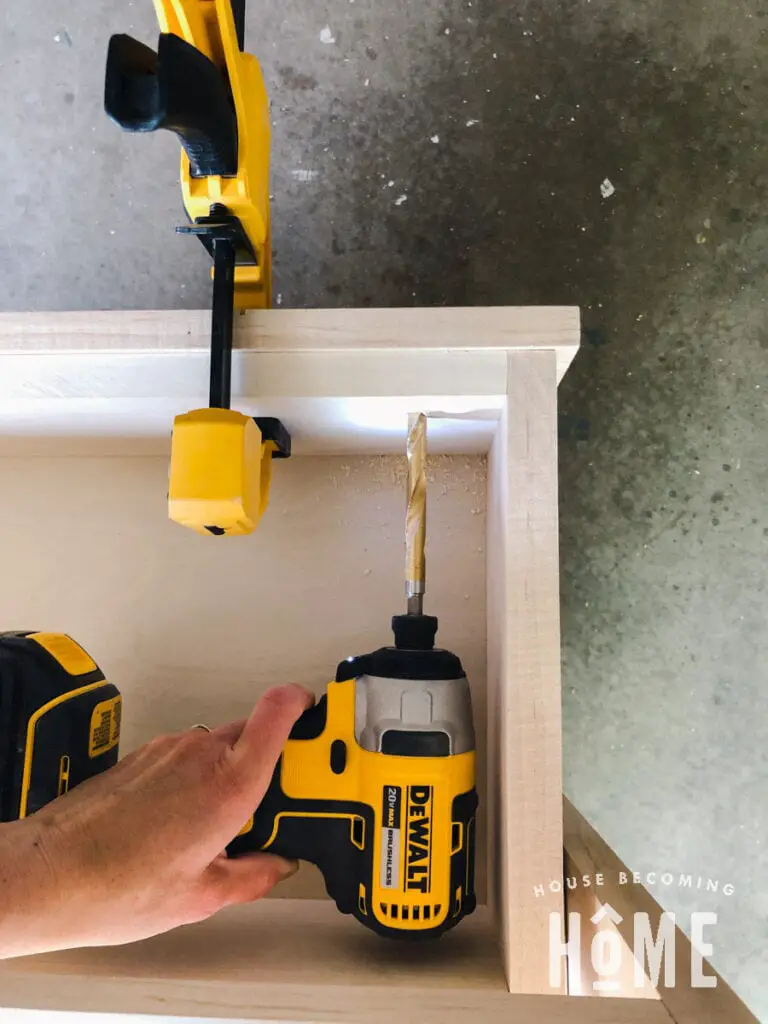
To attach the drawer slides, I first clamped two long pieces of 1×3 lumber to the bookcase. These 1×3’s will be used to help properly place the drawer slides.
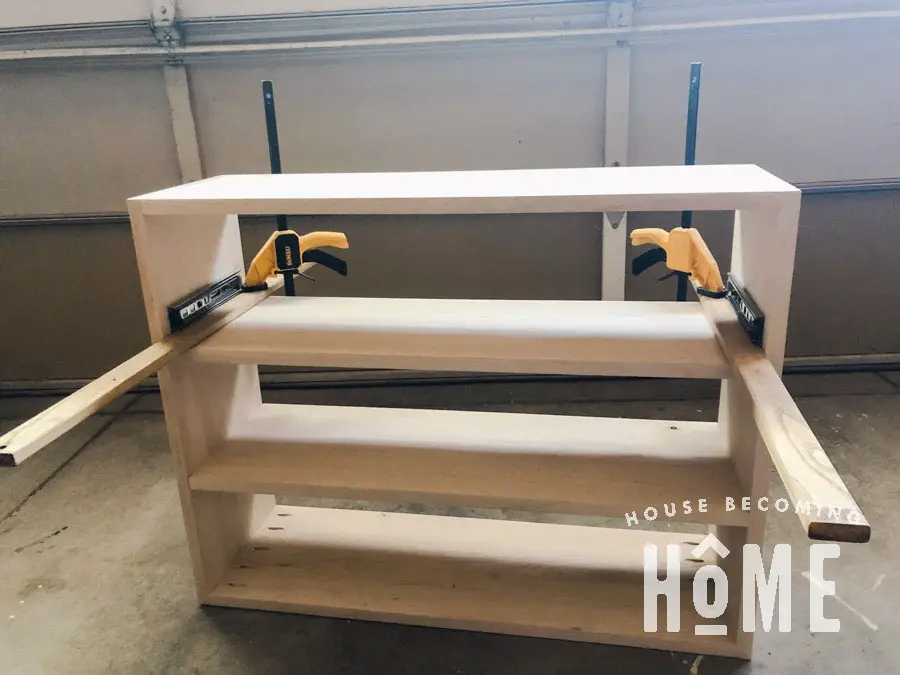
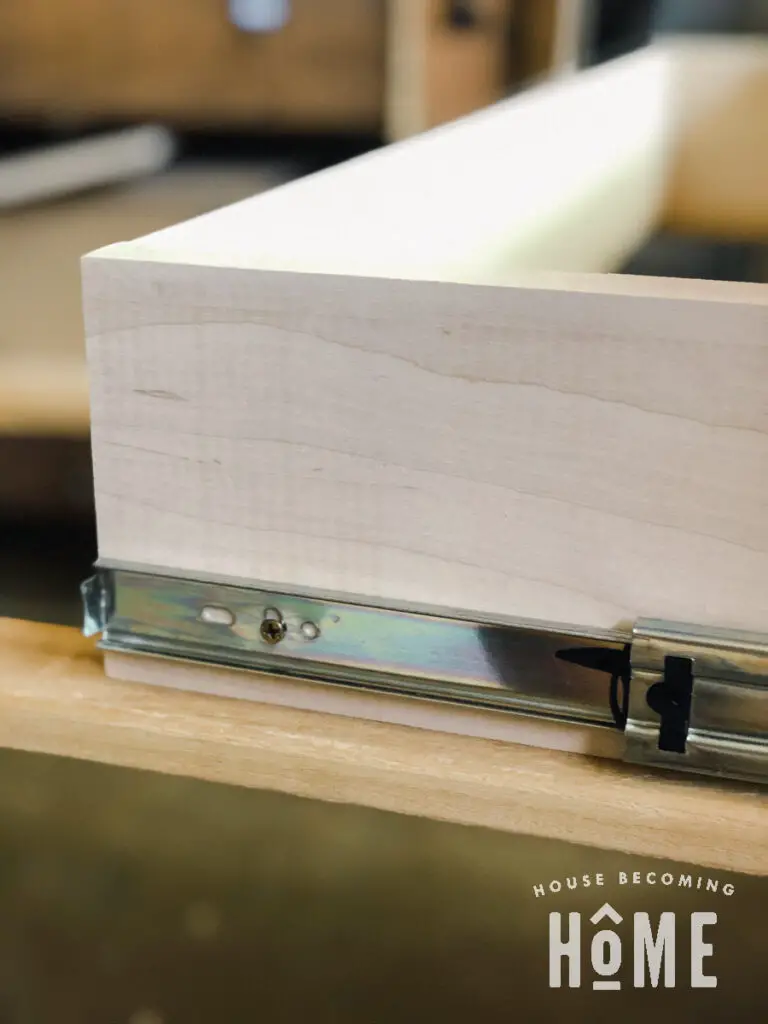
Set the drawer slide back 3/4″ from the front of the bookcase (or however thick your drawer face is). Predrill holes then attach the drawer slide to the bookcase with screws. Repeat for the drawer slide on the other side of the bookcase.
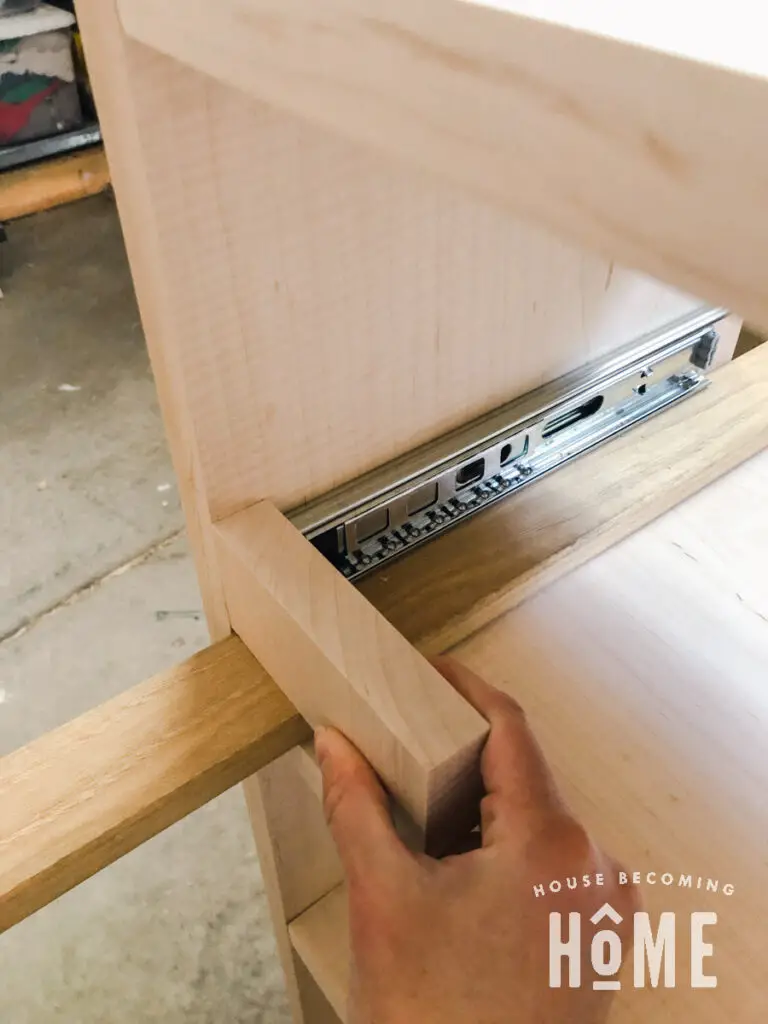
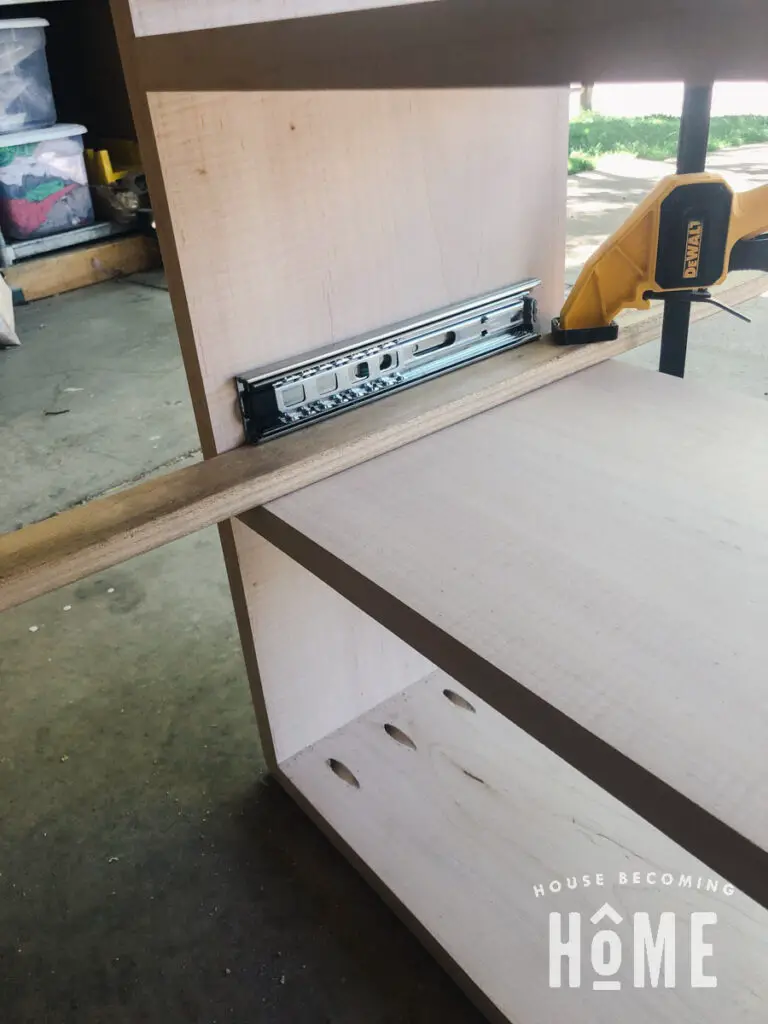
Pull out the drawer slides so that they are fully extended on both sides. Set the drawer box in place on the 1x3s (the front of the drawer should be flush with the front of the fully-extended drawer slides).
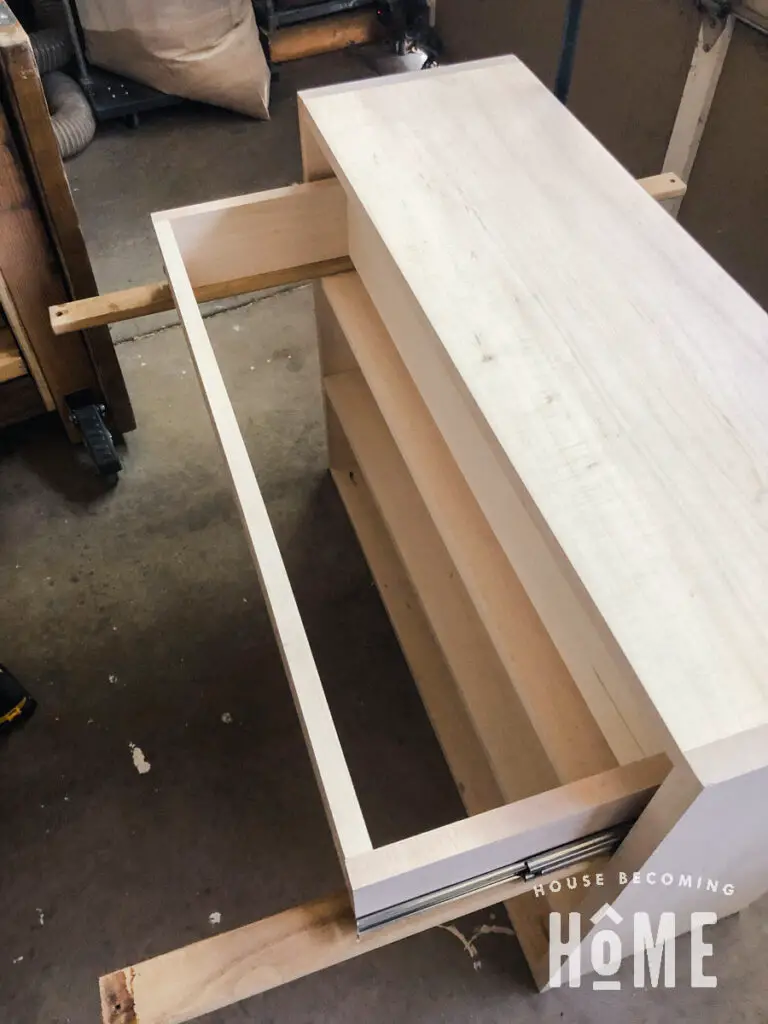
Attach the drawer slides to the drawer with screws:

Prepare Drawer Faces
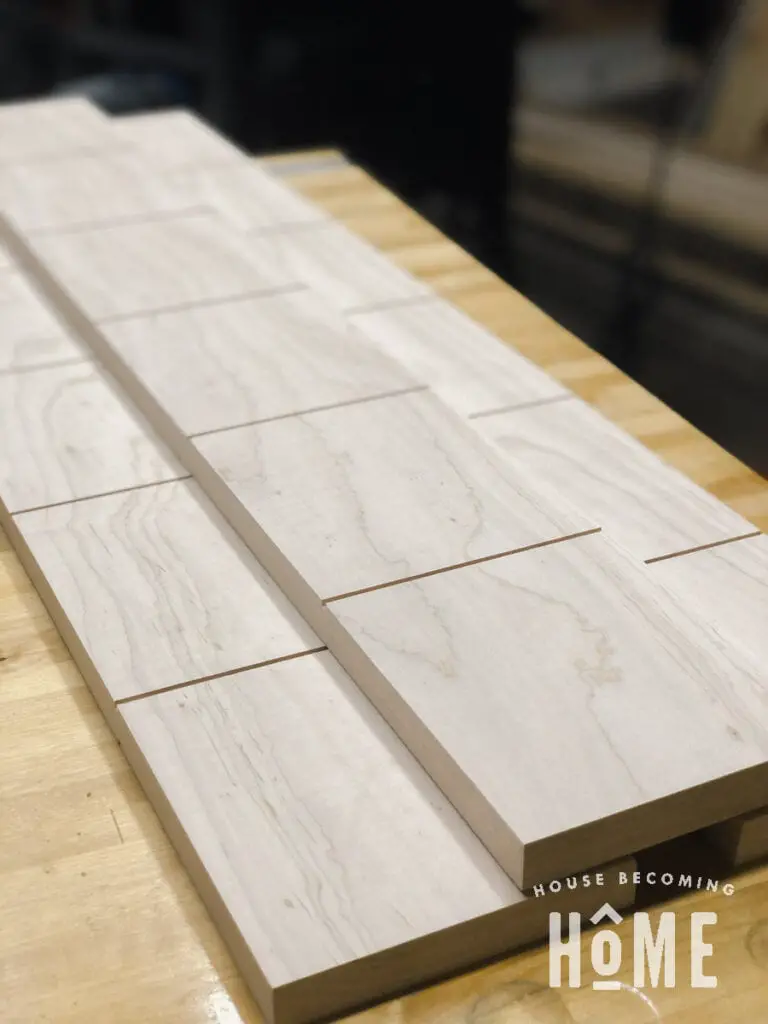
After drawer faces are cut to size, create a faux panel look by cutting five shallow grooves into each drawer face.

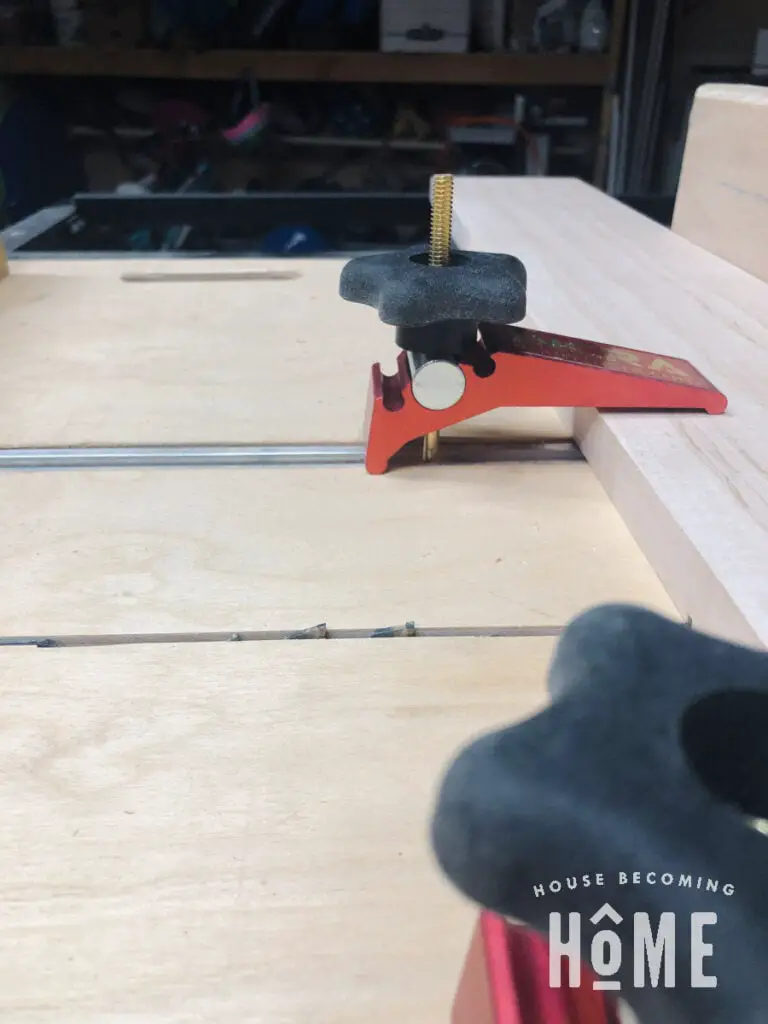
I used my homemade crosscut sled on the table saw to cut these grooves. To make the process somewhat quick, I added a stop block to make repeatable cuts.
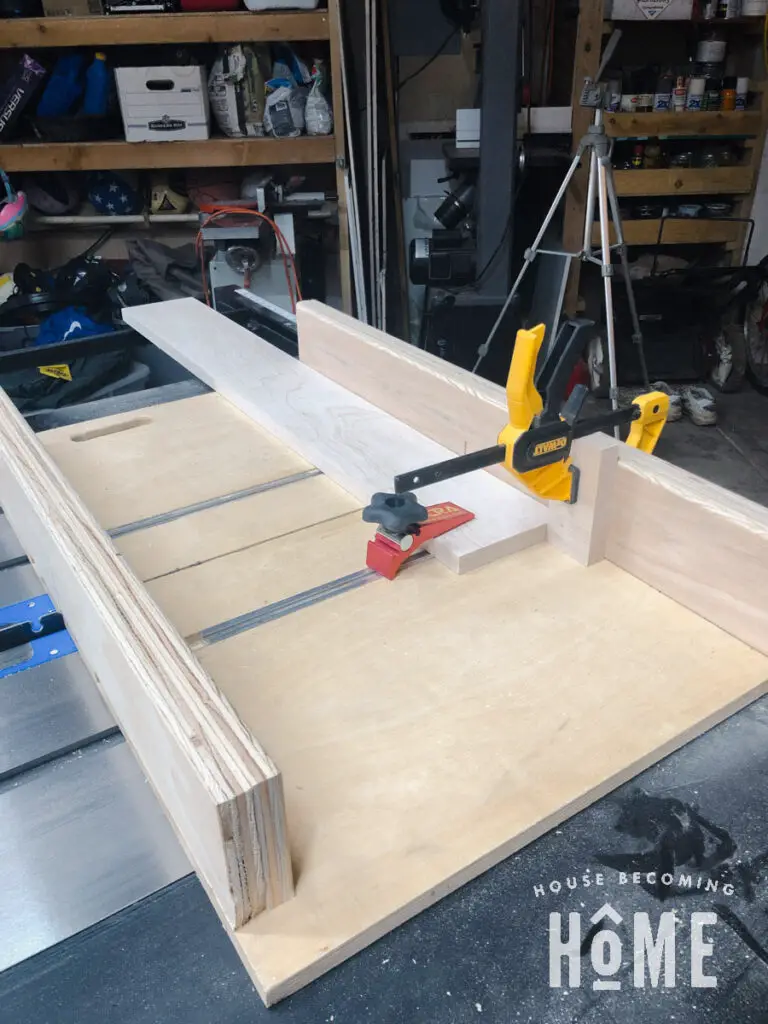
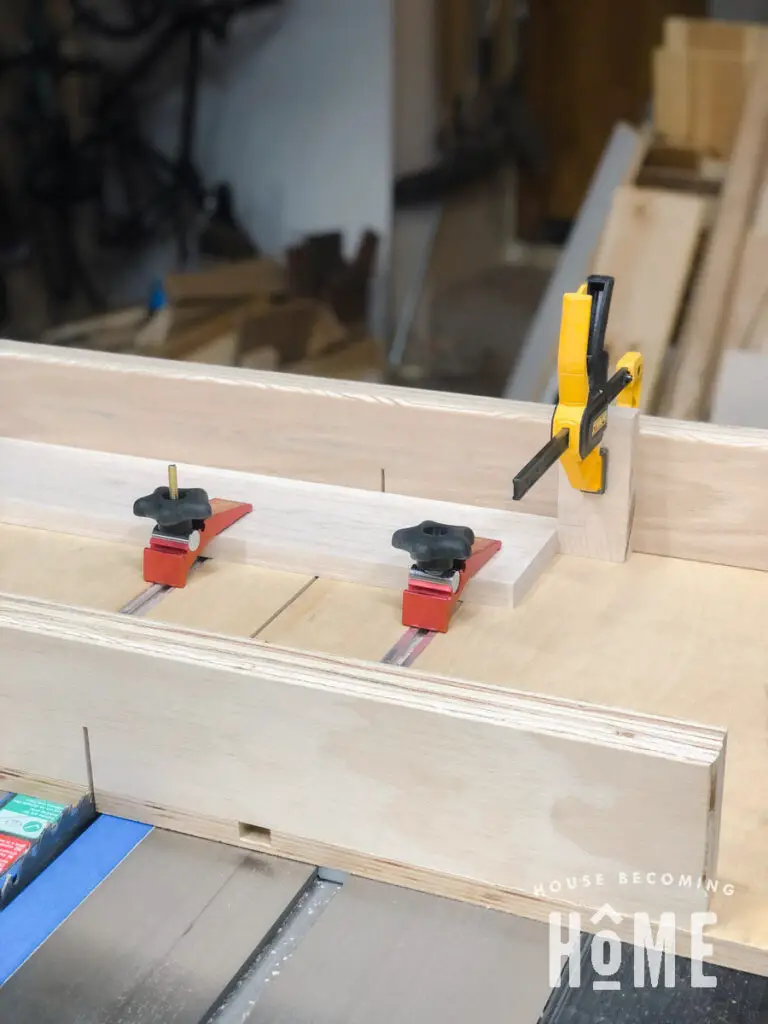
The blade height is set about 1/8″ above the crosscut sled, which you can see below:
With the stop block in place on my crosscut sled, I cut the grooves on the left end of each drawer face. I then flipped the drawer face and cut the grooves on the right end of each one.
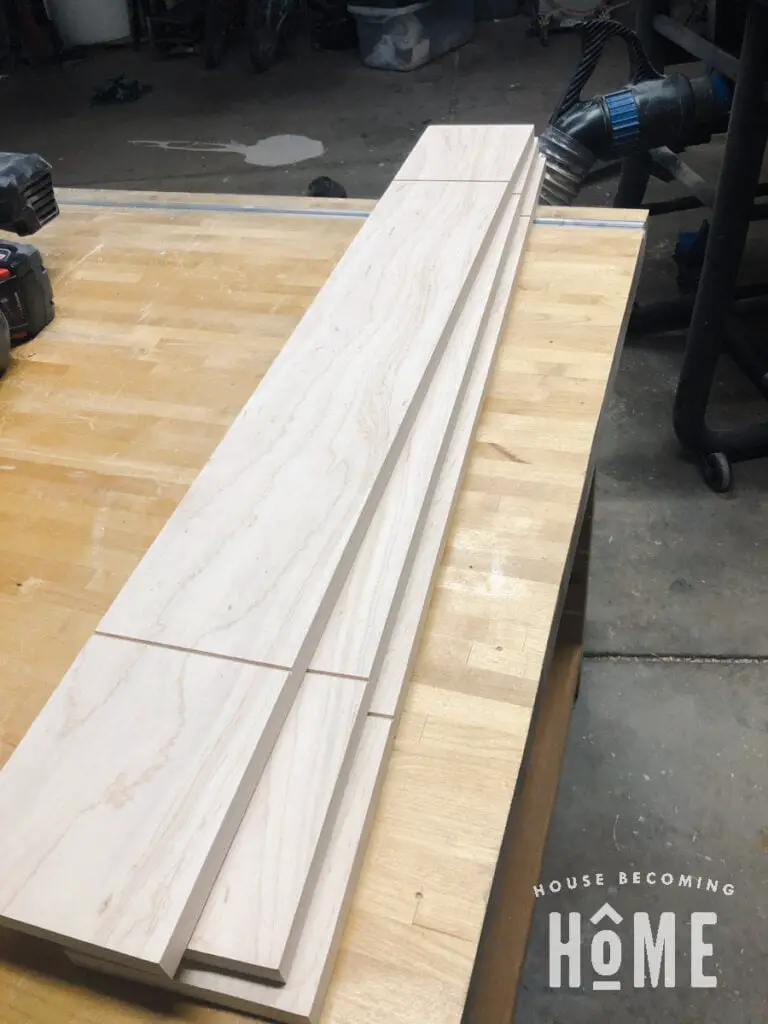
I readjusted my stop block, then made six more cuts.
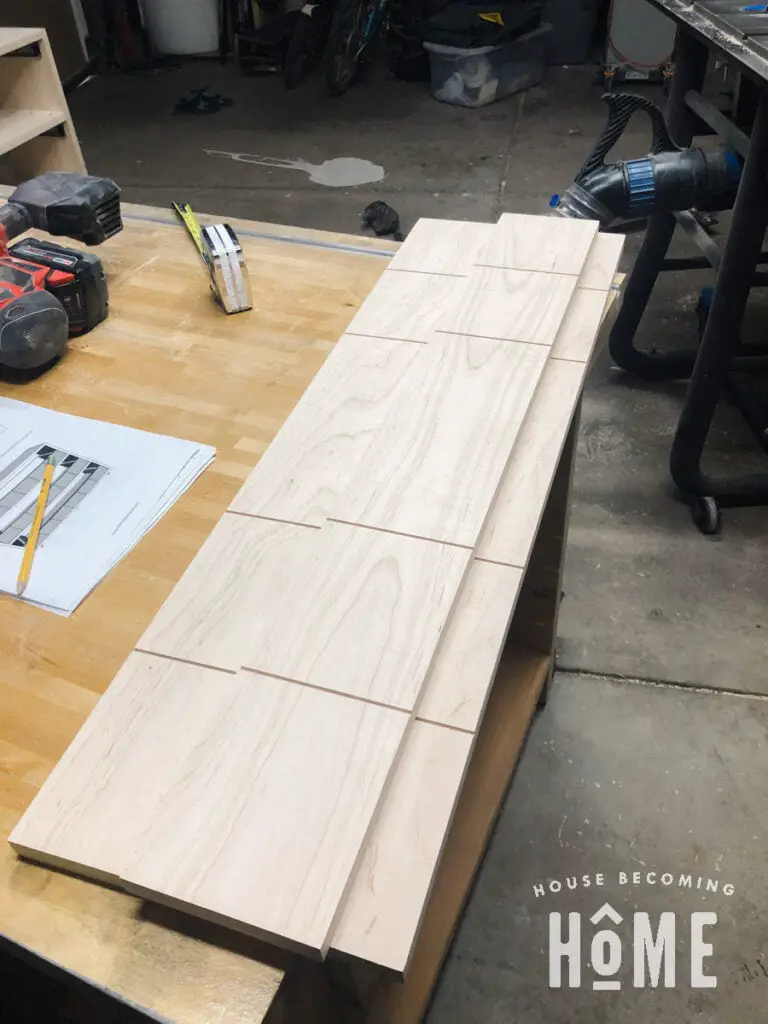
My crosscut sled isn’t big enough to set a stop block for the last cut, so I made the final cut on each drawer face individually.
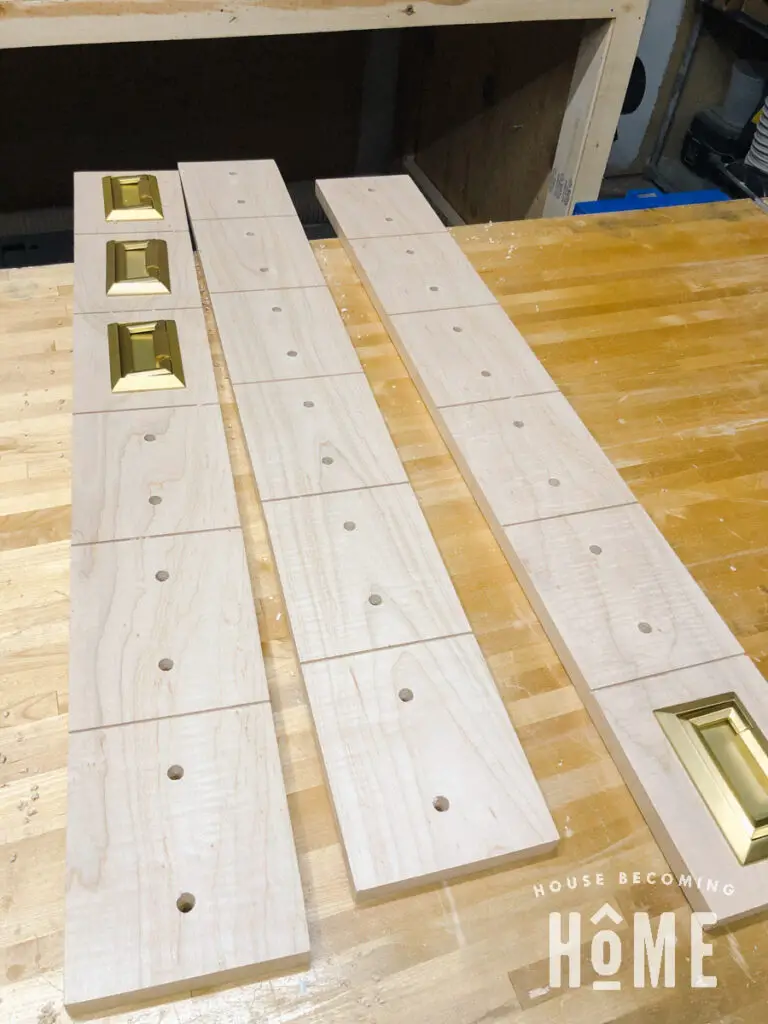
Add DRAWER PULLS
Normally we’d save this step for last, but getting these drawer pulls perfectly lined up is essential, and easiest to do before the faces are attached to the drawers.
I made a simple marking template on a scrap of 1/4″ plywood. It made quick work of marking the drill spots for the hardware.

Use a 3/8″ drill bit to make slightly oversized holes for the hardware. Clamp a straight edge to the drawer face, then push the hardware against the straight edge to get them perfectly aligned.
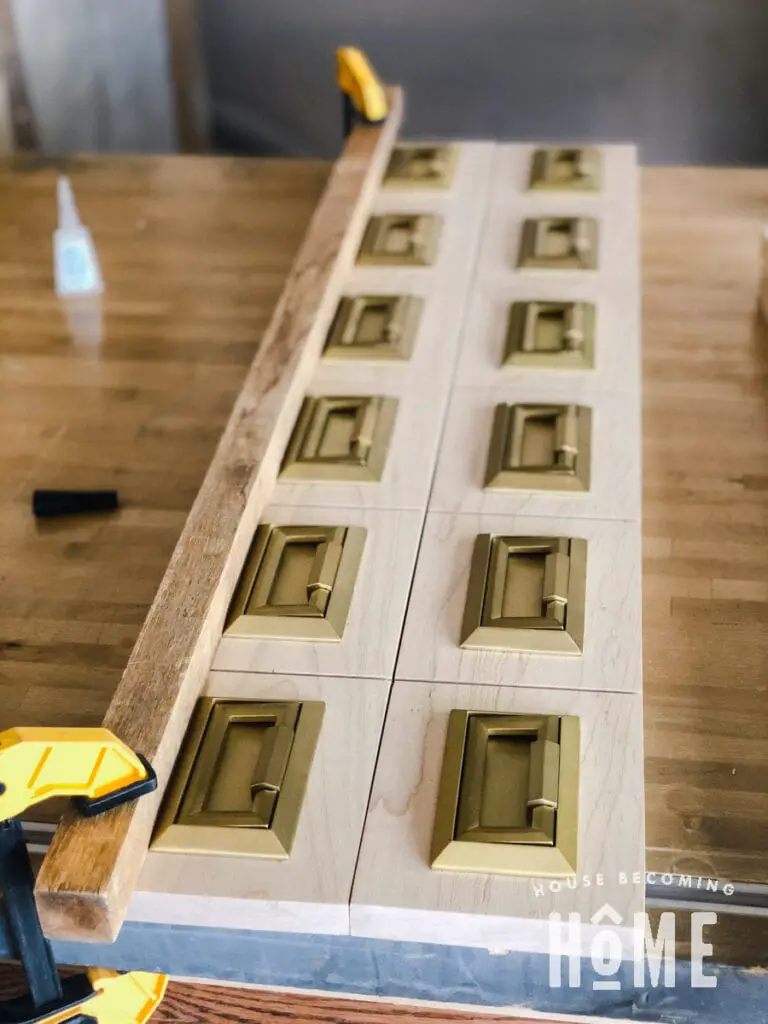
Add some CA glue to the back of each drawer pull for an entire drawer face, then reposition the hardware on the drawer face against the straight edge.
Apply pressure for 15-20 seconds while it sets. Continue until all hardware is attached.
Coupon Code For D. Lawless Hardware
D. Lawless Hardware is offering House Becoming Home & The Created Home readers 10% off their hardware purchase. Use coupon code: tch10
Attach Drawer Faces
I waited 24 hours so that the glue on the drawer pulls had a chance to fully cure, then I attached the drawer faces to the drawers.
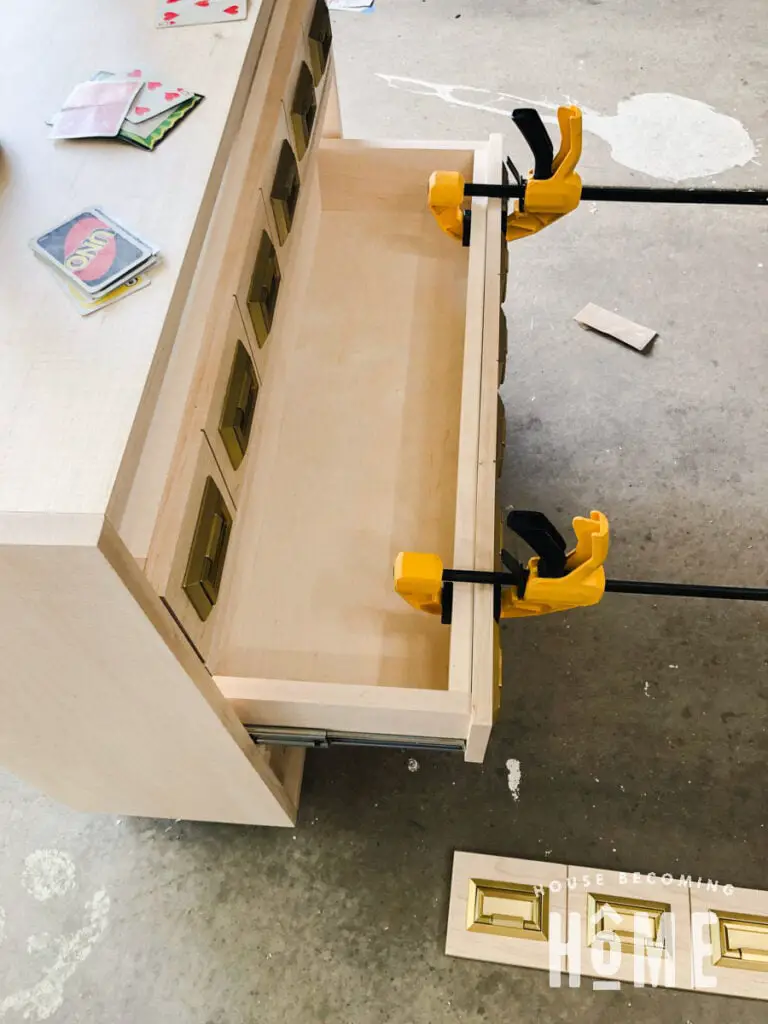
Using old playing cards as spacers, I set the drawer face in place, then secured it with clamps to the drawer. I then attached the drawer face with countersunk screws from inside the drawer.
Protect With Finish
I wanted to keep this maple bookcase as natural as possible, so I brushed on several coats of General Finishes water-based flat top coat.
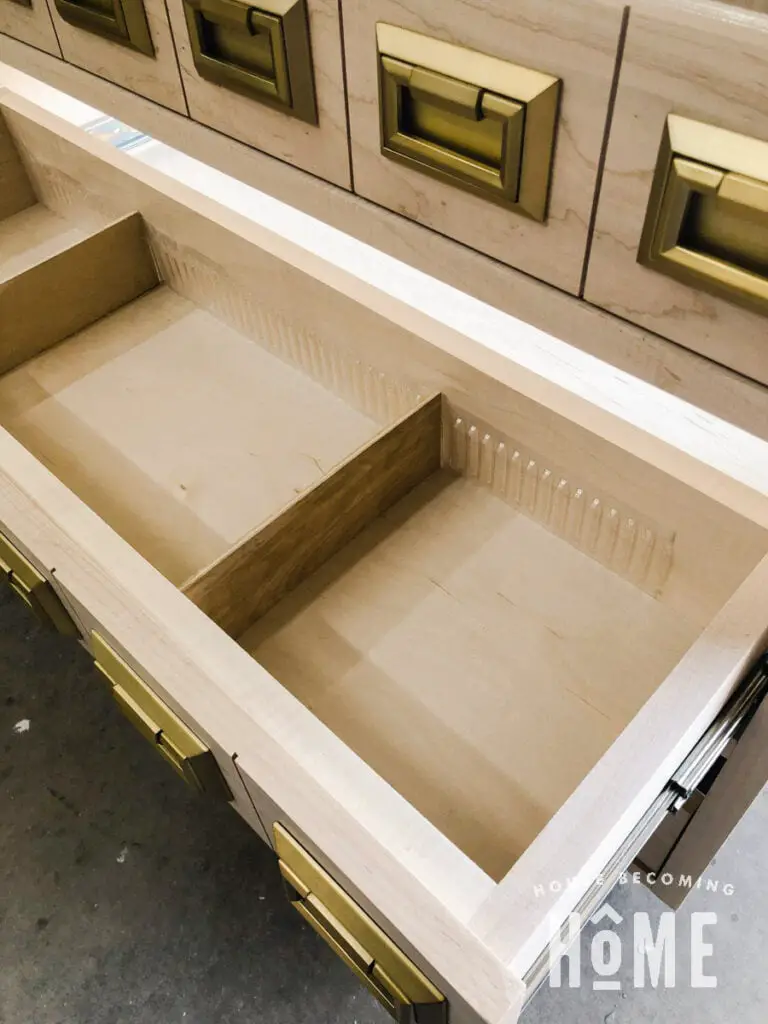
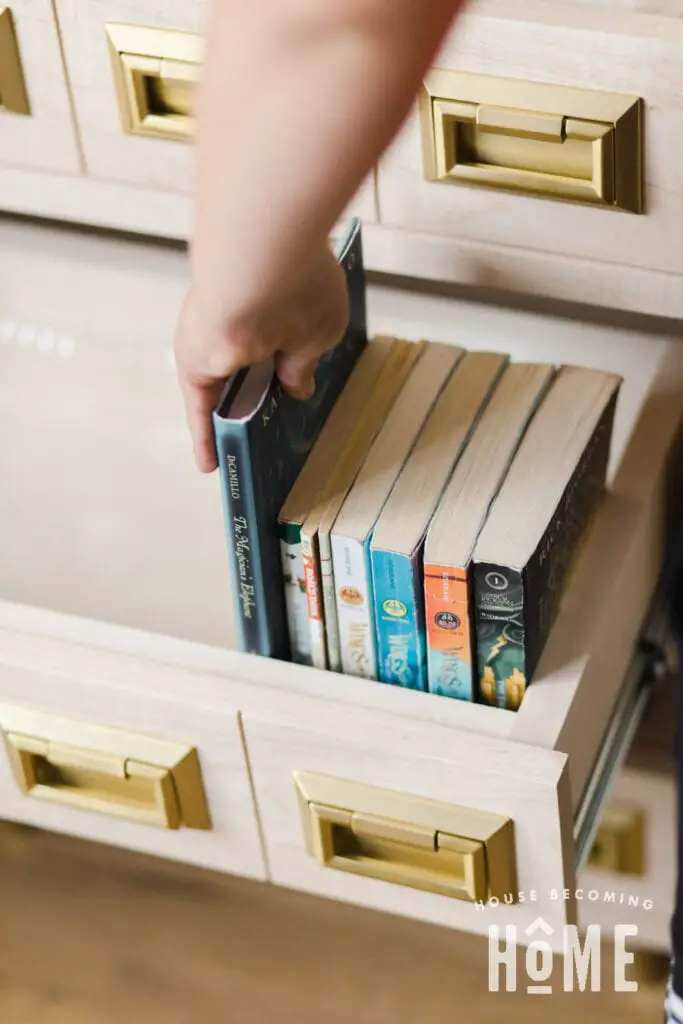
Add Drawer Divider Holders + Dividers
Cut a strip of drawer divider holders in half, then stick inside a drawer at the front and back. Repeat for all drawers, then cut dividers from 1/4″ plywood.

Attach to Wall
Your catalog bookcase is done, but don’t forget to securely attach it to the wall! Fix the bookcase to the studs in the wall with screws through the nailers at the back.
Finished Catalog Bookcase
![]()

I’d love to hear what you think of the catalog bookcase. If you’re interested in building one for yourself, be sure to check out the printable pdf plans available on Sarah’s website, and use coupon code tch10 at D. Lawless Hardware to save 10% on the campaign brass pulls.
